-36-
ST1013 12" Jointer (Mfd. Since 3/16)
To adjust table parallelism:
1. Place straightedge on outfeed table so it hangs
over cutterhead, and lower outfeed table until
straightedge just touches cutterhead body,
as shown in Figure 44 on Page 33 (rotate
cutterhead if necessary).
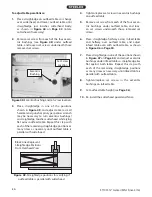
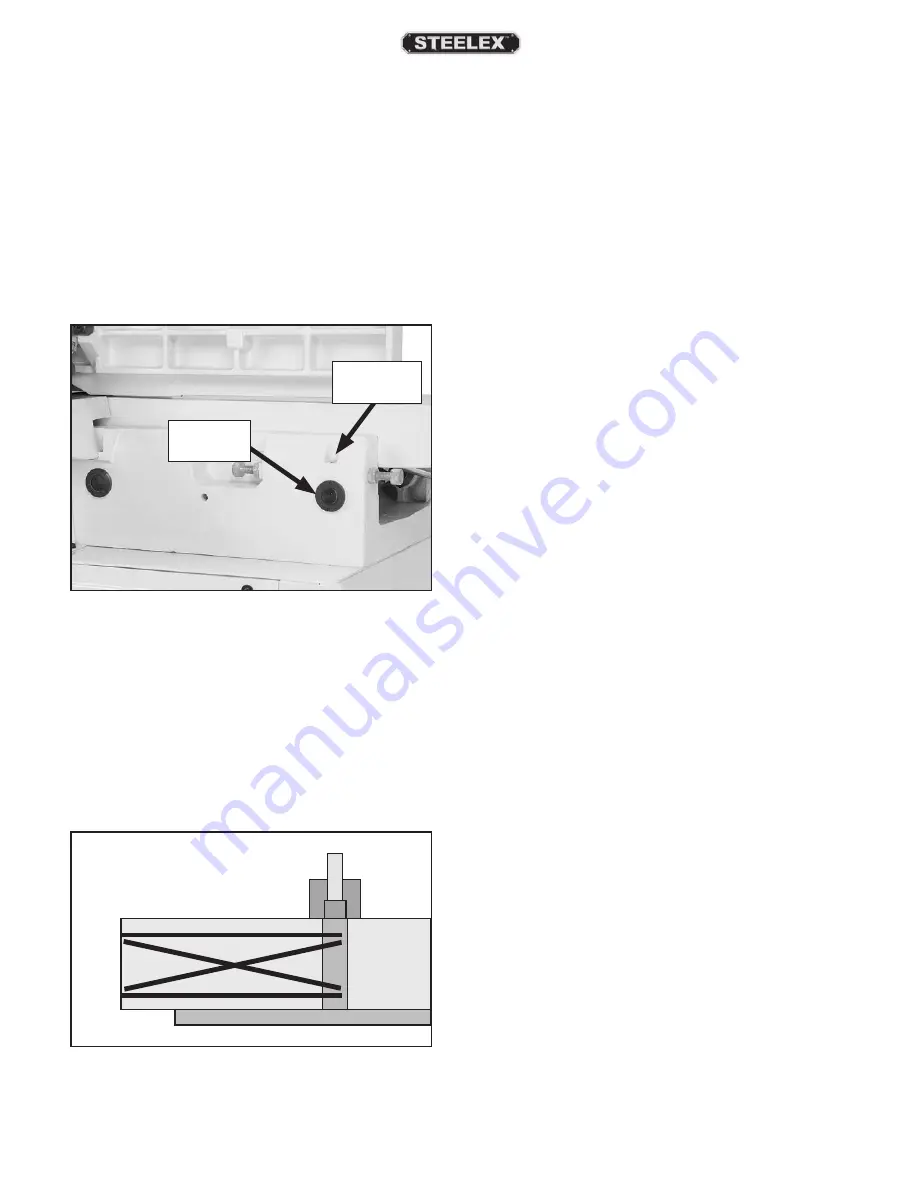
2. Remove set screw from each of the four eccen-
tric bushings (see Figure 48) under outfeed
table, and loosen set screws underneath those
removed set screws.
Figure 48. Eccentric bushing and set screw location.
Eccentric
Bushing
Set Screw
Location
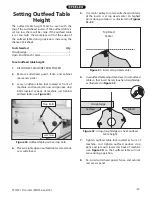
3. Place straightedge in one of the positions
shown in Figure 49, and adjust table (a small
hammer and punch or pin-type spanner wrench
may be necessary to turn eccentric bushings)
so straightedge touches cutterhead while lying
flat across outfeed table. Repeat this step with
each of the remaining straightedge positions as
many times as necessary until outfeed table is
parallel with cutterhead.
Black Lines Represent
Straightedge Positions
From Overhead View
Figure 49. Straightedge positions for verifying if
outfeed table is parallel with cutterhead.
4. Tighten/replace set screws in eccentric bushings
on outfeed table.
5. Remove set screw from each of the four eccen-
tric bushings under outfeed table, and loos-
en set screws underneath those removed set
screws.
6. Place straightedge halfway across infeed table
and halfway over outfeed table, and adjust
infeed table even with outfeed table, as shown
in Figure 46 on Page 34.
7. Place straightedge in one of the positions shown
in Figure 47 on Page 34, and adjust eccentric
bushings under infeed table so straightedge lies
flat against both tables. Repeat this step with
each of the remaining straightedge positions
as many times as necessary until infeed table is
parallel with outfeed table.
8. Tighten/replace set screws in the eccentric
bushings on infeed table.
9. Set outfeed table height (see Page 36).
10. Re-install the cutterhead guard and fence.


