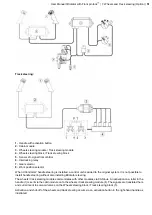
9.4. Checkpoints
Warning:
Before use, the lock function must be pressurized by activating one hydraulic function. Ensure
that work tools and the machine quick coupler is safe and properly secured to tiltrotator before work is
started.
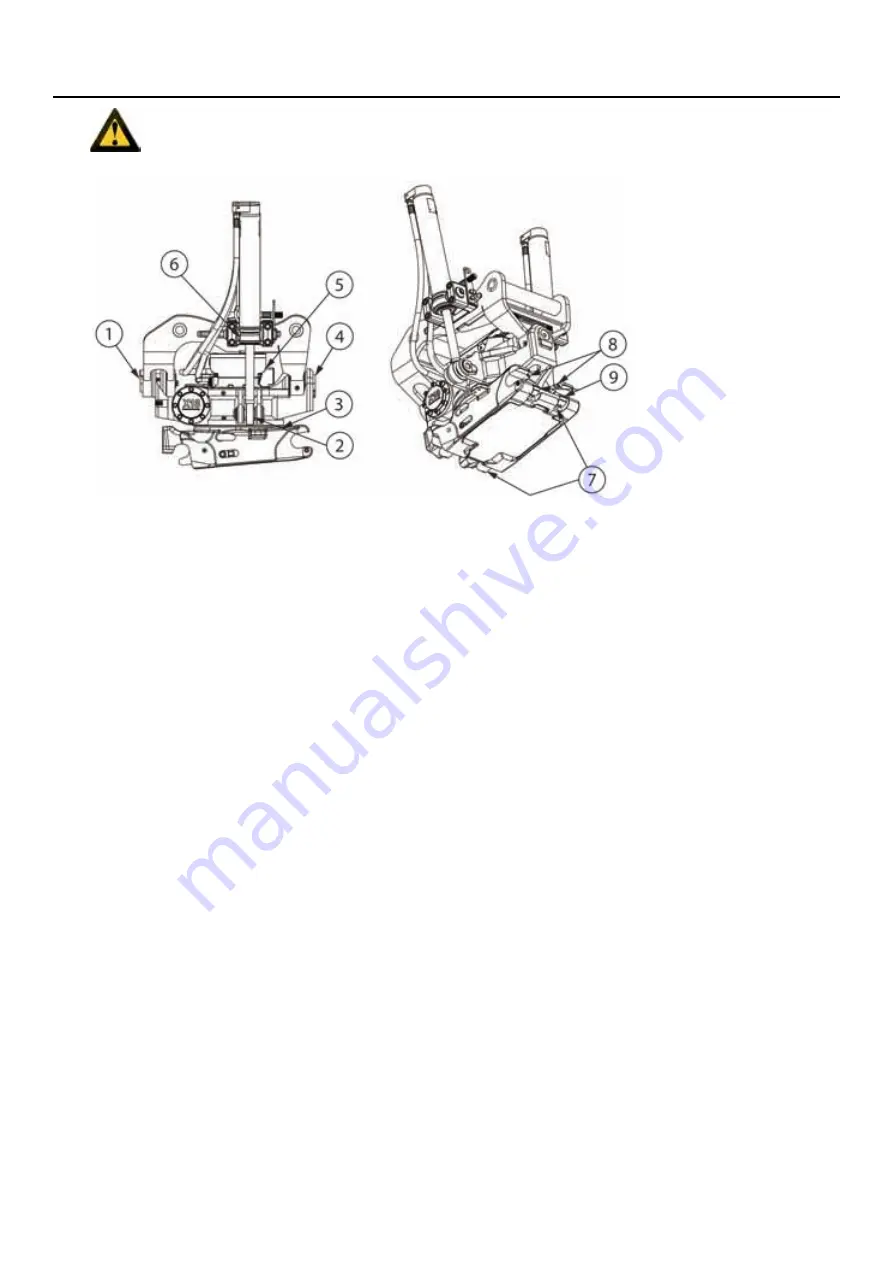
1.
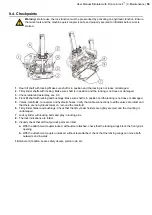
Rear tilt shaft with locking: Make sure shaft is in position and the locking is not loose or damaged.
2.
Tilt cylinder shafts with locking: Make sure shaft is in position and the locking is not loose or damaged.
3.
Check radial and axial play, see 9.3.
4.
Front tilt shaft with locking and bushings: Make sure shaft is in position and the locking is not loose or damaged.
5.
Valves, manifolds, connectors and hydraulic hoses: Verify that cable connections to all the valves are intact and
that there are no hydraulic leaks on / around the manifold.
6.
Tilt cylinder holder and bushings: Check that the tilt cylinder holders are tightly secured and the mounting is
undamaged.
7.
Lock cylinder with locking bolts and play in locking pins.
8.
The lock indications are intact.
9.
Visually check that all front pin lock parts are intact.
a.
With the attachment coupler locked, without tool attached: check that the locking wings block the front grip's
opening.
b.
With the attachment coupler unlocked, without tool attached: check that the locking wings can move both
outwards and inwards.
10.
General Condition: seals, safety decals, piston rods, etc.
User Manual tiltrotator with Front pin lock
™
| 9. Maintenance |
59
Summary of Contents for Tiltrotator Front pin lock X04
Page 2: ......
Page 16: ......
Page 26: ......
Page 48: ......
Page 54: ......
Page 55: ...Chapter 8 8 Environmental aspects Topics Environmental information ...
Page 63: ......
Page 64: ...Steelwrist AB Bäckvägen 18 192 54 Sollentuna Sweden 46 626 07 00 www steelwrist com 700347ENA ...

