PROGRAMMING TRACKS
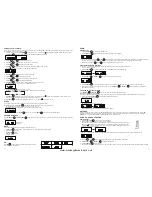
You may store up to 20 tracks in the desired sequence.
1. In the Stop position, press
PROGRAM
/
to start programming. MEMORY and P0-01 start flashing on the display.
2. Press
FF
/
or
FB
/
once or repeatedly until the desired track number appears on the Display.
For MP3:
PRESET
+
/
or
PRESET
/
to select the desired album.
3. Press
PROGRAM
/
to confirm, the Display shows the stored track number and the next store position.
4. Repeat steps 2-3 to select and store all desired tracks. FULL is displayed if you attempt to program more than 20 tracks.
5. Press
PLAY/PAUSE
/
to play the programmed tracks.
Erasing the Program
You can erase the contents of the memory as follows:
-
Press
STOP/BAND
/
once if in Stop position, press it twice during Playback.
-
Press
POWER /
.
-
Select another sound source.
-
Open the CD drawer.
RECORDING
From CD to SD/USB
The system is capable to convert a whole CD disc to MP3 format and copy it to a USB mass storage device or SD card. It also has the ability to copy
one single MP3 track to and from on USB/SD card.
1. In CD playback mode, press
REC
/
to start ripping to USB/SD card (default is USB if both devices are detected), playback will be stopped and
skips back to the beginning of the current track, the system will scan the contents of USB/SD card and create folder to store MP3 track. Resume
CD playback and start ripping from the moment. The corresponding target device icon USB / CARD start flashing.
2. Press
STOP/BAND
/
to exit CD ripping.
MP3 Copying
1. In MP3-CD, USB or SD Card playback mode, press
REC
/
to start MP3 copying from CD to USB/SD card, or USB to SD card or vice versa.
Playback will stop and the system will scan the contents of the USB/SD card and create a folder to store the MP3 tracks.
2. REC will show on the Display.
3. COPY 01 will be displayed, the proportional copied percentage will be shown on the decimal number.
4. The target device icon USB or CARD starts flashing, the decimal number will go up in increments from 01 as MP3 copying starts, the process
will stop as it reaches 100.
5. MP3 playback starts from the beginning.
From AUX to SD/USB
The system is capable of converting an audio signal from AUX input into MP3 format and store it on a USB mass storage device or SD card (the default
is USB if both devices are detected).
1. Press
FUNCTION
/
once or more to select AUX.
2. Press
REC
/
to start ripping, the system will scan the contents of the USB device / SD card and create a folder to store the
MP3 tracks.
3. REC and RIPP TO will be displayed, and AUX will start flashing.
4. The target device icon USB or CARD starts flashing as ripping begins.
5. Press
STOP/BAND
/
to exit AUX ripping.
Note:
a) The message NO FUNCT will be displayed if the Function key is pressed during the AUX ripping process.
b) The message NO DEV will be shown if neither USB nor SD card are detected.
c) The message FULL will be displayed if not enough memory is left on the target device.
Deleting MP3 Tracks
The system can delete previously recorded MP3 or existing files.
1. In USB or SD card playback mode, press and hold
REC/ERASE /
for 2 seconds, the currently playing track is stopped and will be deleted.
2. The message delete is displayed.
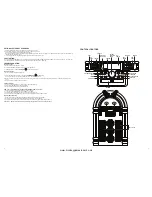
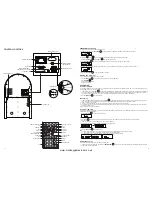
CONTROL LOCATORS
3
8
POWER / STAND BY
EQ
REC
PRESET -
PLAY/PAUSE
SKIP BACKWARD -
RANDOM
ID3
STOP / BAND
0-9
CD OPEN / CLOSE
MUTE
SLEEP
FUNCTION
VOLUME -
SKIP F
PROGRAM
REPEAT
TIMER
MONO/STEREO
FM WIRE ANTENNA
POWER PLUG
EARPHONE
LIGHTING
RELEASE
HOLD
MAIN POWER BUTTON
BATTERY BACKUP
LIGHTING SWITCH
(RELEASE/HOLD)
EARPHONE JACK
EXT.SPEAKER JACK
INTERNAL/EXTERNAL
SPEAKER SWITCH(INT./EXT.)
AUX IN JACK
EARPHONE
LIGHTING
RELEASE
HOLD
RED
BLACK
RED
BLACK
METAL CONDUCTOR
Speaker jack
www.monkeygamesroom.co.uk


