Speedsolar Pool Solar Panel
| 2013_V1
Page 4 of 27
EN
Safety Warnings
Read all instructions BEFORE assembling and using this
product.
Caution: Failure to follow instructions can cause severe
and/or fatal injury.
Carefully read this manual and all CAUTION and NOTE
notices located throughout this manual.
Do NOT allow children to operate this product.
Always turn off the filter system when installing or working
on the solar panel.
Install product away from the pool (enough safety dis-
tance).
Do not use any petroleum based lubricant. Petroleum
based products will destroy plastic parts.
1 General Information
1.1.1
Requirements for the installation of a solar panel
The solar panel you just purchased for your above ground pool or
ground level pool is simple to install and effortless to operate once
connected. The installation instructions included in this manual are
based on a few assumptions:
1) You have an existing above ground pool that is completely set up
and filled with water.
2) Your above ground pool is equipped with a pump-operated water
filtering system.
3) You have the necessary hoses needed to feed water in and out of
your pool and filter system (32 mm Ø or 38 mm Ø).
These assumptions are necessary as the solar panel, once installed,
will be completely dependent upon your pool’s filter pump to push
water in and through the heater’s solar coils.
1.1.2
How It Works
When properly installed, the solar panel will be connected to your fil-
ter and your pool by two hose connections: One hose will feed cold,
filtered pool water from your pump into one port of the solar panel.
The other hose will feed sun warmed water from the other port of the
solar panel to your pool via the pool return inlet in your pool. As cold
water is fed into the solar panel, it travels through the solar coils
where it is heated by the sun before it is delivered back into your
swimming pool.
The warming of the water depends on the following factors: the flow
rate and solar radiation.
Sunshine is required for the solar panel to operate. The solar panel
can be left connected even when the sun is not shining, since its in-
stallation leads to only a slight loss of pressure.
1.1.3
Tools & Equipment Required
The following items are not included with your new solar panel, but
will be required for proper installation and operation:
#2 Phillips screwdriver
¼" Flat head screwdriver
Silicone based lubricant
1.1.4
Know Your Pool
Before you begin installation it is a good idea to know certain specifi-
cations about your pool:
How big is your pool?
What size hose does it use between pool and filter pump
(i.e. 32 mm Ø or 38 mm Ø)?
What kind of hose connection does your pool use? (i.e.
threaded/unthreaded)
What location will position the collector for maximum sun
exposure?
1.1.5
Connecting Multiple Units
DO NOT install multiple units directly into the return line. Doing so
may damage the product and will void the warranty.
To install multiple units, you MUST use a bypass valve and “T” con-
nector with pressure gauge (not included, but optionally available
under the Article No. 00-60045 Bypass Set). The hose for a multiple
unit installation MUST be at least 38 mm diameter. (Picture 1)
1.1.6
Maintenance
The solar panel should not be exposed to cold weather. Prior to the
first frost, or at the end of your swim season, the solar panel should
be removed from its connections to the pool and stored in a frost
free location.
1.1.7
Winterizing
Drain all the water from the solar panel by disconnecting the tubes.
Store in a location protected from frost. Reconnect the pool return
tubes.
Do NOT allow standing water inside the solar panel to freeze. Water
expands as it freezes and can rupture the solar coils on the heater.
2
Technical Data
2.1.1
Technical Data
Dimensions: 3,0 x 0,7 m (Art. 00-49120) / 6,0 x 0,7 m
(Art. 00-49123)
Weight: approx. 6 kg (Art. 00-49120) / approx. 10 kg
(Art. 00-49123)
Max. pressure: 1 bar at 20°C
water passage: min. 2.000 l/h; max. 10.000 l/h
2.1.2
Heating Power
Model: 0,7 x 3,0 m for Above Ground Pools until max. 12 m³ water
content
Model: 0,7 x 6,0 m for Above Ground Pools until max. 20 m³ water
content
NOTE:
Connecting 2 or more elements requires use of a Bypass-Kit
(sold separately).
3
Parts List/Reference
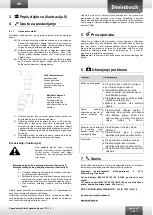
(Picture 5)
4
Install Instructions
4.1.1
Assembly Instruction
The system layouts below will help you install the solar panel(s) to
your above ground pool:
7) To assemble the solar panel two swimming-pool hoses are
needed (not included in delivery): one to connect between
the filtration system and the collector and one leading from
the collector back to the pool
8) Position the solar panel in a way that ensures maximum
solar radiation (6 hrs. per day minimum). WARNING: If the
Summary of Contents for speedsolar Sun 00-49120
Page 27: ...2013_V1 1 2 3 4 5...


