42
OI Tapping unit S-Former E3
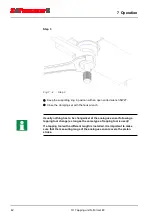
Step 3
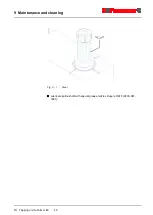
Fig. 7 - 4
Step 3
Keep the supporting ring in position with an open ended wrench SW27.
Close the clamping set with the hook wrench.
Usually nothing has to be changed/set at the analogue sensor following a
tapping tool change (as long as the same type of tapping tool is used)!
If a tapping tool with a different length is installed, it is important to make
sure that the measuring range of the analogue sensor covers the piston
stroke.
Summary of Contents for S-Former E3
Page 1: ...Instruction manual Tapping unit S Former E3 Original instruction manual ...
Page 2: ......
Page 3: ...Instruction manual Tapping unit S Former E3 Original instruction manual ...
Page 6: ...Table of contents IM II IM Tapping unit S Former E3 Table of contents IM Chapter Topic Page ...
Page 22: ...3 Disposal IM Tapping unit S Former E3 17 ...
Page 25: ...Instruction manual Tapping unit S Former E3 Original instruction manual ...
Page 29: ...Structure of the product manual OI Tapping unit S Former E3 III ...
Page 30: ...Table of contents OI IV OI Tapping unit S Former E3 ...
Page 58: ...2 Safety instructions 28 OI Tapping unit S Former E3 ...
Page 64: ...4 Device description 34 OI Tapping unit S Former E3 ...
Page 81: ...9 Maintenance and cleaning OI Tapping unit S Former E3 51 Step 1 Fig 9 6 Step 1 ...
Page 84: ...10 Technical data 54 OI Tapping unit S Former E3 ...
Page 86: ...11 Main parts list and drawings 56 OI Tapping unit S Former E3 11 1 Drawing ...
Page 88: ...11 Main parts list and drawings 58 OI Tapping unit S Former E3 ...
Page 92: ...12 Disposal 62 OI Tapping unit S Former E3 ...
Page 94: ...13 Feedback form 64 OI Tapping unit S Former E3 ...


