6
CAB
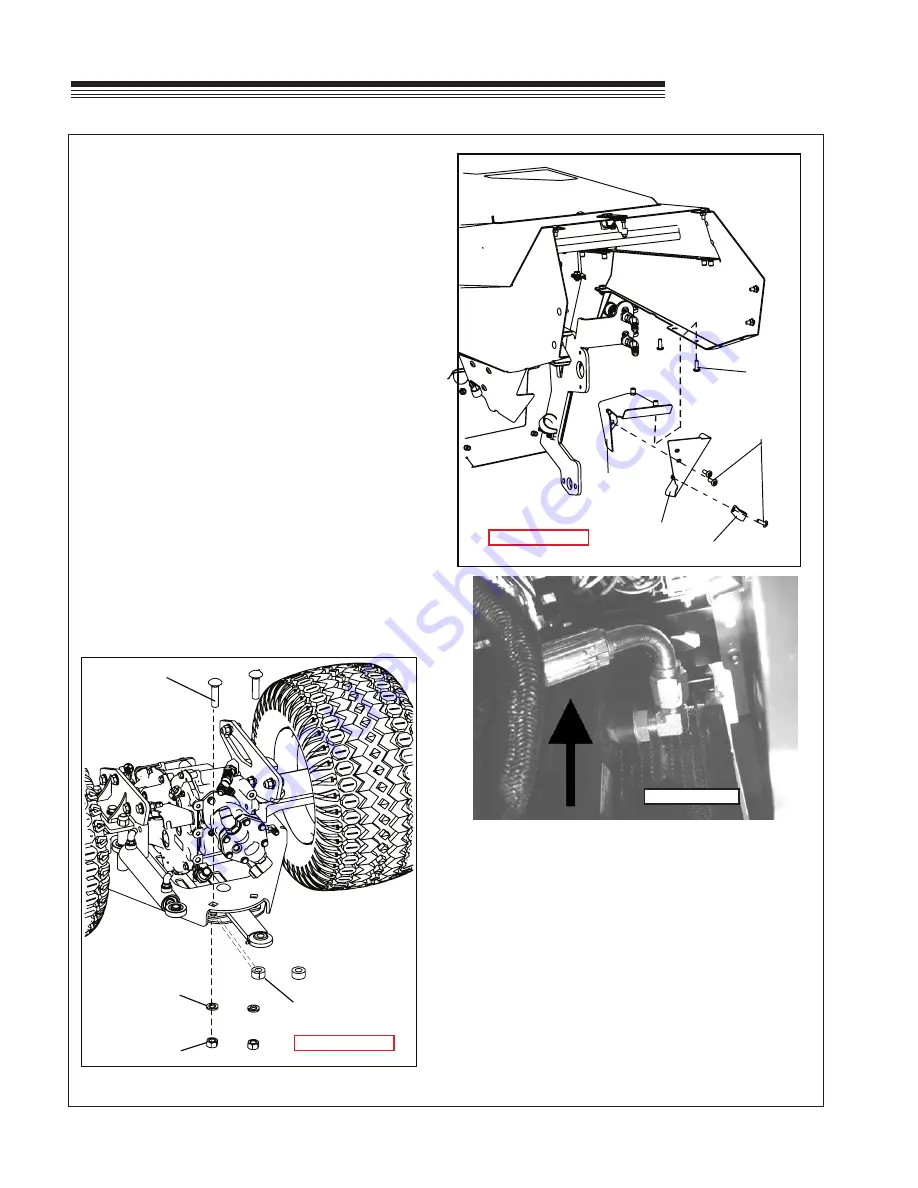
14. Install the RH dash filler mounting bracket
(Item
9)
using two .25 x .75 screws
(Item 27)
Bracket
should sit on top of the hood rail with hardware
going through hood then into bracket.
Figure 10
If you don't have enough room, you may have to
rotate the hydraulic cooler hose on the oil cooler
inward and upward (clockwise) towards the cen-
ter of the machine.
Figure 11
15. Install the RH dash filler assembly
(Item 10)
to
the RH dash filler mount installed in Step 14
using two .25 x .75 screws
(Item 27)
. Tighten
screws. Install one Insulated hose clamp
(Item
21)
to the RH dash filler
(Item 10)
using one .25
x.75 screw
(Item 27)
.
Figure 10
OSCILLATION STOP INSTALLATION:
16. Locate and remove the existing bushings
E
.
They are retained by two 5/8" carriage bolts
F
,
lock washers
G
and nuts
H
. You should be able
to access from the bottom of the machine on the
front side of the steering link. Slide oscillation
stops
(Item 1)
in and attach with existing
hardware.
Figure 12
FIGURE 12
FIGURE 10
10
27
27
9
21
FIGURE 11
F
G
H
E / 1
ASSEMBLY
Summary of Contents for 75-71215B4
Page 13: ...11 CAB PARTS SECTION ...


