7
CAB
REAR MOUNT INSTALLATION:
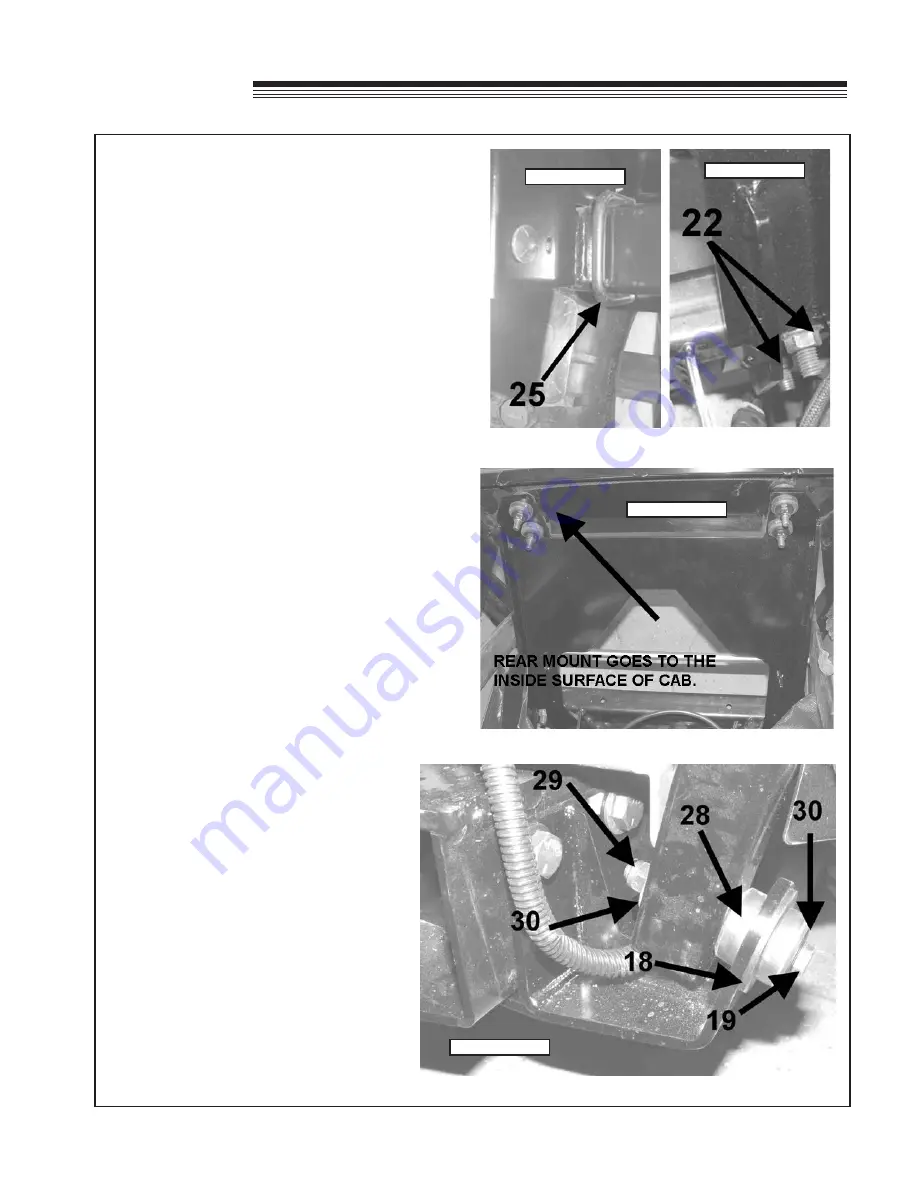
17. Loosely secure the Rear Mounting Bracket
(Item
6)
to the machine as shown in
Figure 13 & 14
using hardware:
(2) 1/2" U-bolts
(Item 25)
(4) 1/2" serrated flange nuts
(Item 22)
DO NOT TIGHTEN AT THIS TIME!
INSTALLING THE CAB:
18. Flip the seat forward on the machine and lower
the ROPS upper hoop.
Using a spreader bar or lifting strap and overhead
crane or forklift, carefully raise the cab and remove
the crating and pallet. Locate the lifting strap at the
location of the roof brackets on the upper sides.
19. Lower the cab onto the tractor and align the front
mount holes of the cab tubes with the holes on
the front mount brackets installed in Step 7. The
rear mount may need to be tilted forward as you
lower the cab to allow it to pass to the inside of
the rear cab wall.
Figure 15
20. Secure the front of the cab to the front mounts
installed in Step 4 using hardware:
Figure 16
(2) rubber isolators
(Item 28)
(2) 3/4" flat washers
(Item 18)
(2) 3/8" x 3.50" bolts
(Item 19)
(2) 3/8" nylock nuts
(Item 29)
(4) 3/8" flat washers
(Item 30)
Torque to 30 ft-lb (41 N-m)
FIGURE 13
FIGURE 14
FIGURE 15
FIGURE 16
ASSEMBLY
Summary of Contents for 75-71215B4
Page 13: ...11 CAB PARTS SECTION ...


