background image

Page 3

© Steltronic – Sensors relocation cable installation

SENSORS RELOCATION CABLE INSTALLATION

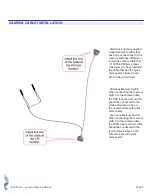
When you have installed 

the sensors onto  the new 

bracket and mounted them 

under the ball return tracks, 

you need to connect these 

sensors back onto the 

PinCam. 

Using the cable (PN: 

716030) make sure you 

install this cable that has 

the MALE pins closest to 

the sensors, and FEMALE 

connections will be 

connected to the PinCam 

PCB. 

We recommend the RED 

GREEN and BLUE wires be 

connected to the ODD lane 

sensor, and then back at 

the PinCam, connect the 

cable with the RED GREEN 

and BLUE connector to 

the odd lane PCB trigger 

sensor connections. 

Summary of Contents for PinCam

Page 1: ...RETURNS AU TOM AT IC S C OR ING 4600 Arrow Hwy Montclair California 91763 USA Service SteltronicUSA com SteltronicUSA com 909 971 9656 Installation manual for PinCams installed on a tunnel with surface ball returns ...

Page 2: ...Contents OVERVIEW 1 INSTALLATION PROCEDURES 2 SENSORS RELOCATION CABLE INSTALLATION 3 BRUNSWICK A OR A 2 4 CAMERA CABLE INSTALLATION 5 MERCURY SWITCH CABLES INSTALLATION 6 ...

Page 3: ...ft an illustration of an 8 lane bowling center with the PinCam is installed on the ball return capping When the bowling center has pinsetters that require a PinCam to detect the bowling pins for scoring purposes and the bowling center ball return system has surface ball returns the Steltronic PinCam has to be installed using a tunnel system This allows the bowling ball to travel above ground on th...

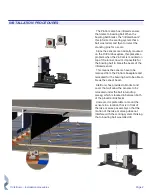
Page 4: ... impossible for the bowling ball to break the beam of the infrared sensor This means the sensors have to be removed from the PinCam baseplate and relocated for the bowling ball to be able to break the sensor beam Steltronic has provided a bracket and cover that will allow the sensors to be relocated under the ball return drop sweep which is located in between both of the pinsetter kickbacks Howeve...

Page 5: ...nnect these sensors back onto the PinCam Using the cable PN 716030 make sure you install this cable that has the MALE pins closest to the sensors and FEMALE connections will be connected to the PinCam PCB We recommend the RED GREEN and BLUE wires be connected to the ODD lane sensor and then back at the PinCam connect the cable with the RED GREEN and BLUE connector to the odd lane PCB trigger senso...

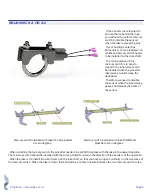
Page 6: ...erefore we need to disable the sensor when the rake sweep passes and breaks the beam of the sensor When installing the mercury switch the pinsetter needs to be at ZERO degrees with the rake in the upward position The mercury switch should be installed with the wires pointed forward in the direction of the bowlers at the approach When the rake is UP install the u bolt clamp on the rake shaft so tha...

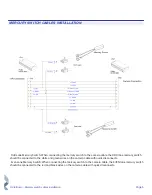
Page 7: ...le that has the quick disconnects closest to the API on the curtain wall Odd Lane Mercury Switch When connecting the mercury switch to the camera cable the ODD lane mercury switch should be connected to the white and green wires on the camera cable with quick disconnects Even Lane Mercury Switch When connecting the mercury switch to the camera cable the EVEN lane mercury switch should be connected...

Page 8: ...itch to the camera cable the ODD lane mercury switch should be connected to the white and green wires on the camera cable with quick disconnects Even Lane Mercury Switch When connecting the mercury switch to the camera cable the EVEN lane mercury switch should be connected to the red and black wires on the camera cable with quick disconnects ...

Reviews: