30
Assembly of the Gearbox
1.
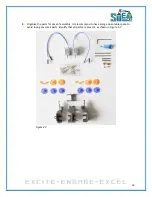
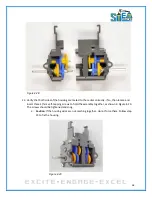
Twist the large yellow bushing off of the yellow part, as shown in Figure 4.8. You will not need
the small yellow bushing.
Figure 4.8
2.
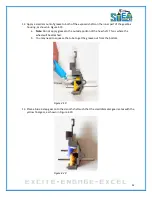
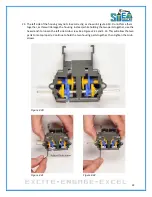
Press a yellow bushing onto each of the smooth shafts, as shown in Figures 4.9 and 4.10. There
should be 3mm of exposed shaft from the flanged side of each bushing. Once you have made
both pieces, set them aside temporarily.
Figure 4.9
Figure 4.10
3.
Locate the right side of the housing.
4.
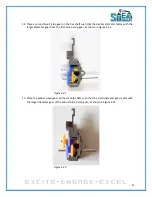
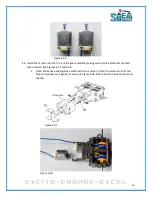
Place a gear hub on each of the hex shafts approximately 18mm from the end and secure with a
grub screw. Do no over-tighten the grub screw, this will be adjusted later on. See Figures 4.11
and 4.12.
Figure 4.11
Figure 4.12
Summary of Contents for Pi-Bot v2.00
Page 67: ...67 Figure 6 15 ...
Page 78: ...78 UltraSonicSensorTestwithLED Program ...
Page 80: ...80 ObstacleAvoidance Program ...
Page 82: ...82 ObstacleAvoidancewithLED Program ...
Page 83: ...83 ObstacleAvoidancewithLED Program CONTINUED ...
Page 90: ...90 Download and run the following program LineFollowing Program ...
Page 91: ...91 LineFollowing Program CONTINUED ...
Page 94: ...94 AdvancedLineFollowing Program CONTINUED ...
Page 95: ...95 AdvancedLineFollowing Program CONTINUED ...
Page 96: ...96 AdvancedLineFollowing Program CONTINUED ...
Page 110: ...Appendix B Complete Pi Bot Wiring Schematic ...


