25
25
9.2 Scheduled recording
1. To begin to schedule recordings go to main menu and select Rercord.
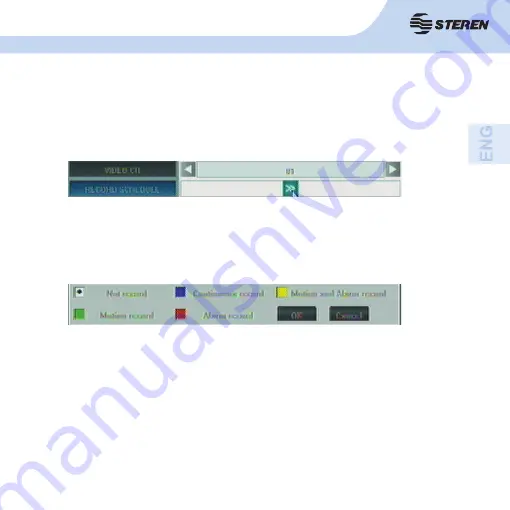
2. In the VIDEO CH option, select the channel number you want to apply the preset (1, 2,
3, 4 or all)
3 Select [> >] click RECORD SCHEDULE to open the time window.
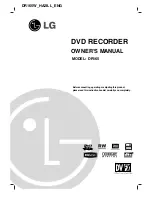
- Not record: this mode is useful if you want to use the CCTV-960 only to monitor.
- Continuous record: in this option the CCTV-960 will begin recording in the confi gured day
and time range.
- Motion and Alarm record: starts recording when there is an event (motion detection or
alarm activation).
- Motion record: indicates that the recording will begin when there is motion detection. The
sensitivity can be adjusted.
- Alarm record: starts recording when activated the alarm.
4. A grid will show on screen. Each horizontal row is a day of the week and every box is
one hour.
In the color boxes at the bottom, select record mode to be applied. The meaning of the colors
is as follows:
9. RECORDING
Summary of Contents for CCTV-960
Page 1: ......
Page 2: ...2 ...
Page 8: ...8 2 CONTROLES 2 1 Panel frontal ...
Page 10: ...10 2 2 Panel trasero ...
Page 12: ...12 2 3 Control remoto ...
Page 56: ......
Page 57: ...2 2 ...
Page 63: ...8 8 2 CONTROLS 2 1 Front panel ...
Page 65: ...10 10 2 2 Back panel ...
Page 67: ...12 12 2 3 Remote control ...
Page 111: ......


