background image

7

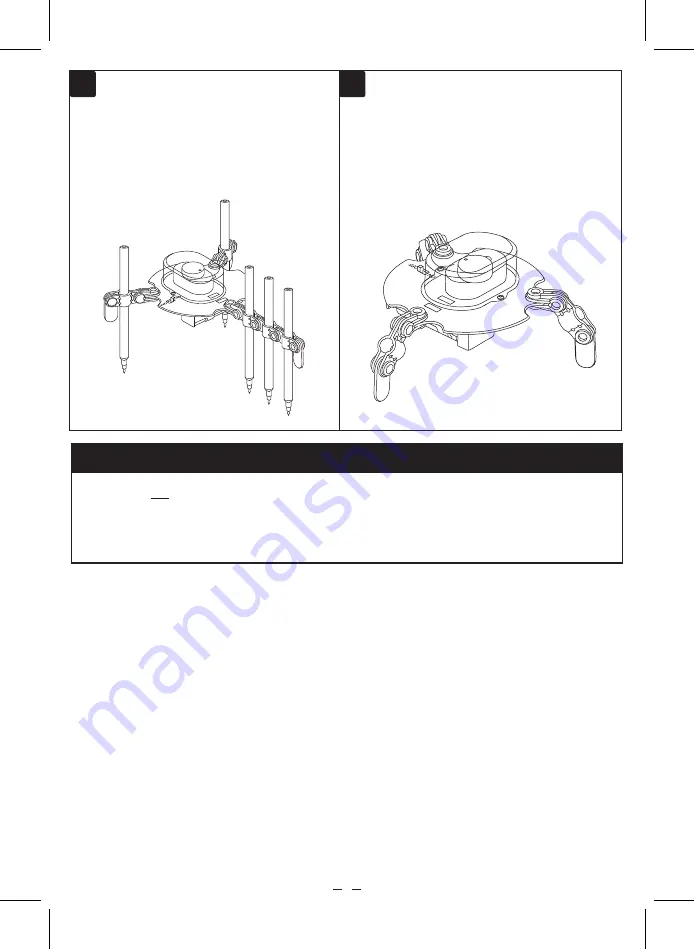
You can place extra markers.

Extend the arm by placing more pieces 

to make more lines of colors. (You can 

add markers, pens or pencil colors).

Remove all markers, pens or pencil 

colors and place the robot arms down. 

The garabot becomes a vibration robot 

that slide on smooth surfaces.

5

6

SPECIFICATIONS

Input: 1.5 V - - - (1 x AA, not included)

Summary of Contents for GARABOT K-325

Page 1: ...K 325 0318m V0 0 de Instrucciones Manual 8 GARABOT...

Page 2: ...a no da ar las piezas No almacenes el producto en areas h medas No coloques los marcadores o brochas mientras el robot se encuentra encendido Aseg rate de que el robot se encuentra apagado antes de co...

Page 3: ...pzas Cant P10 3 pzas Cant P11 1 pza Cant P12 3 pzas Cant Base Cubierta transparente Motor con interruptor Cubierta del motor Pesa Soporte de brazos Soporte de pluma Brazo final Brocha libre P14 12 pza...

Page 4: ...3 ENSAMBLAJE Negro Rojo FIGURA 1 Coloca y fija las piezas correctamente...

Page 5: ...4 FIGURA 2...

Page 6: ...5 FIGURA 3...

Page 7: ...para evitar que se manchen de tinta las superficies Para dibujar un patr n de l neas circulares posiciona el robot como se muestra en la imagen a Para dibujar un patr n de l neas rectas posiciona el r...

Page 8: ...eas de colores Puedes agregar marcadores plumas o colores Retira todos los marcadores plumas o colores y coloca hacia abajo los brazos del robot El garabot se convierte en un robot de vibraci n que se...

Page 9: ...K 325 0318m V0 0 8 Manual Instruction GARABOT...

Page 10: ...ot to damage the parts Do not store the product in humid areas Do not place markers or brushes while the robot is on Make sure that the robot is turn off before placing the battery This product must n...

Page 11: ...3 pc Qty P8 3 pcs Qty P9 3 pcs Qty P10 3 pcs Qty P11 1 pc Qty P12 3 pcs Qty Base Transparent cover Motor with switch Motor cover Weight Arm holders Pen holders Arm ends Free brush P14 12 pcs Qty P15 5...

Page 12: ...3 Assembly Black Red FIGURE 1 Place and fix correctly the pieces...

Page 13: ...4 FIGURE 2...

Page 14: ...5 FIGURE 3...

Page 15: ...heet of paper to avoid staining the surfaces with ink To draw a circular lines pattern position the robot as shown in the image a To draw a straight lines pattern position the robot as follows b When...

Page 16: ...ces to make more lines of colors You can add markers pens or pencil colors Remove all markers pens or pencil colors and place the robot arms down The garabot becomes a vibration robot that slide on sm...

Page 17: ......

Page 18: ...www steren com...

Reviews: