11-58
Pretrip inspection and maintenance
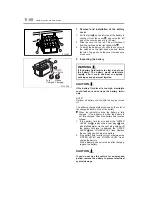
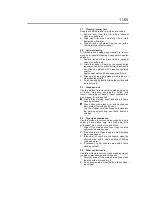
1 Removal and installation of the battery
cover
1. Pull the latch on the left side of the battery to
unhook it from the cover , and raise the left
end of the cover by about 2 in (50 mm).
2. Slide the cover to the left. This will release it
from the catches on the right-hand side .
3. To install the battery cover, slide the cover onto
the catches on the right-hand side and fasten
the latch. Tug gently on the cover to make sure
it is secure.
2 Inspecting the battery
CAUTION
If the battery fluid level is too high, electrolyte
could leak out and corrode the battery termi-
nals.
NOTE:
Perform all battery checks with the engine turned
off.
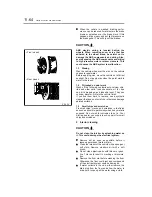
The battery’s charge status is shown by the color of
the charge indicator on top of the battery.
•
When the indicator is blue, the battery is fully
charged. If the indicator is white, the battery is
not fully charged. Check the battery fluid level as
follows
:
1. If the battery fluid level is below the “LOWER
LEVEL” line , remove the 6 vent plugs and
add distilled water via the vent plug holes until
the battery fluid level is between the “UPPER
LEVEL” and “LOWER LEVEL” lines. Replace
the vent plugs and charge the battery.
2. If the battery fluid level is correct, or between the
“UPPER LEVEL” and “LOWER LEVEL” lines,
charge the battery.
If the indicator does not turn blue after charging,
replace the battery.
CAUTION
If you do not use the vehicle for an extended
period, remove the battery to prevent electrical
system damage.
WARNING
If the battery fluid level is too low, do not use
the battery. The battery would deteriorate
rapidly, and it could overheat or explode,
causing serious personal injuries.
Z12092
Needs
Charging
Fully
Charged
Z12093a
Summary of Contents for 360
Page 13: ...2 1 Locations in cab 2 2 Locations outside cab 2 4 2 Warning labels ...
Page 16: ...2 4 Warning labels Locations outside cab Z12496 ...
Page 19: ...2 7 Warning labels 30 gallon 113 liter fuel tank Z12494 ...
Page 27: ...4 1 Seats 4 2 Seat belts 4 4 Steering wheel 4 7 4 Seat and steering wheel adjustments ...
Page 204: ...14 1 Maintenance schedule 14 2 Lubrication schedule 14 6 14 Maintenance schedule ...
Page 210: ...15 1 15 Alphabetical index ...


