11-59
3 Cleaning the terminals
1. Remove any corrosion with a wire brush, and
wash with a weak solution of baking soda and
water. Rinse with clean water and dry.
2. To provide corrosion protection, apply pumpable
dielectric grease to the battery terminals.
4 Charging a battery
NOTE:
If the battery is cold, let it warm up. This will allow a
normal charging rate.
1. Remove the battery from the vehicle and
remove the vent plugs from the battery.
2. Make sure the charger is turned off.
3. Connect the charger, following the charger man-
ufacturer’s instructions. Rock the charger lead
clamps to make sure there is a good connection.
4. Turn on the charger and slowly increase the
charging rate until the recommended value (in
amps) is reached.
CAUTION
If the battery feels hotter than 125
×
F (52
×
C), or if
rapid gassing or spewing of electrolyte occurs,
lower the charging rate or stop charging the bat-
tery and allow it to cool.
5. After the battery has charged for the recom-
mended period of time, turn the charger off.
6. Disconnect the charger from the battery.
7. Install the vent plugs in the battery and install
the battery on the vehicle.
8. Attempt to start the vehicle. If the engine does
not crank, replace the battery with a new one.
NOTE:
Follow the correct procedure when jump starting a
vehicle with a dead battery.
P. 12-22
5 Removing the batteries
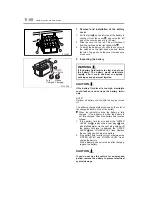
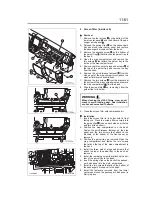
1. Disconnect the battery cables (each indicated
by an arrow
in the illustration) from the bat-
tery terminals. On each battery, disconnect the
negative (–) terminal first.
WARNING
If a metal object connects an ungrounded
battery terminal to a nearby metal part of the
vehicle which is grounded, it could short out
the batteries, causing sparks and possible
property damage.
Z15057
Summary of Contents for 360
Page 13: ...2 1 Locations in cab 2 2 Locations outside cab 2 4 2 Warning labels ...
Page 16: ...2 4 Warning labels Locations outside cab Z12496 ...
Page 19: ...2 7 Warning labels 30 gallon 113 liter fuel tank Z12494 ...
Page 27: ...4 1 Seats 4 2 Seat belts 4 4 Steering wheel 4 7 4 Seat and steering wheel adjustments ...
Page 204: ...14 1 Maintenance schedule 14 2 Lubrication schedule 14 6 14 Maintenance schedule ...
Page 210: ...15 1 15 Alphabetical index ...


