6
S E T T I N G S ADJUSTMENT
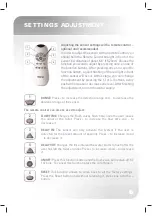
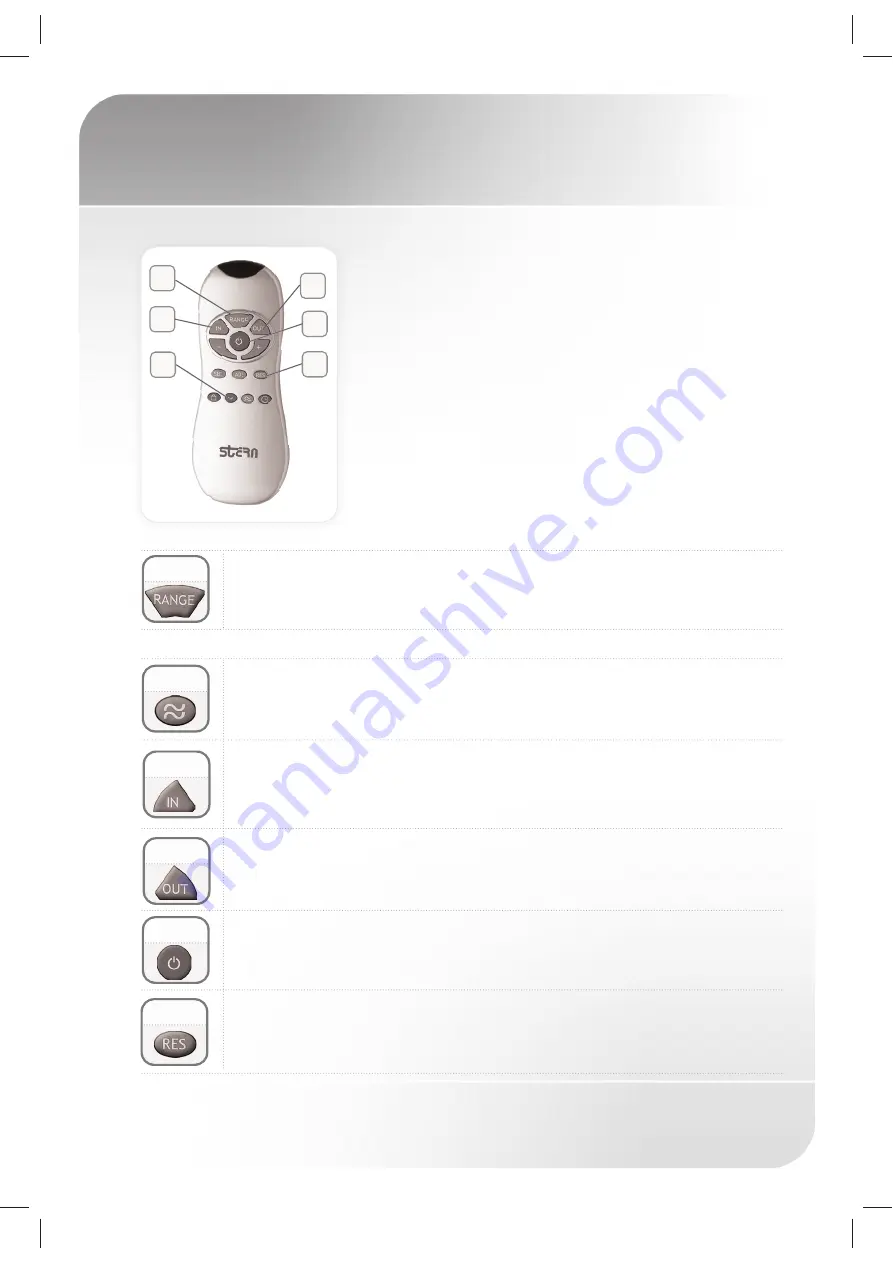
Adjusting the sensor settings with a remote control –
optional and recommended:
In order to adjust the sensor with a Remote Control you
should hold the Remote Control straight in front of the
sensor in a distance of about 6-8” (15-20cm). Choose the
function you want to adjust by pressing once on one of
the function buttons. After pressing once on a specific
function button, a quick flashing of the red light in front
of the sensor will occur. At this stage, you can change
the adjustment by pressing the (-) or (+) buttons, every
push will increase or decrease one level. After finishing
the adjustment, turn on the water supply.
1
3
2
4
5
6
RANGE:
Press + to increase the detection range and – to decrease the
detection range of the sensor.
1
FLOW TIME:
Changes the Flush valves flush time, once the user leaves
the urinal or the toilet. Press + to increase the flow time and – to
decrease it.
2
The remote control can also be used to adjust:
DELAY IN:
The sensor will only activate the system if the user is
detected for the preset amount of seconds. Press + to increase it and
– to decrease it.
3
DELAY OUT:
Changes the time interval the water starts to flush after the
user has left the toilet or urinal. Press + to increase it and – to decrease
it.
4
ON/OFF:
Press this function button and the flush valve will remain off for
1 minute. To cancel this function press the on/off again.
5
6
RESET:
This function allows to come back to all the factory settings.
Press the Reset button and without releasing it, press one time the +
button.


