A. NOTE:
Please make sure the transformer is ‘OFF’ before making any new
wire connections.
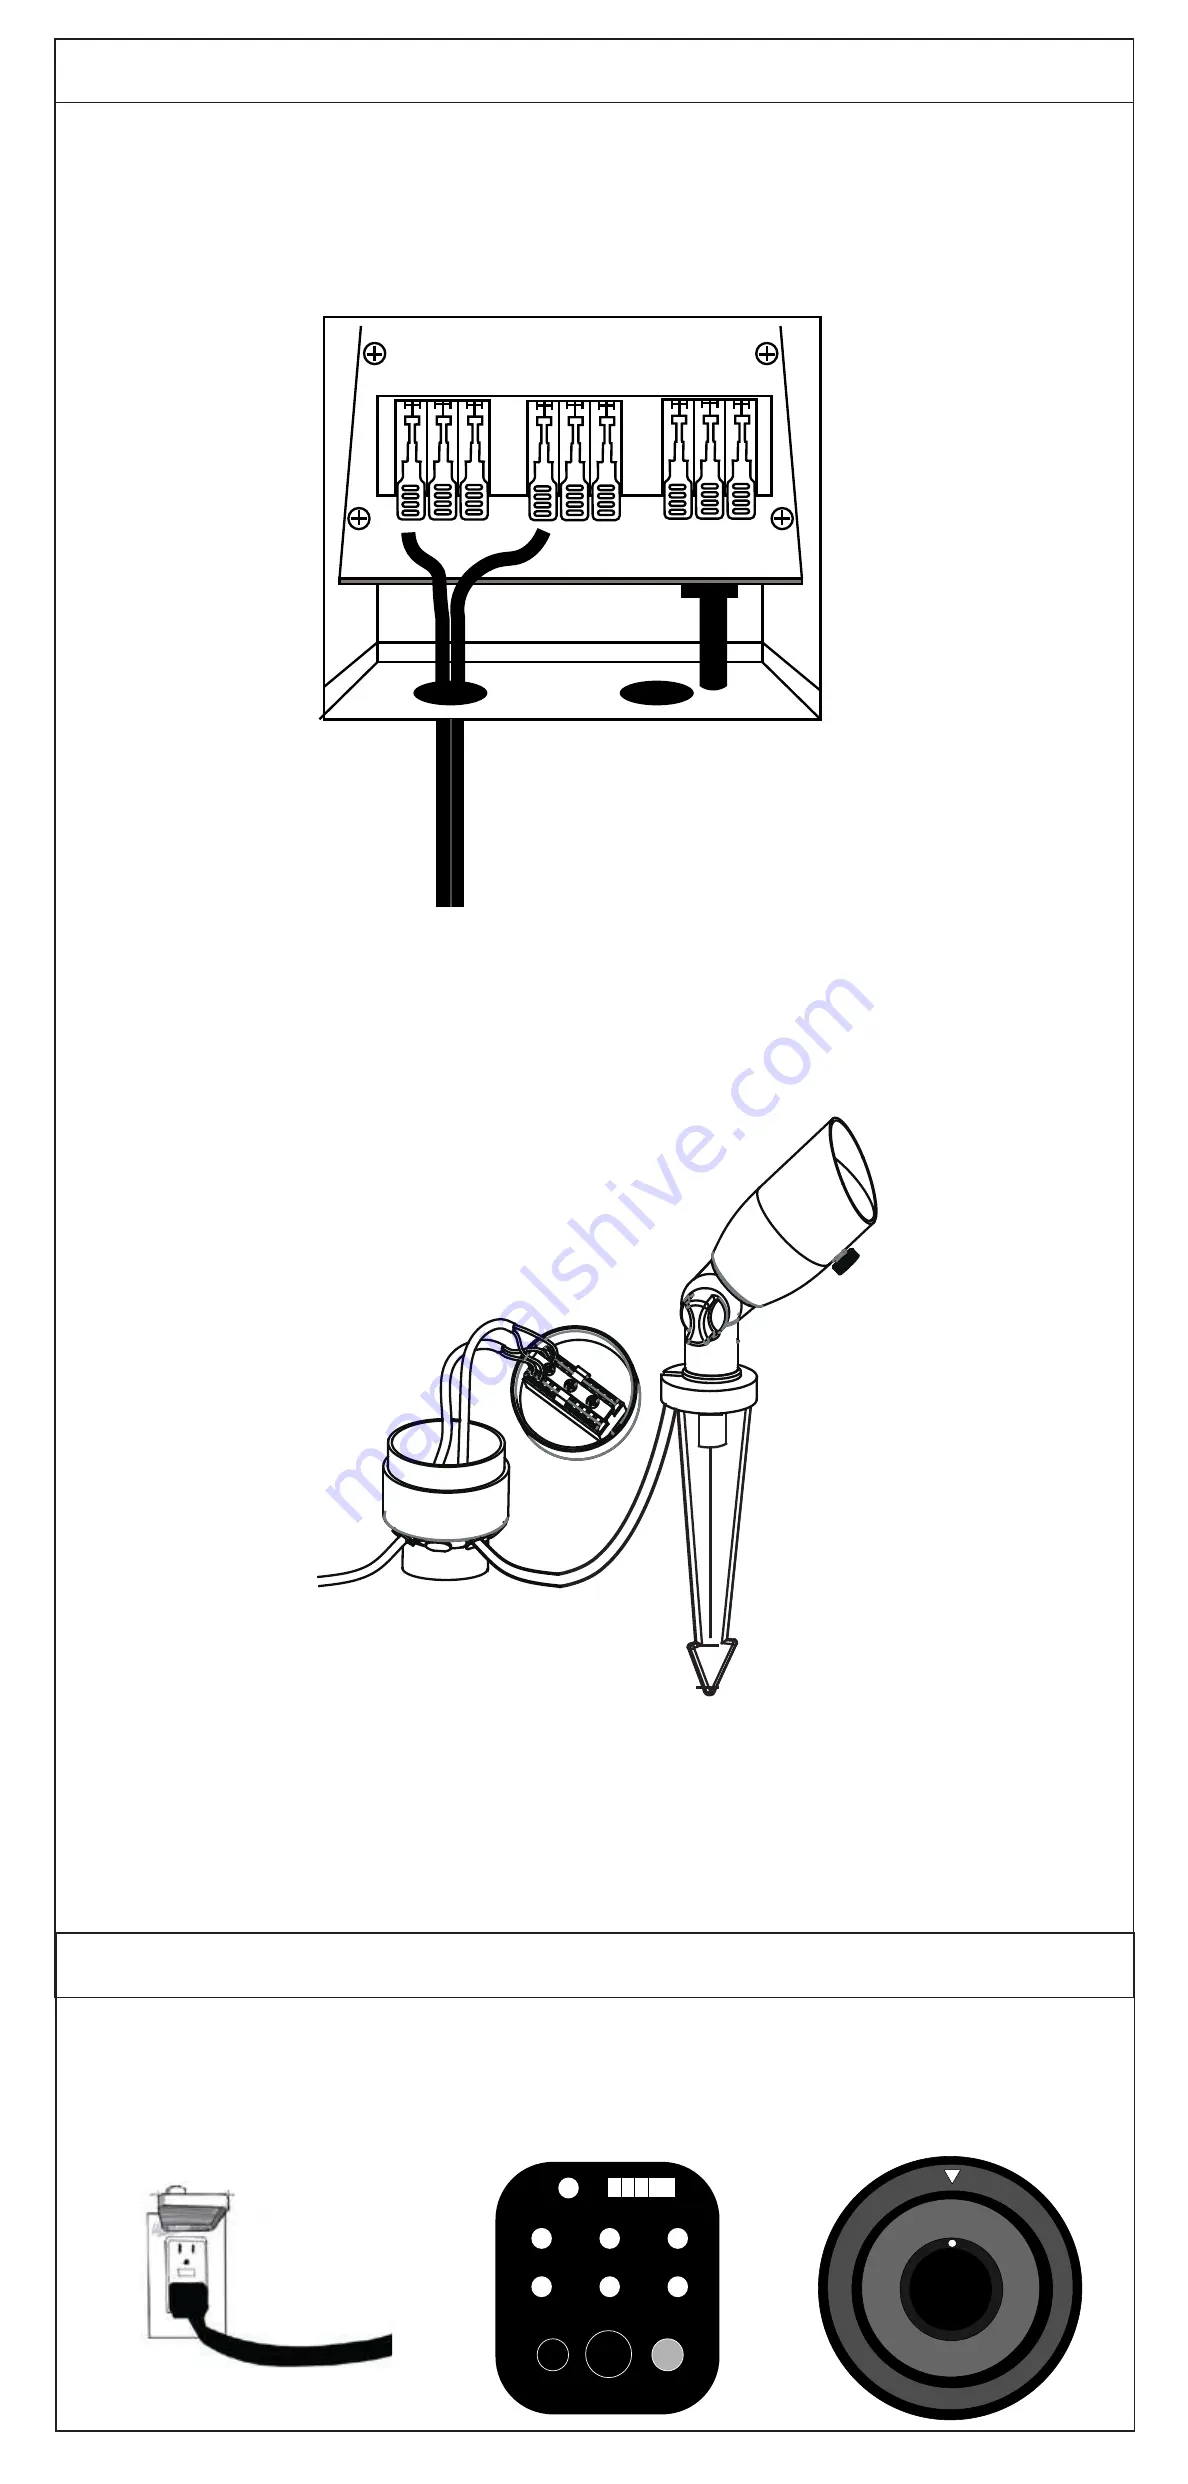
Insert main supply wire into the wire exits on the bottom of
the transformer. Then connect one end of the main supply wire to one lever
terminal on the “COM” tap by simply lifting the lever up, inserting the wire and
flipping the lever down. Then, connect the other end of the supply wire to the
12V lever terminal for shorter runs or 15V terminal for longer runs.
Step 3- Set Up Wiring
COM
12V
15V
Supply
Wire
B. Run the supply wire to the centrally located hubs and insert the wire through the
rubber grommets on the bottom of the hub. Then, flip one of the terminal levers
open, insert one end of the stripped supply wire, and flip the lever closed to make
your connection. Last, flip the lever open that is directly opposite from the first
connection, on the other side of the terminal block, and insert the other end of
the supply wire and flip the lever closed to make the connection.
C. Run the fixture wire to the hub and insert the wire through the rubber grommets
on the bottom of the hub. Then, flip one of the terminal levers open, insert
one end of the stripped fixture wire, and flip the lever closed to make your
connection. Last, flip the lever open that is directly opposite from the first fixture
wire connection, on the other side of the terminal block, and insert the other end
of the fixture wire and flip the lever closed to make the connection.
Supply
Wire
Fixture
Wire
Step 4- Test Lights
A. Check your transformer to ensure the green pilot light is on; this guarantees the
transformer is receiving power from the wall outlet. Manually switch the timer to
the “ON” position and verify the fixtures light up.
B. Once you have verified the fixtures light up, turn the timer to the desired
settings.
2Hrs
4Hrs
SET
RESET
SENSOR
8Hrs
OFF
POWER
LOAD
DUSK-DAWN
ON
4
H
rs
6Hrs
8
H
rs
1
0
H
rs
O
FF
ON
2
H
rs
D
aw
n
Du
sk
-


