5. OPERATION
mower for the first time,raise the cutting position to the height best suited for your lawn.
To adjust the blade height:
Disconnect power supply.
To raise the blade height, use your hand to adjust the blade height adjustment handle
11
, and
in the meanwhile,you have to adjust the blade height adjustment knob
14
to make sure both
blade height level at the same position.
Connect to power supply when you are ready to mow.
Insert the female end of the extension cord into the product.
Connect the male end of the extension cord to the power source.
Make sure the extension cord is secured before beginning operation.
Connect to power supply.
Press and hold the switch button
2
. Pull the switch bar
1
toward the handle and release the
switch button
2
to start the mower.
To stop the mower,release the switch bar
1
. Let the blade come to a complete stop before
making any adjustments to the mower.
Firmly hold the handle with both hands when mowing.
Start mowing near the power socket to ensure that the extension cord does not become an
obstacle.
Do not allow the extension cord to pass under or become entangled beneath the machine.
Do not try to cut long grass all at once. Instead, mow the lawn in steps. Leave a day or two
between mowings until the lawn becomes evenly short.
When mowing at the edge, be sure to face the left side of the machine toward the
edge, and then move the machine along the edge.
WARNING:
The mower can only be used outdoors, and in no case in a building.
The mower must be left outdoors for at least two hours before entering inside a building.
Installing/Removing extension cord
Starting/Stopping the mower
Attention during operation
37
37
FR
EN
Summary of Contents for ELM2-36
Page 2: ......
Page 3: ...x4 x2 x3 4x16 4x30 5130 included ...
Page 22: ...10 VUE ÉCLATÉE ET LISTE DES PIÈCES 22 FR EN ...
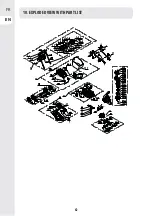
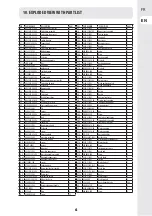
Page 42: ...10 EXPLODED VIEW WITH PART LIST 42 42 FR EN ...
Page 47: ...2 3 4 5 6 7 1 3 47 ...
Page 48: ...6 8 7 4 Clic 5 48 ...
Page 50: ...15 14 110 cm 95 cm 1 2 3 4 1 2 3 4 50 ...
Page 51: ...16 1 2 5 3 4a 4b 51 ...
Page 52: ...17 1 3 cm 1 3 cm 1 3 cm 18 1 3 cm 1 3 cm 1 3 cm 4 3 2 1 19 1 3 cm 1 3 cm 1 3 cm 4 3 2 1 52 ...
Page 53: ...20 21 15 53 ...
Page 54: ...22 54 ...
Page 56: ...27 15 28 56 ...
Page 59: ...37 38 35 36 25 30 N m 5130 included 59 ...
Page 60: ...OR 1 2 3 39 4 60 ...
Page 61: ......
Page 62: ......
Page 63: ......


