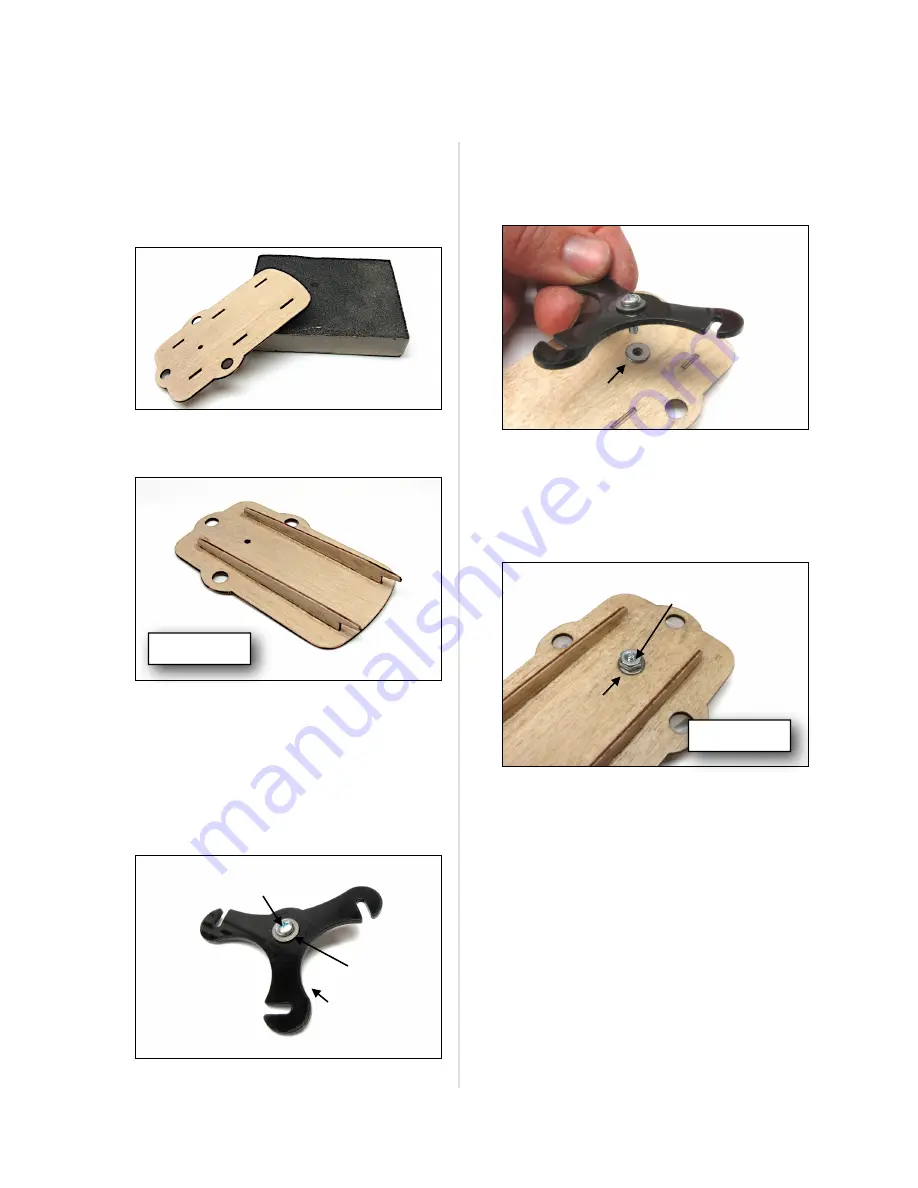
Electronics Hatch Assembly
☐
Prior to assembly of the Electronics Hatch
locate ply parts H1 and H2. Sand both sides
of parts and the edges of H1 round to prevent
the hatch top from later wearing the rubber
gasket material.
☐
Assemble Electronics Hatch from ply parts H1
and H2 as illustrated.
Prior to completing the latch installation it will be
necessary to thoroughly seal the completed hatch
cover and wooden latch using the techniques
described on page 16 of this manual.
☐
Insert one 4-40 x 3/8 in. Machine Screw
through one #4 Flat Washer and install
through latch as illustrated (Updated R1.16
nylon latch illustrated).
☐
Place one #4 Flat Washer on top of hatch
cover, centered over pivot hole for latch
assembly. Now, install latch to top of hatch
cover. (Updated R1.16 nylon latch Illustrated)
☐
Retain latch assembly to hatch cover by
installing a third #4 Flat Washer and 4-40 nut
over end of machine screw. Snug nut to
remove any play in assembly but allow latch
to spin with minimal resistance. Secure nut
with thread locking compound or thin CA glue.
Build Instructions
© 2013 Stevens AeroModel all rights reserved.
Page 14 of 25
H1
H1
H2
H2
Nylon Latch
4-40 x 3/8 in. Machine Screw
#4 Washer
#4 Washer
H1
#4 Washer
4-40 Nut
Secure with Thread Locker
Bottom View
Bottom View


