2 Installation
i. Use only your fingers to firmly tighten the knurled aluminum disk of the Encoder onto the Recorder
pulley shaft.
j. Secure the cable from the Encoder to the bracket with a tie wrap. Leave a little slack between the tie
wrap and the Encoder. The cable may be fastened to a Recorder leg for additional strain relief.
k. Re-install the float cable/tape on the Recorder float pulley. This completes the physical installation.
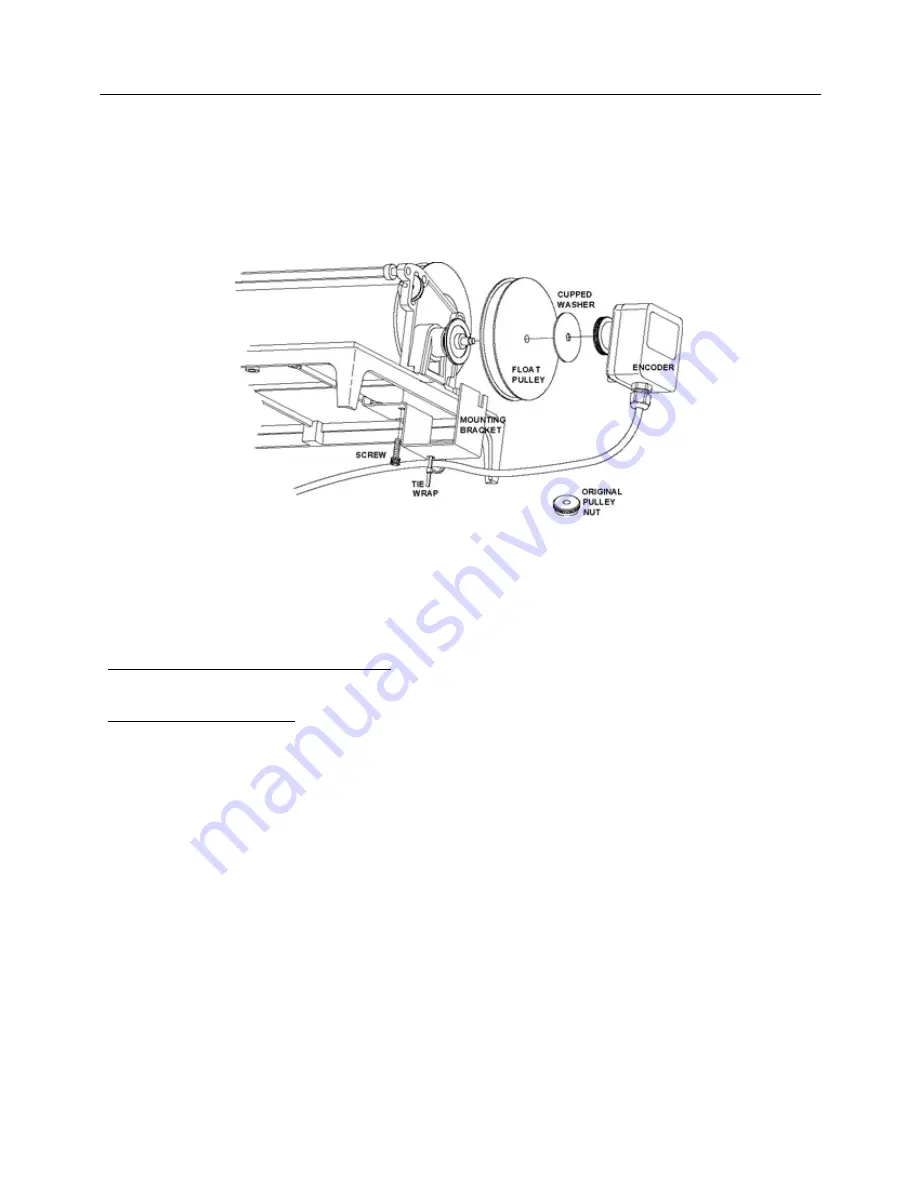
Figure 3 Installation on the Type F Recorder 6 90044
2.3 Type A/F Encoder on Type F Recorder
Reference: Figure 3
2.3.1 Recommended equipment and tools:
• Basic A/F Encoder installation kit for Type F Recorder
2.3.2 Installation Procedure:
a. Remove the cable/tape from the float pulley on the Recorder.
b. Remove the float pulley nut, cupped washer and float pulley. You may wish to save the nut and washer
for future use.
c. Remove the screw from beneath the Recorder (under the pulley shaft), using the Allen wrench in the
installation kit. Install the Encoder bracket and replace the screw.
d. Position the float pulley on the Recorder pulley shaft; the pulley actually fits inside the installed
bracket.
e. Install the new cupped washer from the kit (cup towards Recorder).
f. Begin threading the Encoder onto the Recorder pulley shaft.
g. Engage the lock pin at the base of the Encoder in the slot of the mounting bracket.
h. Use only your fingers to firmly tighten the knurled aluminum disk of the Encoder onto the Recorder
pulley shaft.
10


