


6
Stewart Filmscreen Corporation
Installing the low-voltage 3-button switch (standard)
The Stewart Filmscreen low-voltage control allows the use of low-voltage
wire to connect to the supplied 3-position 24V momentary wall switch.
Preparing the connection
Before making the electrical connections, you need:
An available AC constant power source
A 4-conductor switch hook-up cable (4-conductor bell wire or
category 5 cable is typically used for long runs)
Cat 5, multi-conductor unshielded, or similar type electronic cable
can be used to connect the 3-button switch to the LVC. The
recommended wire gauge is 20 to 24 AWG. Use plenum-rated
cable when required.
Making the connection
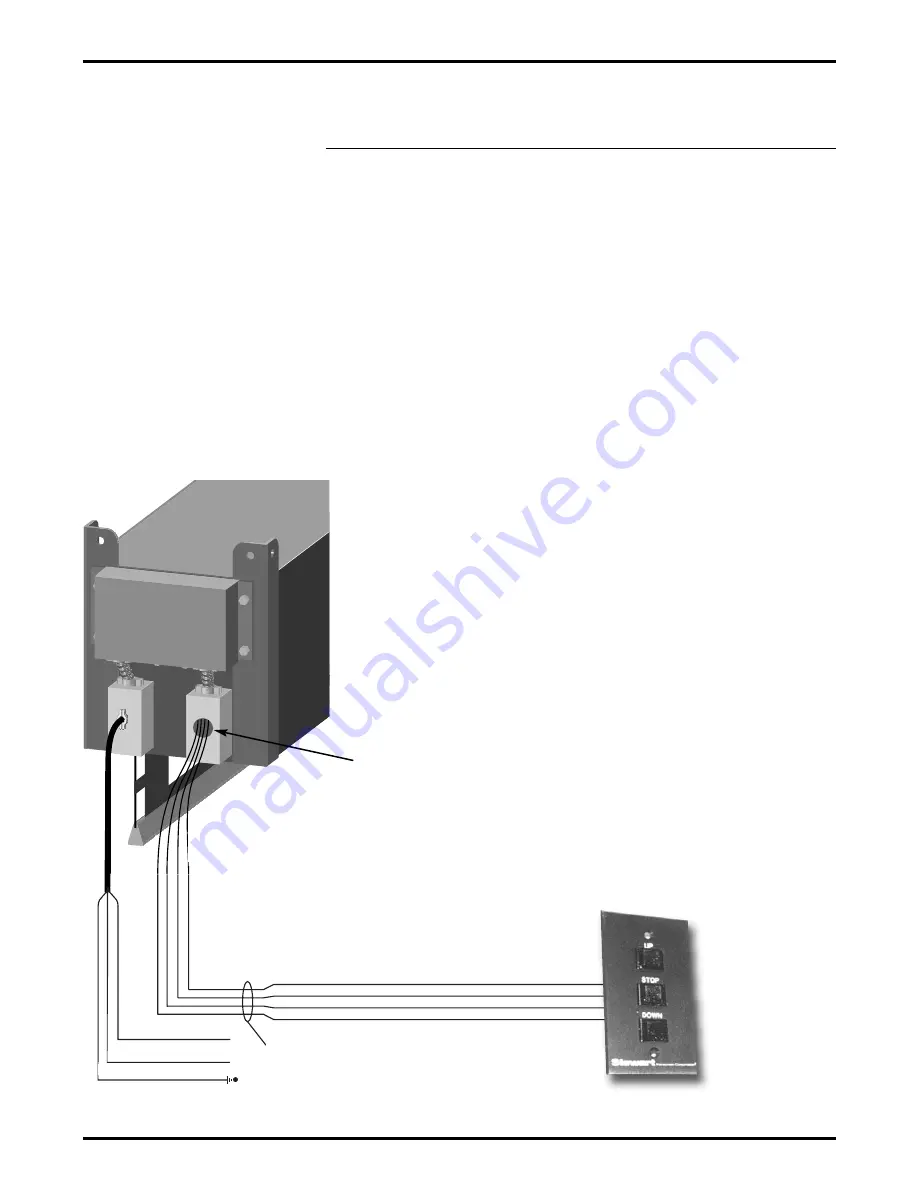
Figure 2 illustrates the connections.
1. Connect the 4-conductor hookup cable to the connection harness
coming from the J-box used for “switch input.”
2. Connect the hookup cable to the 3-button switch.
3. Connect the main AC power source to the AC J-box.
4. A parallel connection to an outboard audio-visual switching
network can be made at this time. (optional)
Figure 2:
Low voltage 3-button switch wiring
3-button Momentary
Switch
4 Conductor Hook-up Cable—20-24ga Recommended
Category 5 Typically Used (NOT Supplied)
Connection
Harness
J-box for
Switch Input
STOP-Yellow
COMMON-White
UP-Red
DOWN-Black
NEUTRAL-White
GREEN-Ground
HOT-Black


