R 8-Oct-05 / P 27-Jul-06
- 5 -
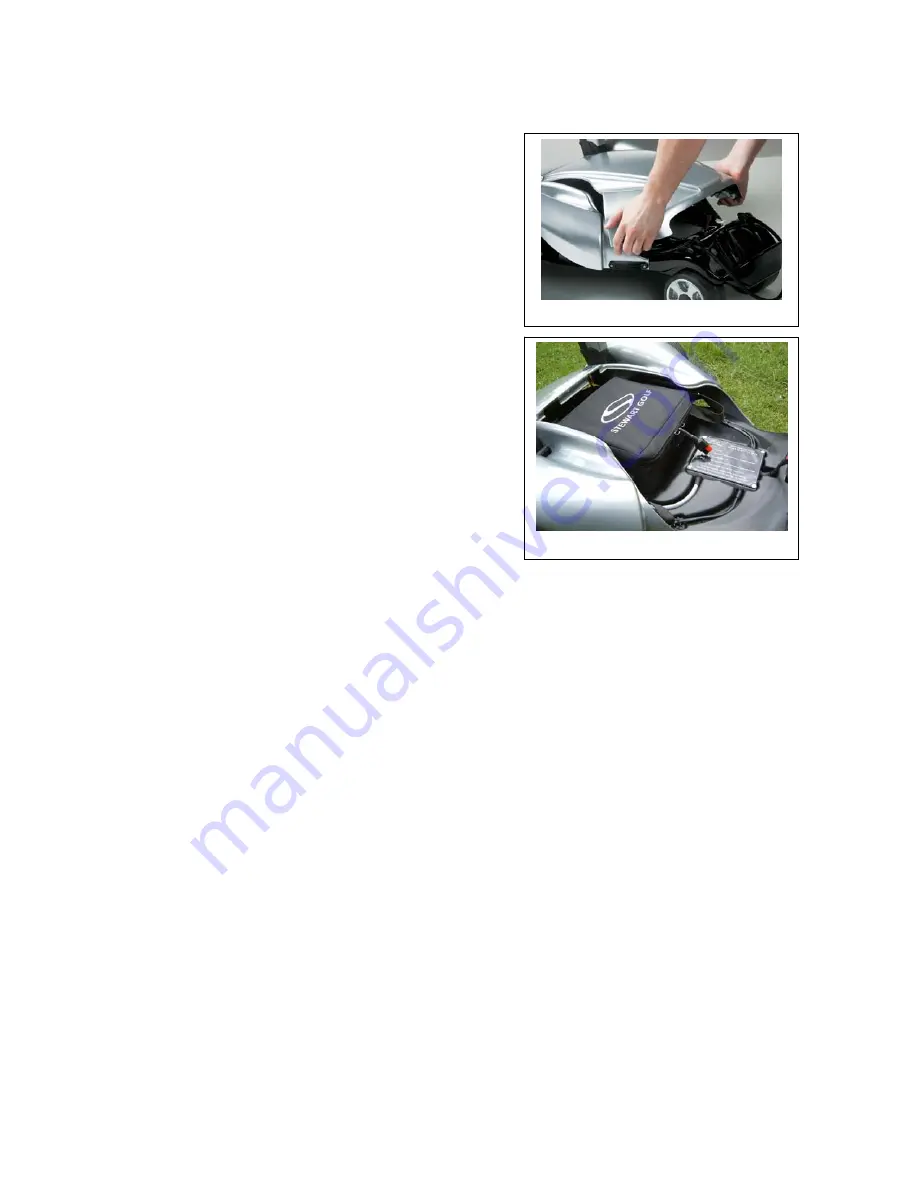
Fig 1: Removing the front cover
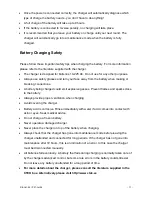
Fig 2: Inserting the battery
To Start Using Your New X3R
1. The X3R has two purpose designed lifting
places, one being the anti-tip device and the
other under the front of the chassis.
These are
the only places from which you should lift
the X3R.
2. With the X3R placed on the floor, hold the
handle and pull it up and towards you until both
top and bottom clips snap into place.
3. Remove the
front cover
(fig 1). To do this, hold
the 'S' logos on either side of the front cover,
apply slight outward pressure and lift. The front
cover can then be lifted completely away from
the X3R.
4. Remove the battery from its box. The battery is
already in the Stewart Golf carry case for your
convenience.
5. Ensuring that the straps are out of the way, insert the battery into the chassis with the
power lead facing forwards (fig 2) and secure with the straps.
6. Connect the battery and ensure that the
safety switch
is in the
'off'
position (the ‘O’).
7. Replace the front cover. Holding the front cover by the 'S' logos, line up the two lugs on
the rear of the front cover with the corresponding parts of the rear cover, and then pivot
it into place. Ensure that the front of the cover is behind the ‘bump’ on the chassis.
8. Make sure that the 'S' clips are secured to the chassis. Gently press the front cover
down until it is secured in place.
9. With the lower bag strap out of the way and the top one only connected on one side,
place your bag onto the lower bag stay and rest it against the top bag stay.
10. Using the large handle in the middle of the strap, pull the lower bag strap over the base
of the golf bag. Using the handle means that you are less likely to trap your fingers.
11. Take the loose end of the top bag strap and pull it around the golf bag, then attach it to
the clip on the other side.
12. Ensure that both wheels are in the ‘drive’ position (not in freewheel, page 9)
13. Operate as outlined in this manual.


