page 11
The truss rod is installed so that it adjusts at the peghead
end. This makes it easy to adjust the truss rod under string
tension.
Roll the rods simultaneously between your thumb and fin-
gers to adjust them until the thread in the upper half of the
brass lug (the rod without the adjusting nut welded to it) is
flush with the face of the lug, and not protruding excessively.
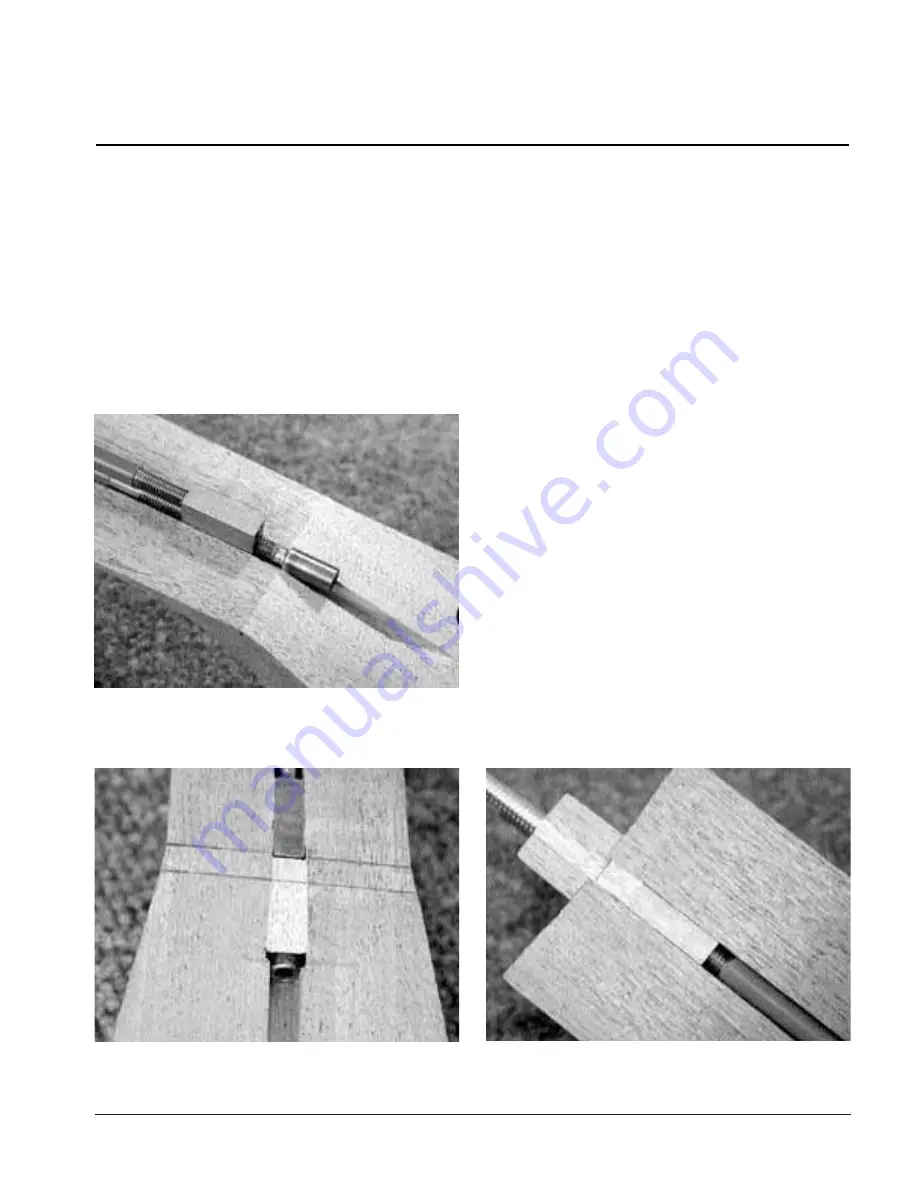
Align the back edge of the adjusting nut with the break line
of the peghead angle.
(21)
. This locates the front edge of the
truss rod’s brass lug just under the end of the fretboard. A flat
area of approximately 7/32" will remain between the end of
the fretboard and the break angle of the peghead — this is
where the bone string nut will be installed.
The adjusting nut is slightly wider than the slot machined
into the neck. Chisel a slight clearance in the slot walls until
the adjusting nut fits to the bottom of the channel.
Install the rod, adjusting nut facing down. Glue in a piece of
the supplied filler strip over the adjusting nut
(22)
and the
exposed truss rod threads, between the brass lug and the
rear of the adjusting nut. The filler strip will support the bone
string nut, which will be installed later. Of course, keep glue
off the truss rod threads. When the glue is dry, chisel the filler
strip flush with the surface of the neck. Glue a filler strip at the
opposite end of the rod too, to fill the remaining empty
channel, and trim it flush
(23)
.
Assembling the neck
Installing the truss rod
21.
Align the back edge of the adjusting nut with the break line of
the peghead angle.
22.
The filler strip will support the bone string nut, which will be
installed later.
23.
Glue a filler strip at the opposite end of the rod too, to fill the
remaining empty channel, and trim it flush.


