32
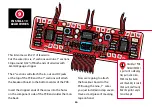
Remove the nut and insert the DC
jack into the top of the housing.
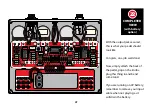
Using a 14mm wrench or needle nose pliers, reattach
nut inside housing on threaded shaft being careful not
to cross thread. Tighten nut just enough to allow the jack
to rotate.
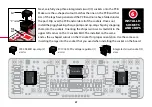
Follow the diagram on the right and solder the battery clip
red wire and the positive and negative wires coming from
the PCB.
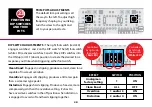
Once solder joints have cooled, tighten the nut with a pair
of needle nose pliers. Do not over tighten because you
could crack the DC bushing.
PLEASE NOTE: The DC jack
and input jack are different for
models 12251 and 12255, so choose
step 17-20 according to your model.
INSTALL THE
DC JACK
FOR MODEL
12255
(with battery
option)
17
17
WD 17-1
BATT.
POS
NEG

