background image

stewmac.com

6

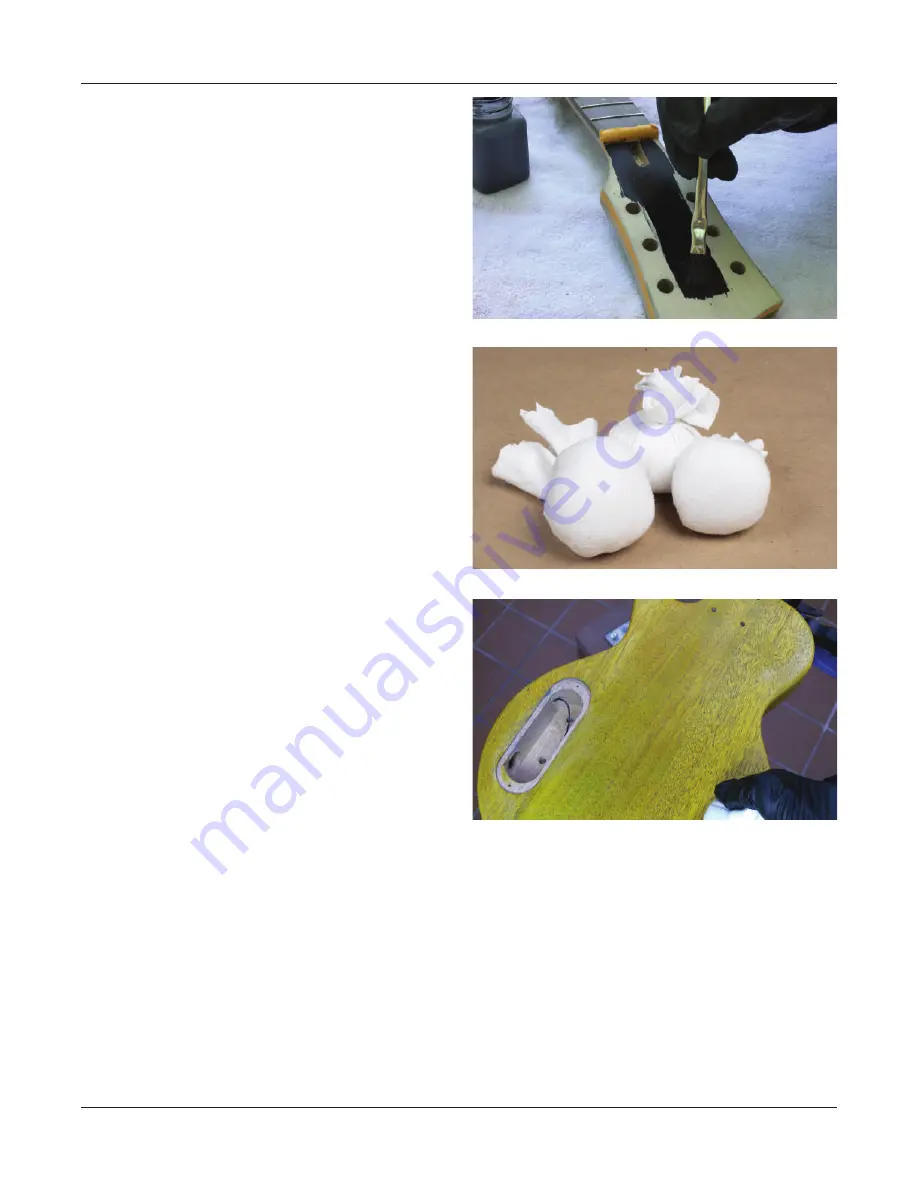
Tape off the edges around the peghead face—the nut 
should still be taped off from filling. Use fingerboard stain to 
color the peghead face black. A little goes a long way! Start in 
the center and work your way out to the edges, as this helps 
reduce bleed around the edges. Let dry for 1 hour. Peel the 
tape and check for any signs of bleeding on the sides and 
top of the peghead. Any stain that has bled onto the sides 
can  be  removed  with  a  scraper  or  sandpaper.                                                                                                  

Color coats

 (optional)                                                                                               

ColorTone Liquid Stains mixed into Wipe On Poly make an 
easy to apply and nice looking translucent finish for the body 
and neck. It’s nonflammable, simple to use, very forgiving, 
and can be applied indoors. 

Mix 1/4oz of Vintage Amber (or the color of your choice) 
ColorTone Liquid Stain into 4oz of the Wipe On Poly finish 
and mix well. Conduct a test on some scrap wood to ensure 
the color looks the way you’d like it to. If it’s too dark, add a 
little more finish to weaken the color. If it’s too light, add an 
additional drop or two of stain. Remember, a small amount 
of stain goes a long way!

As you apply the color watch for streaks and uneven areas. 
Keep working the pad in a circular motion over these areas, 
followed by long strokes running the length of the instru-
ment until you have uniform tinting over the entire surface 
of the body.

Apply the color to the neck in the same fashion as the body. 
Any residual finish that ends up on the fretboard face will be 
scraped back once it dries.  

Allow the color coats to dry 2-3 hours. 

Final top coats 


Do not sand on your color coats. Apply 4-8 additional coats 

of clear over the top of the color or until you’ve reached your 

desired thickness. Allow to dry for 24 hours.
In most cases final sanding and buffing of the ColorTone 

Wipe-On Poly finish is not necessary but there are times 

where it may be needed to level out uneven surfaces and 

imperfections in the finish. If finish sanding is needed, we 

suggest going over the instrument with 800-grit, followed 

by 1200-grit sandpaper. Use care not to sand through the 

topcoats into the color. Then follow up with ColorTone Me-

duim Polishing Compound on a soft cloth or buffing pad.

Applying finish


Summary of Contents for Mini-LP Guitar Kit

Page 1: ...Have a little fun Make a little noise Build a REAL guitar in a weekend Easy to build finish and setup Pre wired electronics All hardware included Sheet i 12259 Updated 06 20 MINI LP GUITAR KIT ...

Page 2: ... 10mm nut driver 5890 or wrench 3691 Soldering iron 0502 6 StewMac Shop Rule 4905 12 Precision Straightedge 3849 Supplies Sandpaper 150 220 320 400 800 1200 grits 5562 Light duty 3M Scotch Brite pad 7445 or 0000 steel wool ColorTone Polishing Compound Medium 1845 Naphtha solvent 0766 Glue Brush 4167 Rubber gloves Finishing supplies ColorTone Powdered Grain Filler ebony 0269 E Wipe On Poly 3622 Vin...

Page 3: ...s washers and screws set of 6 Pickup with mounting ring Control cavity cover with mounting screws Truss rod cover with mounting screws Wiring Kit Bridge with mounting studs Tailpiece with mounting studs Output jack with mounting screws Strap buttons with screws and protective washers 2 4mm hex wrench for adjusting truss rod ...

Page 4: ...ugh the hole into the cavity leaving the stripped end to come in contact with the bushing once installed In stallthetailpiecebushings Pressingtheminwithadrillpress is the preferred method but they can also be installed with gentle hammer taps using a block Install bridge bushings in the same fashion but without a ground wire Next you will be preparing the neck and body for finish Preparing the nec...

Page 5: ...Use care not to change the bevel of the frets in the process While sanding with 320 grit slightly break any sharp edges on the fretboard body fingerboard and peghead Soften ing hard edges promotes even finish coverage Later when you re finish sanding these edges are less likely to sand through to bare wood Degrease with naphtha Whenyou vefinishedsanding wipethebodyandneckwith a naphtha dampened li...

Page 6: ...n additional drop or two of stain Remember a small amount of stain goes a long way As you apply the color watch for streaks and uneven areas Keep working the pad in a circular motion over these areas followed by long strokes running the length of the instru ment until you have uniform tinting over the entire surface of the body Apply the color to the neck in the same fashion as the body Any residu...

Page 7: ...rews are very delicate and will break off if forced into wood without drilling Use a 5 64 bit to drill 3 8 deep pilot holes for the screws if these holes are any smaller youriskshearingoffthescrewheads Lubricatingthescrews by dragging them across a bar of soap or a candle will help the screws go in smoothly With the tuners in place install the screws in the pilot holes with a 1 Phillips screwdrive...

Page 8: ...r the jack plate Markoutthe4mountingscrewswithascribeorpunchusing care to keep the edge of the jack plate square to the body Drill the holes using a 1 16 bit drilling 3 16 deep Do not install the jack yet Assemble your guitar Install the wiring harness Wire the pickup to the harness as shown in the diagram Then run the hot and ground wires through the output jack hole on the body ...

Page 9: ...und tip Once sol dered install the jack plate with a 1 screwdriver and the control cavity cover with a 2 screwdriver Mark out the truss rod cover Drill the holes using a 1 16 bit drilling 3 16 deep Install the bridge and tailpiece Tighten the tailpiece studs all the way down the bridge height will be set during final set up String up the guitar ...

Page 10: ...e slots using gauged nut files or needle files Set the action at the bridge Adjust the action at the bridge by raising or lowering the string saddles Measure string height over the 12th fret between the bottom of the string and the top of the fret A good starting point is High unwound E string 1 16 at the 12th fret Low wound E string 5 64 at the 12th fret You can always go lower or higher dependin...

Page 11: ...d fret adjust the bass side of the pickup to 1 8 from the top of the pickup pole to the bottom of the low E string Adjust the treble side to 1 8 You re done Congratulations Your guitar is ready to play We hope this is the first of many that you have fun assembling and cus tomizing Final setup ...

Page 12: ...21 N Shafer St Athens Ohio 45701 USA USA Canada call toll free 800 848 2273 9am 5pm weekdays Eastern time stewmac com ...

Reviews: