11
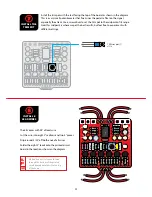
INSTALL THE
TRIM POT
7
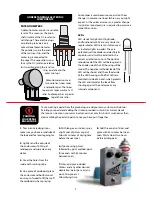
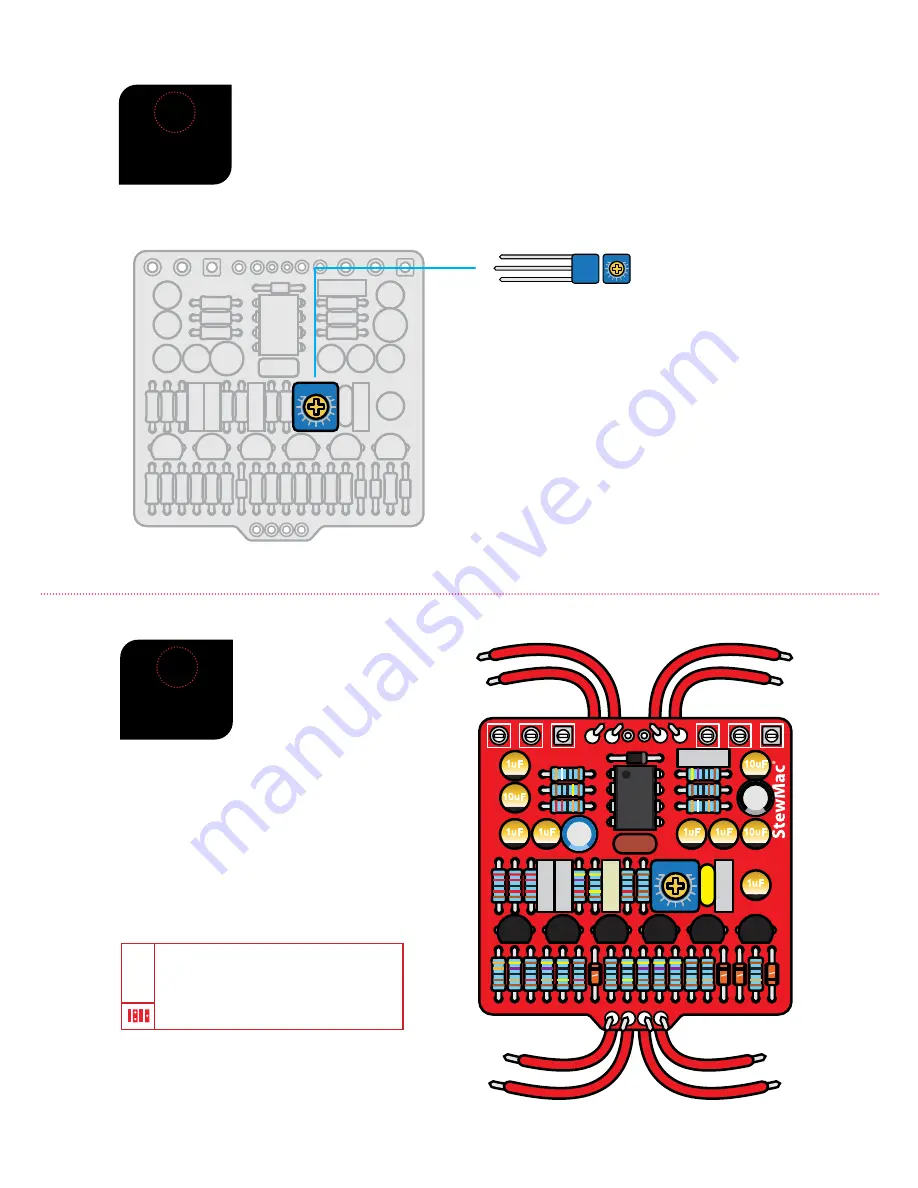
Install the trim pot with the text facing the top of the board, as shown in the diagram.
This is a very small potentiometer that fine-tunes the pedal’s effect on the signal,
especially the attack. Use a screwdriver to set the trim pot to the midpoint of its range.
Near this midpoint is where we get the best results, but feel free to experiment with
different settings.
08 EDT
10uF
10K trim pot (1)
#7570
08 EDT
22nJ
47
n
J
22
n
J
47
n
J
33
n
J
TL07
1
1uF
10uF
10uF
1uF
1uF
1uF
1uF
08 EDT
10uF
1uF
INSTALL 8
LEAD WIRES
8
The kit comes with 24" of lead wire.
Cut the wire into eight 2" sections and two 4" pieces.
Strip around 3/32" off both ends of all wires.
Solder the eight 2" leads onto the printed circuit
board in the locations shown in the diagram.
We find it easiest to feed each lead
through the bottom of the printed
circuit board and solder it on the top
of the board.
TIP


