INSTALLATION
Installation
EN
GL
ISH
www.stiebel-eltron-usa.com
SOL 29 Premium |
7
2
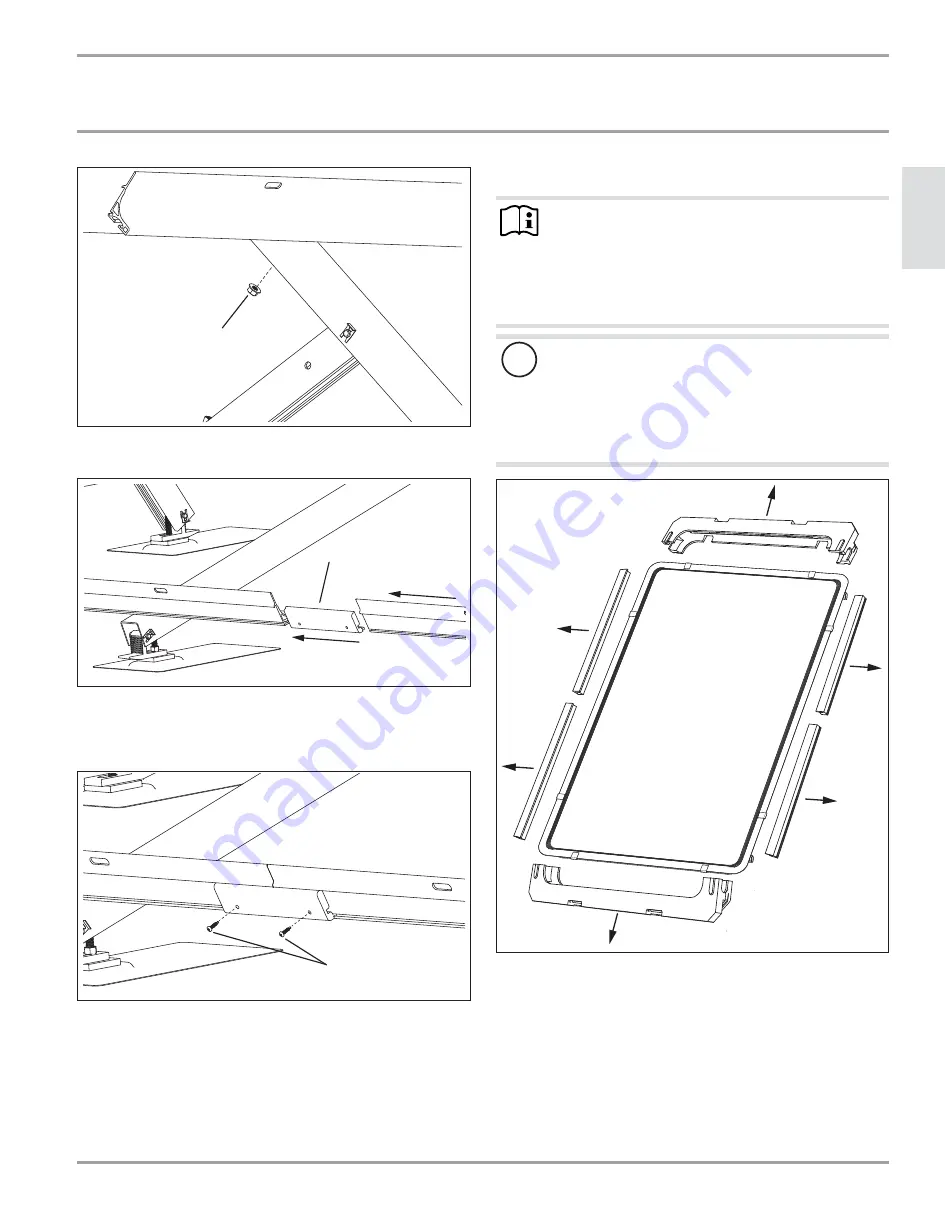
2 Fastening nut
Secure the collector frame by fastening a nut to the carriage bolt.
3
3 Splice connector
If joining two frames together for a larger sub-array of collectors,
slide the splice connector into the groove of the fi rst frame. Slide
the next frame onto the splice connector.
4
4 Sheet metal screws
6.7 Collector
installation
NOTE :
The collector has a sensor well near one of the four con-
nection points. This sensor well must be oriented so that
a sensor can measure the temperature of the solar fl uid
as it exits the array. Do not orient the collector so that
the sensor well is located at the bottom of the collector.
For more information see section 6.9 on page 9.
!
Material losses:
While carrying out work on the installation site, the col-
lectors are susceptible to damage from heavy equipment
or large objects.
To protect the collectors, do not remove the collector insu-
lation until the mounting hardware is completely installed
and ready for collector insulation.
Remove the protective insulation from the collector.


