5
3. DESCRIPTION
1. Guide bar cover
2. Front handle guard / chain brake
3. Front handle
4. Safety lock-off button
5. Switch trigger
6. Oil tank cover
7. Oil level gauge
8. Spike bumpers
9. Saw chain
10. Guide bar
11. Nuts
12. Rear handle
13. Chain tensioner adjustment knob
14. Sprocket cover
15. Sprocket cover tighten knob
16. Bolt for saw chain tension
17. Sprocket
18. Bar guide
19. Oil outlet
20. Bar groove
21. Chain drive links
22. Cutter
23. Felling direction
24. Danger zone
25. Escape route
26. Direction of fall
27. Notch
28. Felling back cut
29. Hinge
30. Limb cut
31. Keep work off ground leave
support limbs until log is cut
32. Log supported along the entire length
33. Cut from top (over buck) avoid cutting earth
34. Log supported one end
35. Under buck RCS36-23lgs manual
36.Over buck
37. Log supported both ends 38. Bucking a log
39.Stand on uphill side when
cutting because log may roll
40. Battery pack
41. Battery latch button
42. Charger
43. Charger cable
44. On/off switch
45. EC Conformity marking
46. Name and address of the manufacturer
47. Manufacturing country
48.Voltage and current
49. Manufacturer’s model of reference
50. Guaranteed sound power level
51. Year of manufacture
52. Serial number
REMARKS
:The declared vibration value has
been measured with a standard test method and
may be used to compare one tool with another.
The declared vibration value may be used
in a preliminary assessment of exposure.
The actual vibration values
during use of the tool can be
different from the above stated
and depend on the use of
the tool; and the need to identify
safety measures to protect
the operator are based on an
estimation of exposure in
the actual conditions of use (taking
account all parts of the
operating cycle such as the times
when the tool is switched
off and when it is running idle in
addition to the trigger time)
As soon as you have purchased the
machine, do not forget to write the
identification numbers (S/n) in the spaces
on the last page of the manual.
The example of the Declaration of Conformity is
provided on the penultimate page of the manual.
4. ASSEMBLY
This chain saw does not require assembly,
but user should know how to assemble the
guide bar and saw chain. Check the chain
tensioning and add oil as described later
in this manual before each operation.
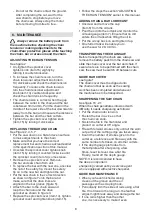
ASSEMBLING THE GUIDE
BAR AND SAW CHAIN
See figure 2 - 7
Make sure remove the battery pack from
the unit. Wear protective gloves.
•
Unscrew the sprocket cover tighten knob
(item 15) and remove the sprocket cover.
•
The saw chain should face in the
direction of chain rotation. If they face
backwards, turn the loop over.
•
Place the chain drive links into the bar
groove. Position the chain so there
is a loop at the back of the bar.
• Hold the chain in position on the bar
and place the loop around the sprocket
and make sure it is correctly mounted.
Make sure the bar hole fits well with
bolt (item 16) for saw chain tension.
•
Replace the sprocket cover, turn the chain
tension adjust knob (item 13) clockwise
until the saw chain is properly tensioned.
The guide bar must then be pushed
upwards, check chain tension again,
do not tension the chain too tight.
Summary of Contents for CS 48 Li 14
Page 4: ...ii 1 2 3 4 8 7 5 4 5 6 ...
Page 5: ...iii 16 15 14 13 12 11 10 9 18 17 19 ...
Page 6: ...iv 20 21 22 ...
Page 22: ...12 ...
Page 55: ...11 ...
Page 56: ......
Page 112: ......
Page 132: ......
Page 144: ......
Page 166: ......
Page 210: ......
Page 232: ...12 ...
Page 244: ......
Page 256: ......
Page 322: ...STIGA SpA Via del Lavoro 6 31033 Castelfranco Veneto TV ITALY dB LWA Type s n Art N ...


