0478 131 8349 A - EN
46
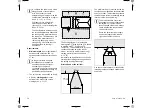
at the relevant starting point, it always
mows within a circle around the starting
point first. Once it has mown this partial
area, it continues mowing in the remaining
area.
●
Setting starting points (
5. Test edge:
Start edge following for checking
correct wire routing.
The step "Check installation" of the
installation assistant is called up. (
6. Edge mowing:
Define the mowing frequency.
Never
– The edges are never
mown.
Once
– Default setting, the edges are
mown once a week.
Twice
– The edges are mown twice per
week.
7. Secondary areas:
Enable secondary areas.
Inactive
– Default setting
Active
– Setting if secondary areas are to
be mown. With the commands "Start
mowing" and "Start time-delayed mowing",
the mowing area (main area/secondary
area) must be selected. (
11.15 Setting starting points
To set, either
●
teach in starting points
or
●
select the required starting point and
define it manually.
Teaching in starting points
:
After pressing the OK button, the
robotic mower begins a new
learning run along the perimeter wire. If it
is not docked, it first travels to the docking
station. All the existing starting points are
deleted.
During travel, up to 4 starting points can be
specified by pressing the OK button.
Interrupting the teach-in procedure:
Manually – by pressing the STOP button.
Automatically – by obstacles at the edge of
the mowing area.
●
If the learning run has been interrupted
automatically, correct the position of the
perimeter wire and remove any
obstacles.
●
Check the position of the robotic mower
before continuing the learning run. The
machine must either be located on the
perimeter wire or within the mowing
area with the front facing the perimeter
wire.
Ending the teach-in procedure:
Manually – following an interruption.
Automatically – after docking.
The new starting points are saved
following confirmation with OK.
Starting frequency:
The starting frequency defines how often a
mowing operation is to begin from a
starting point. The default setting is 2 of 10
mowing operations (2/10) at each starting
point.
●
Change the starting frequency as
required after teach-in.
●
If the teach-in procedure has been
aborted prematurely, send the robotic
mower back the to docking station via a
command. (
●
RMI 632 C, RMI 632 PC:
A
radius
from 3 m to 30 m around each
starting point can be defined after
teach-in. The stored starting points are
not assigned any radius as standard.
Setting starting point 1 to 4
manually
:
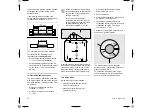
Determine the distance of the
starting points from the docking
station and define the starting
frequency.
The
distance
corresponds to that
covered from the docking station to
the starting point in metres, measured in a
clockwise direction.
The
starting frequency
can be between 0
of 10 mowing operations (0/10) and 10 of
10 mowing operations (10/10).
RMI 632 C, RMI 632 PC:
A
radius
from 3 m to 30 m around the
starting point can be defined.
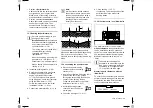
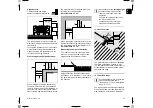
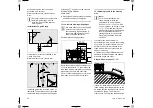
To check correct wire routing
around no-go areas, position the
robotic mower in the mowing area
with the front facing the no-go area
and start edge following.
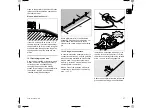
The home area of the robotic
mower is defined during edge
following. If necessary, a home
area already stored in the memory
is extended. (
RMI 632 C, RMI 632 PC:
The home area of the robotic
mower is defined during the
learning run. If necessary, a home
area already stored in the memory
is extended. (
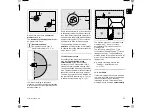
Starting points with radius
:
When the mowing operation is
started at the respective starting
point, the robotic mower starts by
mowing the partial area within the
circular segment around the
starting point. Only then does it
mow the rest of the mowing area.


