background image

14   SERVICING AND MAINTENANCE

60

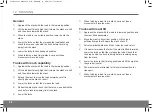
Mast system

Description

Service

Lift chains

X

Forks, fork carriage

X

Bearings/Rollers

X

Lubrication

X

Mast profile

X

Reach carriage

X

Fork locking

X

Steering

Description

Service

Servo motor

X

Steering servo unit

X

Steering wheel/Steering wheel sensor

X

Steering gearbox

X

Sliding bearing

X

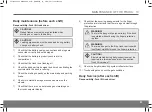
Hydraulic system

Description

Service

Hydraulic oil level

X

Hoses

X

Hydraulic system

Description

Service

Couplings

X

Pump motor

X

Hydraulic pump

X

On/off valve proportional valve

X

Lift cylinders

Description

Service

Cylinders

X

Electrical system

Description

Service

Cables, Switches

X

Contactors

X

Battery

X

Traction motor controllers

X

Horn

X

Speed Controller

X

Brake pedal

X

Level selector

O

Mast sensor/switch

X

Instruction Handbook UFW — D008453, B, GBR, ForTranslation

Summary of Contents for FM-4W 20

Page 1: ...Original instructions Reach truck FM 4W 20 FM 4W 25 first in intralogistics EN 159007 Rev A 01 2015 ...

Page 2: ... be copied fully or in part without written permission The material has undergone careful examination with regard to correctness We reserve the right to make changes Copyright UniCarriers Manufacturing Sweden AB 2014 Instruction Handbook UFW D008453 B GBR ForTranslation ...
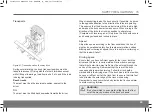
Page 3: ...ation of machine plates 12 Location of machine plates 12 07 DESCRIPTION OF THE TRUCK 13 UFW Tergo four way truck 13 Driver environment 13 Stability Support System S3 1 20 Stability Support System S3 2 21 Weight indication 21 Dynamic Curve Control DCC 22 Active Spin Reduction ASR option 22 Fork Safe Zone System option 23 Cab option 23 Options 27 08 BATTERY 29 Specifications 29 Battery charging 29 M...

Page 4: ...rs 49 Maximal load 49 Picking up a load 49 12 STACKING 50 General 50 Trucks with reach capability 50 Trucks with mast tilt 50 13 MAINTENANCE OF THE TRUCK 51 Daily maintenance before each shift 51 Daily Service after each shift 51 Weekly inspection 52 Preventive maintenance 53 14 SERVICING AND MAINTENANCE 54 Service personnel 54 Safety instructions for maintenance 54 Maintenance intervals 54 Mainte...

Page 5: ...f service 76 Taking the truck out of service 77 Swinging loads 77 Installing the fire extinguisher 78 In the event of accidents 78 Noise Sound levels 78 Vibrations 78 Climatic conditions 78 Work platforms 78 Overhead guard 79 Protective shoes 79 Lighting 79 Additional units Trailers 79 Safety and warning signs 79 16 DIMENSIONS 81 Dimensions 81 17 WEIGHT 83 Weight 83 18 ORDERING HANDBOOKS AND MANUA...

Page 6: ...ng trucks since 1958 Quality operational safety and innovation have made us a leading worldwide truck supplier UniCarriers Genuine Parts To maintain the reliability that UniCarriers promises insist on UniCarriers genuine replacement parts Only UniCarriers genuine replacement parts guarantee correct operation long life and the right to a warranty Declaration of conformity UniCarriers Manufacturing ...

Page 7: ...acity shall also be changed appropriately Only in the event that STILL is no longer in business and there is no successor in the interest to the business may the user perform a modification or alteration to a powered industrial truck This applies on condition that the user arranges for the modification or alteration to be designed tested and implemented by one or more engineers who are experts in ...

Page 8: ...ereby reducing the environmental impact Waste Waste material in conjunction with repairs maintenance cleaning or scrapping must be collected and disposed of in an environment friendly way and in accordance with the directives of respective countries Such work should only be carried out in areas intended for this purpose Recyclable material should be taken care of by specialised authorities Environ...

Page 9: ...ance personnel NOTE The daily maintenance and certain service is to be carried out by the driver after he she has received sufficient training in the construction and maintenance of the truck Continuous regular servicing should be performed by an authorized servicing organization To ensure efficient and satisfactory servicing of the truck please contact the STILL service department or an authorize...

Page 10: ...erating in an area where there is a risk of fire explosion or in any other high risk area must be specially equipped for the purpose Trucks are not normally equipped for these situations Instruction Handbook UFW D008453 B GBR ForTranslation ...
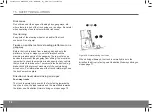
Page 11: ...r shall have the permission of the supervisor to drive the type of truck in question and be specially trained for the work and the traffic conditions involved The responsibilities of the driver in specific markets The following apply in respect of the driver s responsibilities concerning the use of fork lift trucks Australia Users shall follow the requirements of AS 2359 2 North America Users shal...

Page 12: ... centre distance D 6 Lift height for fork lift H 7 Battery voltage 8 Weight without battery 9 Minimum battery weight 10 Maximum battery weight 11 Reference number 12 Unit designation option Total truck weight Weight without battery Battery weight Load Driver Location of machine plates The machine plate is located behind the driving seat The load limit plate is located on the overhead guard pillar ...

Page 13: ...ation The truck operates both with the load carried in front of the straddle legs and with the mast retracted for minimum aisle width The truck is used for stacking in different storage systems and for transporting load carriers Driver environment Functions Controls Figure 3 Foot control A Left foot switch safety function B Brake pedal C Speed Controller D Battery lock for carriage mounted battery...

Page 14: ...or battery plug K Lever for battery changing system option G1 Camera 1 2 option G2 Floor lift lower G3 Options G4 Work lighting option G5 Camera on off option Table 1 Switches G Rear view camera system for sideways driving option UFW four way trucks can be equipped with a rear view camera system which gives the driver a better reverse view during sideways driving The rear view camera gives increas...

Page 15: ...complete control away from towards the driver B Mast out in Move the complete control towards away from the mast C Tilt up down Move the control up down D Turning the steered wheel clockwise counterclockwis e Move the control away from towards the driver E Fork spreading together apart Move the control up down F Direction control switch forwards backwards Press the button to obtain the desired dri...

Page 16: ...n Tilt up 4 Steered wheel assembly counterclockwise Steered wheel assembly clockwise 5 Forks apart Forks together Table 3 Lever operated four way truck Holding down the button located above the lever positions the drive wheel in the same direction as the steered wheel CAUTION The fork spread function must not be used with any load on the forks The forks may misalign and damage the boom For the sam...

Page 17: ... For the operating procedures refer also to the instructions in the pocket under the right side arm rest Figure 8 Adjustment of the dashboard and arm rest A Press button A to adjust the complete dashboard forward or back B Move lever B upwards to adjust the height of the arm rest Driver seat The driving seat can be adjusted to suit the driver s weight size and seating posture The adjustments can b...

Page 18: ... one of three positions using lever C Tilt the backrest back pull out the lever and place it in the desired position Release the backrest For a more upright position move the lever so that it points downwards So that the backrest shall be angled more in the non tilted state move the lever so that it is horizontal D Forwards backwards adjustment The seat can be moved forwards or backwards by liftin...

Page 19: ...the mini steering wheel supporting your arm on the armrest The armrest is adjusted in accordance with the movements you make In order to facilitate getting in and out the armrest can be lifted up Figure 10 Mini steering wheel armrest adjustment A Adjusting the armrest forwards and backwards The armrest can be adjusted forwards and backwards by pressing button A and moving the armrest to the desire...

Page 20: ...tract the reach carriage If this is not done the truck speed is limited The speed of operation with the second and third control levers is also reduced when the forks are raised NOTE When a four way truck is moving sideways S3 1 does not limit the speed during a turn Reducing the risk of tipping sideways A When the driver increases speed too quickly or is driving too fast in combination with sharp...

Page 21: ...e the weight to the operator to allow for comparison with the truck s load limits The load weight is rounded off to the nearest 100 kg NOTE The result of the weight measurement during lifting can be affected if the oil temperature of the truck is different from the oil temperature during weight calibration Weight indication Introduction NOTE This system does not meet the legal requirements in orde...

Page 22: ...50 kg The measurement reading can however differ more than this if the forks are lowered slowly Functions The weight indicator system is comprised of a number of functions For specification and use of the various functions see Weight indication page 42 Dynamic Curve Control DCC Dynamic Curve Control DCC is an electronic auxiliary system which reduces the risk of tipping accidents When the driver i...

Page 23: ...age to the forks fork carriage The system is active when the forks are in transport mode under 0 5 m When the system prevents a fork movement the symbol flashes on the truck display To override the system and continue a fork movement depress button 5 on the truck keypad Cab option For the comfort of the driver trucks used under canopies can be equipped with a cab Instruction Handbook UFW D008453 B...

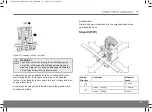
Page 24: ...rgency exit The hatch can be opened slightly and then completely unhooked Figure 13 Cover CAUTION The roof hatch may only be used as an emergency exit Heating element The truck is equipped with one or two heaters and adjustable vents which distribute the hot air inside the cab and to the Instruction Handbook UFW D008453 B GBR ForTranslation ...
Page 25: ...lement Figure 15 Heating element flap Beneath the heating element there is a flap which directs air to the floor level in the cab Heating element functions The heater is started in its automatic setting when the truck is started The automatic function automatically regulates the temperature and blower speed Instruction Handbook UFW D008453 B GBR ForTranslation ...
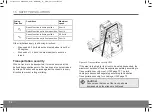
Page 26: ... Air is then drawn in from outside If the control is set somewhere in between its end positions the cab receives a mixture of air from outside and inside Press on the arrow up to increase or arrow down to decrease the blower speed If the blower speed is adjusted while automatic operation is activated the automatic mode is switched off Press on the arrow up to increase or arrow down to decrease the...

Page 27: ...there is ice or misting up on the cab that reduces visibility the truck must not be driven Other functions Figure 17 Cab functions A Lighting B Inner handle C Outer handle Options The truck may be equipped with optional equipment Among other things there are the following possibilities Instruction Handbook UFW D008453 B GBR ForTranslation ...
Page 28: ...iting desk Adjustable writing desk suitable for A4 format including accessory holder Rear view camera system Colour system with a mast mounted camera and a 7 inch LCD display Reversing mirror Wide angle mirror Fork Safe Zone System Electronic system to protect the straddle legs from being damaged by the forks 360 degrees steering As standard the trucks have manually operated direction of travel se...

Page 29: ...lly automatic charging units should be used Comply with local legislation and safety instructions when charging batteries Areas where batteries are charged should be labelled and have good ventilation An eye douche washing facilities fire extinguisher and protective glasses should be available WARNING Specific gravity checks should only be performed by an authorised service technician WARNING Alwa...

Page 30: ...el is not above or below the cell plates The battery can be damaged if the cell plates are dry during charging The battery electrolyte may overflow during charging if its level is too high 5 Connect the battery plug to the charger s connector 6 Set the charging switch on the battery charger to on 7 Check that the ammeter shows a normal indication After charging 1 Check that charging is completed 2...

Page 31: ...ever until the reach stops and the battery is locked CAUTION Ensure that the battery wiring does not get trapped or incorrectly routed while inserting the battery Battery on rollers 1 Pull out the battery plug 2 Lift up the battery lock on the side where you want to pull the battery out by slackening the screw and pulling the axle up to its uppermost position Then lower the axle in the fork direct...

Page 32: ... V battery plug 10 To move in and lock the new battery Sit in the driving seat and operate only the mast in lever until the reach stops then press button 4 on the keyboard and continue to operate the mast in lever until the reach stops again and the battery is at its innermost position 11 Lift up the other battery lock Lock the battery in place by tightening the screws CAUTION Ensure that the batt...

Page 33: ...tart key option as standard but is started and stopped by pressing the ON OFF buttons on the keyboard The driver will need a user ID number and a password to start the truck There is an optional function called Smart Card which means that the driver has to log on with a card instead of entering a user ID number and password Symbols and characters on the display Instruction Handbook UFW D008453 B G...

Page 34: ...centred option M The lift stop option N 360 degrees steering O Running time in hours P Time Q Error code R Remaining battery capacity S Servicing alarm option T Date Keyboard Figure 21 Keyboard The keyboard consists of 13 keys with the following functions Numeric key 0 and selection of level for picking out pallets height preselection Numeric key 1 and selection of level for depositing pallets hei...

Page 35: ...ity reaches 20 the lifting function is switched off the red segment flashes and the warning triangle is lit In the logged off condition the battery capacity is shown as a percentage as the battery indicator is not lit NOTE The percentages are default values but can be altered by authorised service personnel Error messages Error codes All error messages will be shown on the lower row of the display...

Page 36: ...in the steering wheel to synchronize steering Left foot switch The driver has the left foot switch activated during start up Battery lock The truck s battery is not correctly secured option Other warning messages are shown if for example a system in the truck is beginning to overheat If the warnings do not disappear even when the driver has followed the instructions on the display contact service ...

Page 37: ...cs return to the factory settings if any of the system s weight indication S3 2 speed or S3 2 weight are activated This is to ensure that all operators can attain maximum lift and lowering speeds which are essential for an accurate reading Each driver can set his her own performance profile under the condition that individual driver IDs are used The performance profile is activated each time the d...

Page 38: ...r the normal direction The parameters for sideways driving cannot be altered 6 When all the parameters have been gone through press and to exit the Service menu 7 Log on to the truck and test drive Trucks equipped with options Height preselection Basics The height pre set function can be used as an aid when one often loads in and out of pallet racks with one or more height levels By using pre set ...

Page 39: ...en lowered to the correct level Interrupting the lift and then continuing is possible without losing the selection 001 0261 0202 1 4 When the control is in the neutral position and the level is reached the display shows Level reached 001 0261 0260 Level reached Error messages Bad level 100 305h If the forks are above the selected level or a level that has not been preset the error message Incorrec...

Page 40: ...e forks are above the resetting level and the driver shall deposit the load on level 5 1 The display shows Lower to floor 2 The driver presses I for depositing The display shows Syst not reset for one second and then returns to Lower to floor Sys not zeroed 100 305h Lower to floor 100 305h 3 The driver lowers the forks to the resetting level Lower to floor is removed from the display 4 The driver ...

Page 41: ...ng at the next pre programmed level When the truck reaches this state there are two short audible signals and the symbol flashes on the display If the driver increases the lift lever movement to more than 80 of the maximum speed the forks will rise beyond the next pre programmed level The system is only active in the main stroke of the mast The bottom row on the display also shows the next level w...

Page 42: ... kg Example Weight in kg 780 kg Use the function accumulated total weight Weight indication The operator can add the current load weight to an accumulated total of the load weight and view the total result in the display This is done by pressing the button briefly less than 1 5 seconds under normal operation The total rounded to the nearest 10 kg lb will be shown on the display for 5 seconds If a ...

Page 43: ...he total 0 kg lb will be shown on the display for 5 seconds Example Weight in kg 0 kg Tare Weight indication In certain situations e g when transporting bulk materials in one container it may be desirable to measure the net load weight by subtracting the weight of the container from the total weight To activate tare weight 1 Press the button on the button panel 780 kg 2 Whilst the weight is indica...

Page 44: ...ive presettable levels If any of the five levels are exceeded one or more of the following functions are activated 1 A warning message is shown on the display 2 The truck s normal horn is activated and sounds an intermittent signal 3 The truck flashing lights are activated and begin to flash 4 The truck logs off 5 The truck logs off and needs to be unlocked by means of a code Service alarm When th...

Page 45: ... This should then be changed so that each driver receives an unique user number User ID 5 The text Enter code will now be displayed Enter your user password The truck is delivered with the password 2222 This should then be changed so that each driver receives an unique password Code 6 The truck is now ready for use Truck on C1 Driving instructions 1 Start the truck in accordance with Starting the ...

Page 46: ...e turning wheel Extremely slow movements of the steering wheel do not effect the steering If the truck is driven in the direction of the forks and steered clockwise the truck will turn anticlockwise If the truck is driven in the opposite direction to the forks and steered clockwise the truck will turn clockwise CAUTION Do not steer the truck using a pincer grip i e with the steering knob between t...

Page 47: ...h feeds power back to the battery when the motor brake is activated in the case of lower pressure on the acceleration pedal You should work with minor movements on the acceleration pedal to achieve smooth driving Trucks are always equipped with 360 steering During sideways driving the steered wheel on the seat side is turned 90 by means of the steered wheel control in accordance with Hydraulic fun...

Page 48: ...rised service technician Normal or crawler mode Normal mode There is no symbol for the normal mode Crawler mode It is possible to manually activate crawl speed during operations The crawl speed is to begin with set to 40 of the pre defined maximum speed This setting can be altered by authorised service personnel The speed is selected by means of the numeric key 2 The button has an ON OFF function ...

Page 49: ... one may pass or stand under the raised forks whether they are carrying a load or not The driver has the right and duty to see that these directives are followed Maximal load The maximum lifting capacity of the truck must not be exceeded refer to the fork lift truck load limit plate Note the effect of the centre of gravity on the lifting capacity Check carefully if the lifting capacity of the truc...

Page 50: ...the forks so that they release the load 5 Retract the mast and check that there is no one behind the truck before reversing away from the stack 6 Lower the forks 7 When fetching a load from a stack carry out these movements in reverse order Trucks with mast tilt 1 Approach the stack with the load in a lowered position and the mast tilted backwards 2 Move the mast to its vertical position Lift the ...

Page 51: ...k for external damage or excessive wear on the wheels 7 Check that there are no error messages or warnings on the truck computer display 8 Check that the securing arrangements for the finger protection are intact and that there is a good view through the protection WARNING There is the danger of personal injury if the truck is operated without having the finger protection in place WARNING There is...

Page 52: ...aulic system by pushing all the hydraulic cylinders to their end positions Then check that the fork carriage go all the way up to maximum lifting height without the pump sucking air 3 Check that the wheels have not separated tread hub 4 The outside of the truck should be cleaned Vacuum clean and wipe with moist cloth in the driver cab Electrical panels and printed circuit boards must always be pro...

Page 53: ...NOTE Preventive maintenance must be carried out by specially appointed and trained personnel with a good working knowledge of the function and maintenance of the truck To obtain the best results from your truck investment we advise you to contact your service organisation and take out a service agreement for preventive maintenance Instruction Handbook UFW D008453 B GBR ForTranslation ...
Page 54: ... To prevent injuries caused by crushing the battery plug should always be removed when working on and around the mast and hydraulic unit When dismantling parts of the hydraulic system the system must not be pressurised e g the pump motor is shut off and the forks are down The battery should always be protected during grinding work When changing a fuse the controllers must be thoroughly discharged ...

Page 55: ... 55 The gearbox oil should be changed every three years or every 3 000 hours of operation Hoses should be replaced after 5 years since they are perishable Lubrication chart UFW Instruction Handbook UFW D008453 B GBR ForTranslation ...
Page 56: ...k carriage and forks 3 Thrust rollers 4 Fork attachment bearing Cab lubrication schematic diagram option The door hinge cover and heater along with the lock must be lubricated at every routine service Figure 25 Lubrication chart for cab 1 Door hinge 2 Cover hinge 3 Heater hinge 4 Lock Instruction Handbook UFW D008453 B GBR ForTranslation ...

Page 57: ...slide surfaces and springs D Reach and tilt cylinders E Mast bearing support rollers F Chain pulley Table 5 Lubrication points UFW Pos Lubrication points G Lift chains all lift chains in the mast height measurement chain H Wheel tracks springing I Slide rails J Hydralic tank K Guide ring torsion ring bearing L Gearbox Steered wheel must be turned 45 in order to reach the grease nipple NOTE All tor...

Page 58: ...y cold storage cab F15 5 Radio and internal cab lighting F21 35 Power feed battery changing system F22 5 Logic supply battery changing system F25 15 DC DC converter cab heater F26 5 Check the cab heating voltage Should be changed by authorized service personnel Table 6 Options Servicing type and frequency General A complete operations test must be performed before the inspection Faulty functions m...

Page 59: ...ast is to be lubricated Service points UFW Planned service inspections are implemented in accordance with the following points X Obligatory O Not obligatory Chassis Description Service Signs Decals X Covers and panels X Overhead guard X Battery stop Lock Rollers X Rubber mat X Chassis X Chassis Description Service Lubrication X Driver seat X Caster wheel steered wheel X Microswitch X Colour X Fing...

Page 60: ...gearbox X Sliding bearing X Hydraulic system Description Service Hydraulic oil level X Hoses X Hydraulic system Description Service Couplings X Pump motor X Hydraulic pump X On off valve proportional valve X Lift cylinders Description Service Cylinders X Electrical system Description Service Cables Switches X Contactors X Battery X Traction motor controllers X Horn X Speed Controller X Brake pedal...

Page 61: ...rriers should be used for engineering and maintaining trucks See UniCarriers Genuine Parts Maintenance instructions Genuine replacement parts UniCarriers Genuine Parts To maintain the reliability that UniCarriers promises insist on UniCarriers genuine replacement parts Only UniCarriers genuine replacement parts guarantee correct operation long life and the right to a warranty Basic trouble shootin...

Page 62: ...Drive fuse defective Change the defective drive fuse Truck condition Possible cause Procedure The truck will not lift the load The truck is not ready for use Carry out all the actions under the heading The truck will not start The hydraulic oil level is too low Check the level and top up the hydraulic oil The battery capacity is below 20 Charge the battery Pump fuse defective Change the defective ...

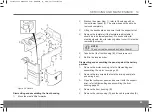
Page 63: ...heel cover G must be removed 2 screws NOTE The cover is also secured by Velcro item 4 5 Take hold of the front housing B lift and remove it 6 Refit in the reverse order Dismantling and assembling the panel against the battery partition 1 Remove the motor housing refer to Dismantling and assembling the motor cover page 62 2 Remove the two screws that hold the driving seat plate and swing it out 3 O...

Page 64: ...ction so that it is released from its holder 5 Refit in the reverse order Dismantling and assembling wheels Safety regulations concerning wheel change WARNING For safety reasons UniCarriers recommends that wheel changing is only carried out by authorised service personnel WARNING For optimum performance and so as not to invalidate the warranty use only UniCarriers genuine replacement parts Otherwi...

Page 65: ...h the wheels from the wheel fork and roll them out Fitting steered wheels UFW 1 Roll the wheel unit into the wheel fork and secure it 2 Connect the service wiring to release the brake 3 Connect the battery plug to supply power to the truck 4 Log on to Truck computer ATC and select Auth service Tests calib Drive menu Brake tests Load wheel br 5 Release the brake using the service cabling 6 Fit the ...

Page 66: ...en the screws for the lock plate and guard to 24 Nm NOTE In connection with a wheel change the locking washer should also be replaced Dismantling and assembling the drive wheel The drive wheel must be replaced if its diameter is less than 320 mm 1 Undo the bolts and open the rear cover 2 Slacken the drive wheel nuts 3 Lift up the truck so that the drive wheel becomes free Secure with wooden blocks...

Page 67: ...ng or standing under a raised lift whether this is loaded or unloaded WARNING Take great care in the machinery compartment beware of hot surfaces etc Getting in and out Be careful when getting in and out Use the handle if one is installed and take into account the height difference between the floor and the truck WARNING It is not permitted to climb on to the truck Driving the truck Driving in pub...

Page 68: ...r place the truck or the load within the industrial lift s risk zones Ensure that the truck s brakes have been engaged before the industrial lift is started Floor load Carefully check notices or other instructions concerning the maximum floor load or maximum wheel pressure to ensure that these are not exceeded For the truck s total weight see the machine plate Signalling Use the signal horn to att...

Page 69: ...sings closed and locked in place Speed Adjust the speed according to the floor conditions the line of sight and operational safety Avoid rapid acceleration sudden braking and cornering at speed there is a risk for overturning or that the load will fall off Driving space Ensure that you have sufficient space for the truck both the driver and the load in narrow aisles Narrow door openings that will ...

Page 70: ...om sliding You must also remember to check the maximum load capacity of any vehicle that you intend to drive onto There must also be devices e g brake chocks that prevent movement of the vehicle being driven on to For information about the truck s total weight see the truck s machine plate Direction of travel when driving on slopes Four way trucks The truck is normally driven with the forks facing...

Page 71: ...e as it may be difficult to start moving again If it is essential to stop on an upwards incline it may be safer to back down to a level surface and start up again from there Ensure that the ends of the load are clear of the ground when handling long items Awareness Always be aware of personnel in the neighbourhood when operating the truck Speed UFW Driving Direction Conditions Maximum speed 13 km ...

Page 72: ...it must be secured at the defined transportation points The truck can also be restrained by straps Chocks can be placed against the chassis in every direction to prevent rolling or sliding Figure 30 Transportation security UFW If the mast is too high for the truck to be safely transported the mast must be taken off and transported separately according to Transportation security mast UFW page 73 Th...

Page 73: ...arriage UFW Moving the forks UFW See control E in table Control functions page 15 Manual fork spread option UFW If the forks are in a position where the locking pin is in a hole in the boom the pin must be lifted using the eye so that the fork can be moved Instruction Handbook UFW D008453 B GBR ForTranslation ...

Page 74: ... area where there is a risk of fire explosion or in any other high risk area must be specially equipped for the purpose WARNING A truck is not normally equipped for these situations Parking The truck must not be left unattended other than in specified parking areas The truck must always be parked on a level surface The parking brake must always be applied The forks must be lowered to their lowest ...

Page 75: ...nded for this purpose Figure shows where the permitted lifting points are located on the truck The lifting points are marked with a decal representing a lifting hook When the truck is to be lifted using a jack make sure it is secured by blocks The truck must not rest on the jack while work is carried out WARNING Lifting of the truck should only be carried out by authorised service personnel WARNIN...

Page 76: ... The following actions are to be taken in order to make the truck ready for use Charge the battery Perform an inspection in accordance with Daily maintenance before each shift page 51 Visually inspect the truck including the forks and reach cartriage for signs of damage Check that the safety and warning signs are in place and are legible See Safety and warning signs page 79 Temporarily taking the ...

Page 77: ...ith the lubrication chart 5 Connect the battery plug 6 Carry out a weekly inspection in accordance with Weekly inspection page 52 WARNING Putting the truck into service may only be carried out by authorised service personnel Taking the truck out of service If the truck is out of action and cannot be operated from the driver s seat using normal driving controls contact the supervisor immediately In...

Page 78: ... zS 0 79 m s measuring accuracy Cv 0 064 Climatic conditions The normal operating temperature in which the truck is designed to operate in is in the range of 1 C to 25 C Max short term temperature 40 C min short term temperature 25 C If the truck has been specified for use in a cold store the temperature range is extended for continuous operation to 35 C If the truck is specified for use under can...

Page 79: ...fluence the stability or braking capacity of the truck STILL or its authorised representative must be contacted Before the truck is assembled it must have been approved by UniCarriers Manufacturing Sweden AB see Truck modification page 7 Safety and warning signs General NOTE There are a number of warning signs on the truck Always replace signs that are damaged or missing Explanation of symbols UFW...

Page 80: ...15 SAFETY REGULATIONS 80 Locations of safety and warning signs A If the truck is equipped with a mini steering wheel Instruction Handbook UFW D008453 B GBR ForTranslation ...

Page 81: ...nsional information applies to trucks equipped with the smallest possible battery and a fork length of 1150 mm Figure 36 Dimensions UFW Measurements UFW200 UFW250 H 4350 8500 4500 9700 h4 H 700 H 700 Instruction Handbook UFW D008453 B GBR ForTranslation ...

Page 82: ...215 2215 s x e 45 x 125 45 x 125 l1 2473 2555 l2 1323 1405 l7 1942 2102 Wa 1772 1932 B 1744 1498 1744 1498 b4 903 903 Cab dimensions option Figure 37 Cab dimensions Measurements Cold storage cab H 2400 W 1000 D 830 Table 7 Cab and dimensions in mm Instruction Handbook UFW D008453 B GBR ForTranslation ...

Page 83: ...ttery If the truck has extra equipment fitted there may be deviations from the table Refer to the machine plate for the weight information for a particular truck Truck model Weight kg UFW 200 4520 H 8500 UFW 250 4940 H 9700 Table 8 Weight standard truck Instruction Handbook UFW D008453 B GBR ForTranslation ...

Page 84: ...e STILL does not automatically send out spare parts catalogues with delivery of your truck It is possible to order a Master Manual via your local distributor for a fee Delivery time is estimated at around three weeks Instruction Handbook UFW D008453 B GBR ForTranslation ...

Page 85: ...UniCarriers Manufacturing Sweden AB SE 435 82 Mölnlycke Phone 46 0 31 98 40 00 info atlet se www atlet com ...

Reviews: