background image

6

NOTE:

  If you are installing the optional amplifi er system, connect and install the power wire at this time.

32. Reinstall foam battery cover, load fl oor and carpet

Subwoofer Installation

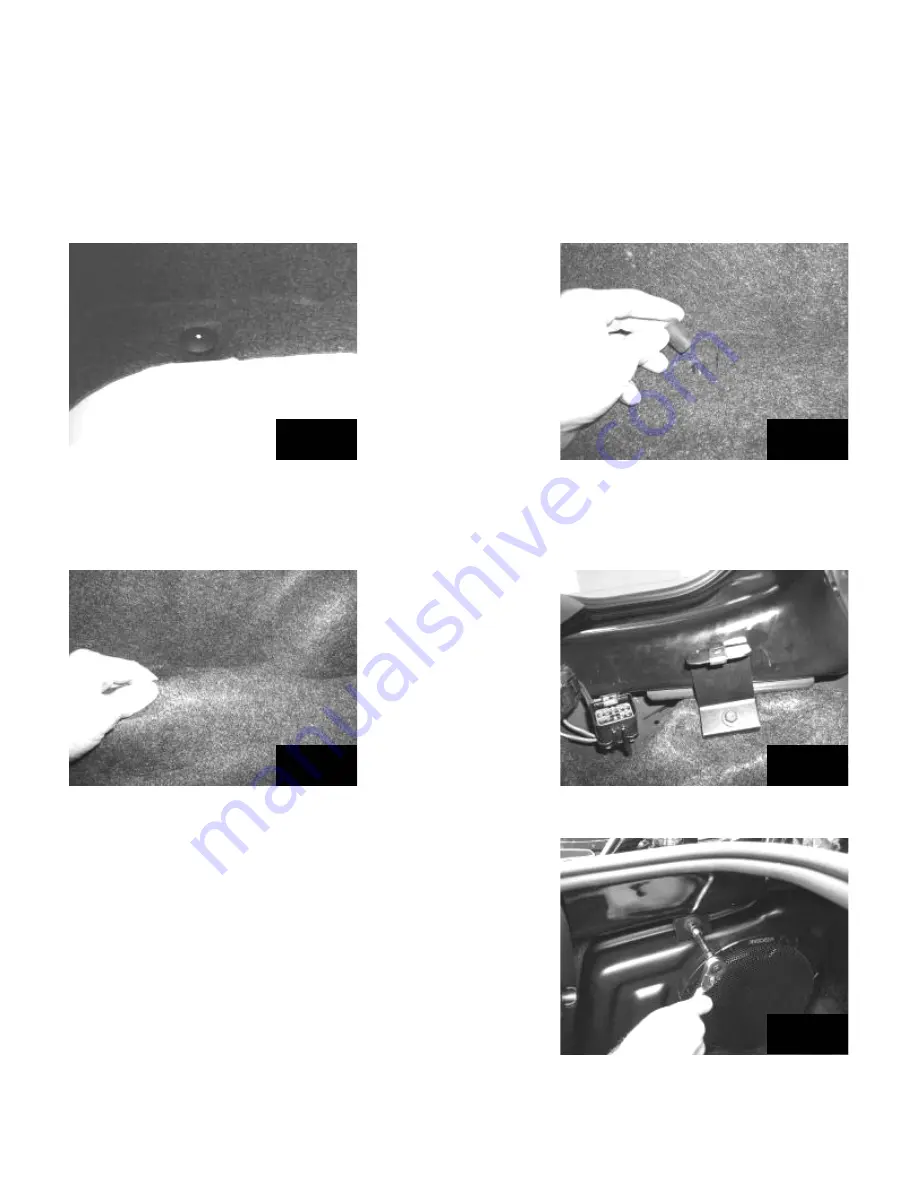
33. Remove the plastic carpet retainer on the bottom of the trunk in Fig. 23
34. Install the supplied rubber bumper over the stud. Fig. 24

35. Fold the edge of the carpet under itself so that carpet does not cover rubber bumper. Fig. 25
36. Remove the carpet retainer underneath the truck lid hinge and tuck the carpet behind the metal tab.  
Install the upper bracket to the metal tab using the supplied bolt and nut as shown in Fig. 26

37. Set subwoofer in place aligning the rubber bumper with the 
hole in the bracket on the bottom of the subwoofer enclosure.  
Connect wiring and install the supplied bolt into the top bracket. 
Fig. 27

NOTE:

 If installing the optional amplifi er system, refer to the am-

plifi er instruction manual to complete the installation.

38. Reinstall all previously removed parts in reverse order.

Place your warranty card in the glove box for future use.


Fig. 23 


Fig. 24 


Fig. 25 


Fig. 26 


Fig. 27 

Summary of Contents for Kicker VSS SCAMA10

Page 1: ... for 2010 2015 Chevrolet Camaro vehicles Subwoofer Assembly Subwoofer Harness M6 Nut M6 Bolts x2 Fuse Adapter Harness Subwoofer Bracket Wire Ties x6 Wire Taps x2 Rubber Bumper 2012 Stillwater Designs SCAMA10 A3 20151028 ...

Page 2: ... 5 Remove the shifter bezel by carefully prying loose with a plastic panel removal tool and disconnect wiring Fig 1 6 Remove the four screws retaining the shifter Automatic transmission only Fig 2 7 Remove the screw in front of the cup holder retaining the console Fig 3 8 Remove the console side panels using a plastic panel removal tool Fig 4 9 Remove the screw on each side of the front of the con...

Page 3: ...ssion only 14 Lift up on the console and slide it slightly towards the rear of the vehicle 15 Remove the two screws securing the radio bezel below the radio Fig 10 16 Pull the radio bezel loose and disconnect wiring Fig 11 17 Remove the four screws securing the radio pull the radio from the dash and disconnect all wiring Fig 12 NOTE If you are installing the optional amplifier system route the amp...

Page 4: ... the rear seat on the driver s side of the vehicle Fig 17 23 Route the signal input wire with the white two pin connecter on it along the driver s side of the vehicle and up to the driver s kick panel or radio opening depending on installation If vehicle is equipped with the Factory Premium sound system route the signal input wire to the left rear package tray speaker and refer to the connection i...

Page 5: ... Factory Premium Audio 27 Connect the six inch adapter harness to the end of the two pin connecter Locate the blue with a white stripe wire and the green with a black stripe wire connected to the left rear package tray speaker Lay the wire in the open channel fold the connecter body over and squeeze with a pair of pliers until connecter snaps shut Fig 19 Connect the green wire of the adapter harne...

Page 6: ...ainer underneath the truck lid hinge and tuck the carpet behind the metal tab Install the upper bracket to the metal tab using the supplied bolt and nut as shown in Fig 26 37 Set subwoofer in place aligning the rubber bumper with the hole in the bracket on the bottom of the subwoofer enclosure Connect wiring and install the supplied bolt into the top bracket Fig 27 NOTE If installing the optional ...

Page 7: ...ncy element of the music Check for a connector or any other object that could be very near the enclosure Check the subwoofer enclosure mounting brackets to make sure they are secure Symptom Possible Cause Solution No Subwoofer Output Fuse not installed in inline fuse holder on subwoofer and or amp harness Install fuse into fuse holder Refer to instructions for correct placement Low battery voltage...

Page 8: ...ctions for correct place ment Ground wire not grounded properly Check ground wire with voltmeter to insure it is a good ground Low battery voltage Recharge the battery P O Box 459 Stillwater Oklahoma 74076 USA 405 624 8510 stillwater designs If you continue to experience problems after troubleshooting please contact KICKER Technical Support at 800 256 0808 ext 6009 or support kicker com ...

Reviews: