


14
AFTER SALES SUPPORT
1300 886 649
info@tempo.org
AUS
MODEL: STR-X60IC PRODUCT CODE: 53104 03/2016
Cooktop Installation
• Carefully turn the cooktop back over and then gently lower it into the
aperture hole that you have cut out.
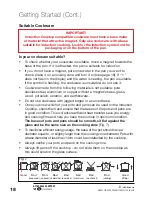
• Using the screws provided, affix the 4 brackets to the underside of the
cooktop, as illustrated (Fig. 4). Adjust the bracket position to suit your
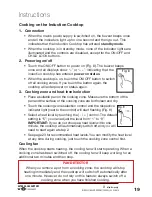
benchtop thickness (Fig. 5).
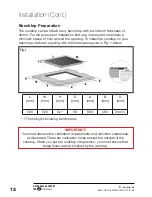
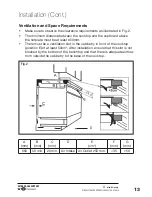
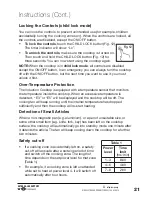
Installation (Cont.)
Fig. 4 illustrates how to affix a bracket to the cooktop.
Fig. 5 illustrates the cooktop sitting securely in the benchtop cut-out.
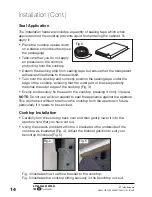
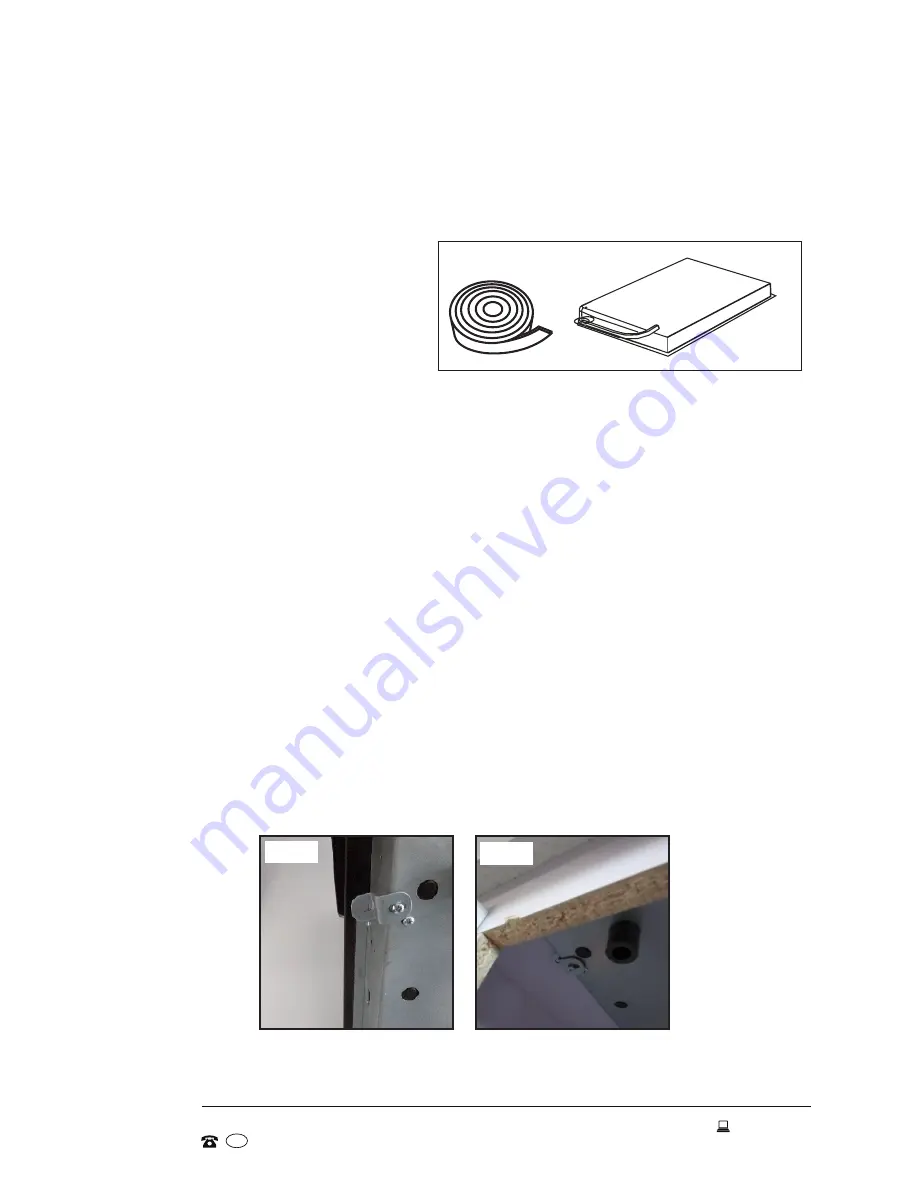
Seal Application
The installation hardware includes a quantity of sealing tape which when
applied around the cooktop prevents liquid from entering the cabinet. To
apply it:
• Place the cooktop upside down
on a stable, smooth surface (use
the packaging).
• Take care that you do not apply
an pressure on the controls
protruding from the cooktop.
• Detach the backing strip from sealing tape but ensure that the transparent
adhesive still adheres to the seal itself.
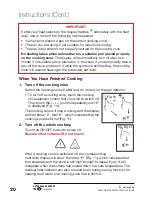
• Turn over the cooktop and correctly position the sealing tape under the
edge of the cooktop, ensuring that the outer part of the seal perfectly
matches the outer edge of the cooktop (Fig. 3).
• Evenly and securely fix the seal to the cooktop, pressing it firmly in place.
NOTE:
Do not use a silicon sealant to seal the appliance against the aperture.
This will make it difficult to remove the cooktop from the aperture in future,
particularly if it needs to be serviced.
Fig. 3
Fig. 5
Fig. 4


