
Steam ironing
The machine works with normal tap water. In case of very hard water (hardness above
27ºF) we suggest using 50% distilled water diluted with tap water. Alternatively, we
suggest using normal bottled drinking water. The use of de-ionized water is not
recommended.
1.
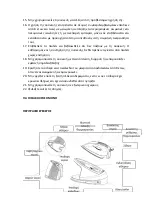
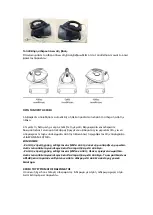
Put the unit base on a stable and level surface.
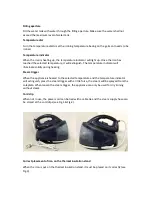
2.
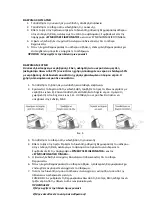
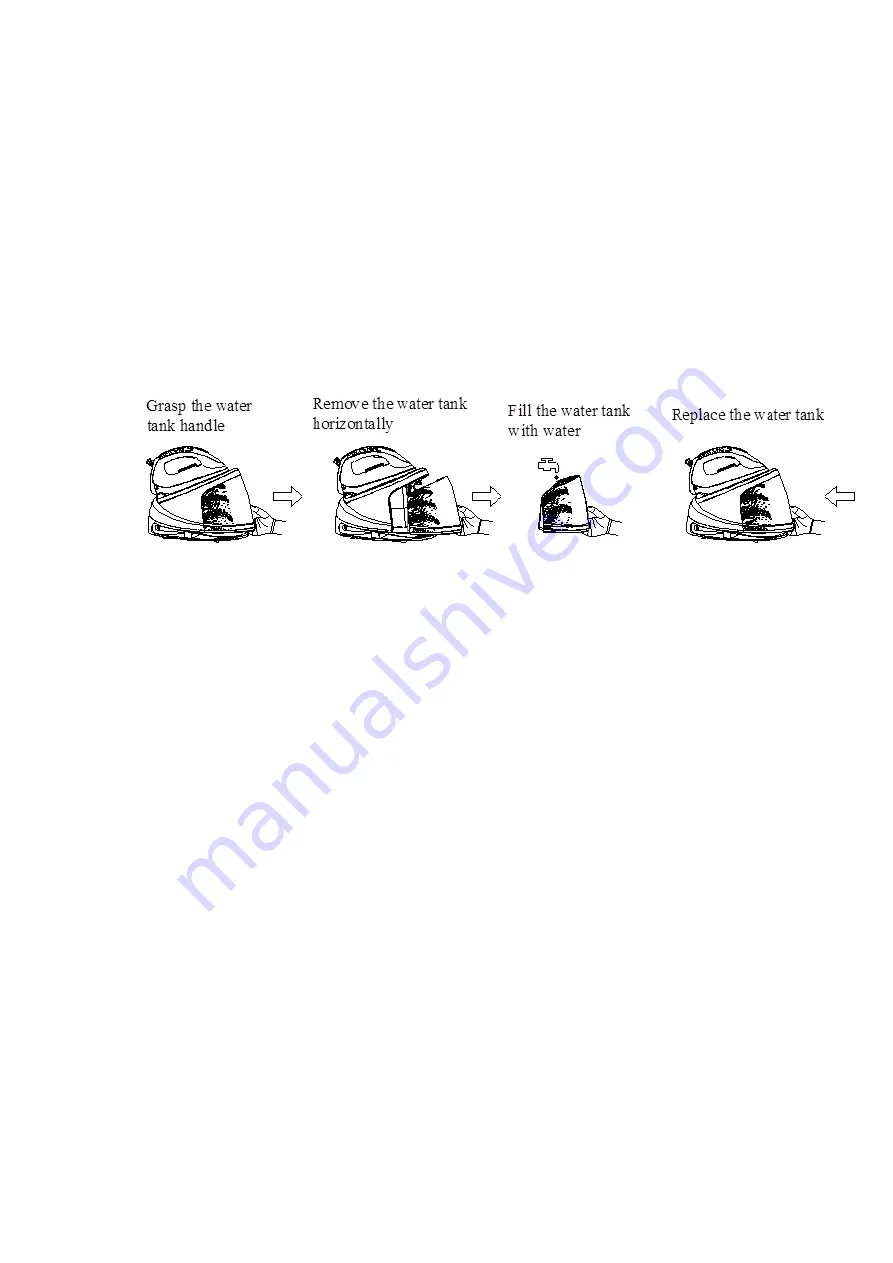
Grasp the water tank handle and then pull out the water tank horizontally, fill the water
tank with water through the filling aperture and then replace the water tank well in position
(see Fig.4). Make sure the water tank shall be pulled out horizontally when removing the
water tank. You had better use purified water with less calcium particles. The maximum
capacity of water tank is 1.2L, the water level shall not be exceeded the maximum level.
Fig.4
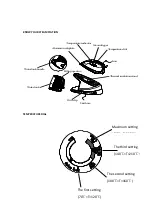
3.
Put the iron on the thermal insulation stand of unit base correctly (see Fig.3).
4.
Connect the plug to wall outlet, and then turn the temperature dial to select your desired
temperature setting, which is depended on the fabric of garment. Refer to
“
IRONING TIPS
”
and
“
ADDITIONAL TABLE
”
as below when select temperature.
5.
And then the temperature indicator illuminates and the iron starts heating.
6.
After a few minutes, the temperature indicator extinguishes, which indicates the soleplate
temperature has achieved the selected temperature. And you can start ironing with steam
now.
7.
Press the steam trigger with a little force, the steam will be sprayed from the soleplate
continuously, and then you can iron the garment with steam.
NOTE:
There may be dripping water during spraying steam when the temperature is lower
than that of the second setting. This is normal.
CAUTIONS:
(1)
Do not touch hot soleplate at any time before cooling down!
(2)
Never direct the steam at people!
(3)
Do not activate the steam function when the iron is placed on the unit base to avoid
being scalded by steam.
Summary of Contents for SP1031
Page 1: ...SP1031...
Page 2: ...1 2 3 4 5 6 7 8 9 10 11 12 13 14...
Page 3: ...15 16 8 17 18 19 8 20 21 22...
Page 4: ...MAX 70 T 120 100 T 160 140 T 210 170 T 225...
Page 5: ...1 2...
Page 6: ...1 2 3 4 5 27 F 50 1 2 o 4 1 2L MAX 3 4 5 6 7 A 1 2 4...
Page 7: ...3 8 1 2 3 100 1 70 T 120 C 2 100 T 160 C 3 140 T 210 C 170 T 225 C...
Page 8: ...2002 96...
Page 16: ...www vassilias gr 8 111 45 210 8543260 Fax 210 8543271...


