background image

 14

14-3  Electrical Connections 

Power requirement is 12 volts with a minimum continuous 30amp supply.  Ensure the power supply cable is  
connected direct to the vehicle battery to ensure maximum power. Connect the positive wire (fused) to the  
positive (+) terminal and negative earth connection to the negative (-) terminal                                                

NOTE

  the disc should rotate in a clockwise direction when viewed from above.    

WARNING 

Failure to connect to the vehicle battery may result in control function problems and      

possible damage to the vehicle battery and charging system must be in good condition to achieve the best 
results. All cables and controls are fitted with matching plugs and sockets.   

 WARNING 

any modifications to the wiring, fuse holder or control system will invalidate any warranty claim 

and may effect the performance of the machine                                                                                   

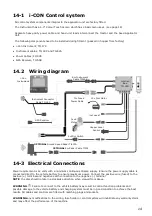
14-1   i-CON Control system

All control system components integral to the applicator unit are factory fitted. 

The Instrument has a 4.3" Colour Touch Screen which has 4 basic menu keys  (see page 16)

Separate heavy-duty power cable and head unit leads interconnect the tractor and the Seed Applicator 
Unit. 

The following components need to be installed during fitment  (packed in hopper from factory)  

 

i-Con Instrument; TJ117C 

 

Instrument cables; TJ118C and TJ242A  

 

Power Cables; FJ107E

 

GPS Receiver; TJ255B

14.2   Wiring diagram 

i-Con                      

Instrument 

Instrument Connector 

Cable TJ118C

6m Instrument  

Cable TJ242A

Junction 

Box 

TJ119D 

7m Fused                 

Power Cable 

12v Disc Motor 

(not used)

Feed 
Motor

Hopper Level 

Sensor

GPS Receiver  

OPTIONAL

 Ground Speed Radar TJ233A

OPTIONAL

 6m Radar Cable TJ234

Cut Out Switch  

Summary of Contents for Fan Jet Mini i-CON 130

Page 1: ...and Parts List Original Instructions Revision 1 August 2020 This document must not be copied duplicated or distributed without prior consent All and patent rights apply STOCKS AG LIMITED CROMWELL ROA...

Page 2: ...er 11 11 5 Disposal 11 12 1 Fitting to a vehicle or implement 12 12 2 OPTIONAL ATV Fitting Kit 12 12 3 OPTIONAL UTV Fitting Kit 12 13 Mounting Plate 13 14 1 i Con Control system 14 14 2 Wiring diagram...

Page 3: ...will not be liable for any resulting damage Suitable for UTV vehicles and some ATV fitments OPTIONAL fitting kit available see page 12 The operator alone bears the associated risk if used for uninten...

Page 4: ...ngdom by Statutory Instrument 2008 No 1597 The Supply of Machinery Safety Regulations 2008 as amended The following standards have been applied in the design and construction of this machine BS EN ISO...

Page 5: ...gdom by Statutory Instrument 2008 No 1597 The Supply of Machinery Safety Regulations 2008 as amended The following standards have been applied in the design and construction of this machine BS EN ISO...

Page 6: ...ed by normal or excessive wear Warranty expires if damage is caused by external forces operator error modifications Jet washed or if the machine has not been used for its intended use Contact the comp...

Page 7: ...ccept any liability for the storage and use of the material being applied If unsure contact the material supplier for more information WARNING Always adhere to the warning information as the disc rota...

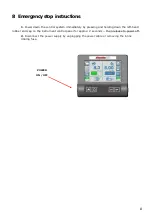
Page 8: ...e control system immediately by pressing and holding down the left hand rubber end cap on the instrument control panel for approx 2 seconds then release to power off 2 Disconnect the power supply by u...

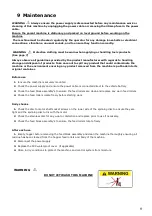
Page 9: ...nal container Before use 1 Ensure the machine is securely mounted 2 Check the power supply and ensure the power cable is connected direct to the vehicle battery 3 Check the feed block assembly s to en...

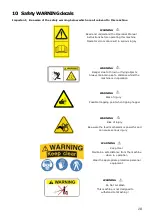
Page 10: ...ue to thrown or flying objects Always maintain a safe distance whilst the machine is in operation WARNING Risk of injury Possible trapping point when tipping hopper WARNING Keep Clear Maintain a safe...

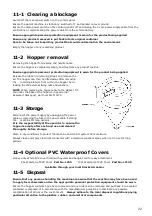
Page 11: ...r is in good order Replace if damaged part number FJ017S 11 3 Storage Disconnect the power supply by unplugging the power cable or removing the fuse in the power cable if storing the machine for long...

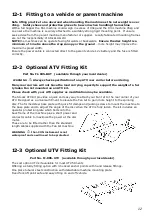
Page 12: ...d carrying capacity to support the weight of a ful ly laden Fan Jet mounted on an ATV kit Please check with your ATV supplier as modification may be available The Stocks ATV Kit provides a quick and e...

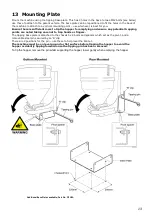
Page 13: ...ential trapping points are noted taking care not to trap hands or fingers The tipping base plate is attached to the chassis by 2 bolts and spacers which act as the pivot and a removable steel pin secu...

Page 14: ...iring fuse holder or control system will invalidate any warranty claim and may effect the performance of the machine 14 1 i CON Control system All control system components integral to the applicator...

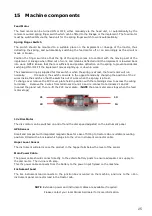
Page 15: ...de the switch so that the switch is out of work when the sprung is at rest To change over remove the PVC cover plate held in position with the retaining screw to access the wiring terminals Remove the...

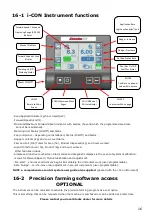
Page 16: ...ocks dealer for more details Seed Application Rate kg ha or Seeds m2 Forward Speed km hr Minimum Maximum Forward Speed indicator with alarms beyond which the programmed seed rate cannot be maintained...

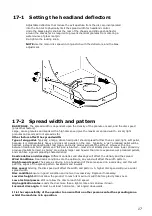
Page 17: ...d speed The same as driving into a headwind of the same speed on a calm day and this will peel the edges of the spread pattern backwards and inwards Disc speed Altering the disc speed will affect the...

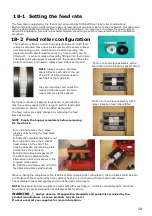
Page 18: ...and needed to reduce friction between the feed rollers and the plastic spacers Photo of a feed block assembly with 6 feed rollers and 6 blacking spacers fitted 18 2 Feed roller configuration For high...

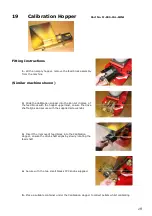
Page 19: ...an Jet in place of the feed block with the hopper uppermost ensure the drive shaft aligns and secure with the supplied screw knobs 4 Secure with the two small blacks PVC knobs supplied 3 Insert the re...

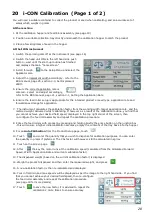
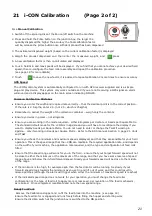
Page 20: ...a result of the calibration routine you find that you cannot achieve your desired field speed displayed in the top right corner of the screen then re configure the feed roll assembly and repeat the ca...

Page 21: ...e Metre The standard default mode for the i CON is in Kgs Ha and you will have to reconfigure the display if you want to display Seeds per Square Metre You do not need to enter or change the TGW if wo...

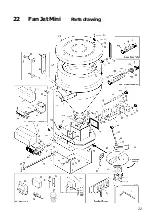
Page 22: ...22 22 Fan Jet Mini Partsdrawing...

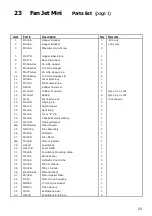
Page 23: ...30L 17 TJ131 4mm Allen Key 1 not shown 18 FJ415B Tipping Pin 1 19 FJ417A Nylon Spacer 2 20 FJ418A Split Ring 1 21 FJ419A 3mm R Pin 1 22 FJ500B Chassis Weld Assembly 1 23 FJ514B Tipping Bracket 1 24a F...

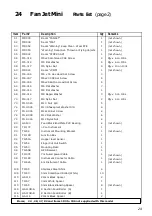
Page 24: ...026 M10 Shakeproof Washer S S 4 77 M12 006 M12x40 Set Screw 2 78 M12 008 M12 Flat Washer 6 79 M12 014 M12 Nyloc Nut 2 80 GA103 Feed Block End Plate PVC Bearing 2 not shown 89 TJ117C i Con Instrument 1...

Reviews:

Related manuals for Fan Jet Mini i-CON 130