Owner’s Manual #513613
15
E112/F112 Model Machines
NOTE
If the condenser is not kept clean, refrigeration ef-
fi ciency will be lost.
F112 Air Cooled Condenser Cleaning
A.
Remove the Phillips head screws from the bottom
of the right side panel, and then slide the panel
down and out.
B.
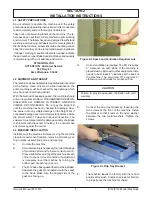
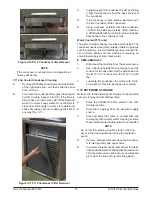
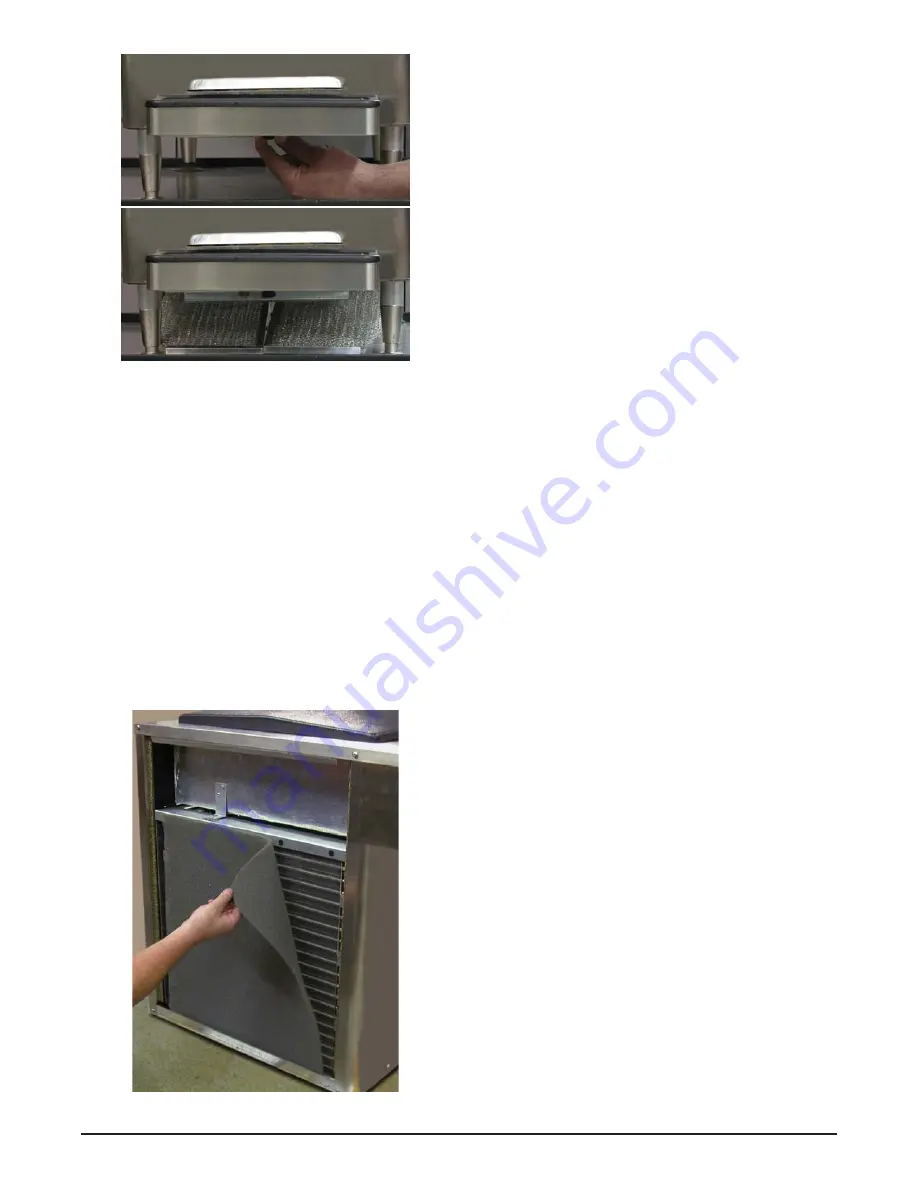
To remove the condenser fi lter, grasp the top and
pull off. Visually inspect it for dirt. If the fi lter is
dirty, shake or brush excess dirt off the fi lter and
wash it in warm, soapy water. Once the fi lter is
clean rinse thoroughly in warm, clear water and
shake dry, taking care not to damage the fi lter in
any way (Fig. 3-11).
Figure 3-11 F112 Condenser Filter Removal
C.
Visually inspect the condenser for dirt by shining
a light through the coil from the back (inside) of
the condenser.
D.
If the condenser is dirty, place a wet towel over
the front (outside) of the condenser.
E.
Using a vacuum, carefully clean the condenser
coil from the inside and outside of the machine.
A stiff bristled brush may help in releasing debris
from between the condenser coils.
Water Cooled (F112 only)
The water-cooled condenser is a tube and shell type. The
condenser needs a cool, clean supply of water to properly
cool the machine. Inlet and discharge lines must be 3/8”
I.D. minimum. Make sure the machine is receiving an
unrestricted supply of cold, clean water.
E. SEMI-ANNUALLY
1.
Disconnect the machine from the power source.
2.
Use a Burroughs Belt Tension Gauge to set the
tension for the drive belt. Set the belt tension on
the E112 to 5-15 lbs and on the F112 to 30-40
lbs.
3.
Lubricate the condenser fan motor with S.A.E.
20 weight oil. Three to six drops are required.
3.14 EXTENDED STORAGE
Refer to the following steps for storage of the machine
over any long period of shutdown time:
A.
Place the CLEAN-OFF-ON switch in the OFF
(middle) position.
B.
Disconnect (unplug) from the electrical supply
source.
C.
Clean all parts that come in contact with mix
thoroughly with a warm water cleaning solution
Rinse in clean water and dry parts. Do not sanitize.
NOTE
Do not let the cleaning solution stand in the hop-
per or in the freezing cylinder during the shutdown
period.
D.
Remove, disassemble and clean the front door,
mix inlet regulator and auger parts.
E.
In a water cooled machine, disconnect the water
lines and drain water. With a fl athead screwdriver,
hold the water valve open and use compressed
air to clear the lines of any remaining water.
Figure 3-10 E112 Condenser Filter Removal

