19
5. Connect the ohmmeter to terminals C and S.
Resistance through the start winding should be 7.77
to 8.93 ohms with the ohmmeter set at ohms x 1.
6. To check if windings are shorted to ground, connect
one ohmmeter lead to a bare metal part on the
compressor, such as any copper line leading to or
from the compressor and checking terminals C, R,
and S.
NOTE
The compressor is equipped with an internal
overload protector. If the compressor is warm and
ohmmeter reads indicate an open winding, and
allow up to one hour for the overload to reset.
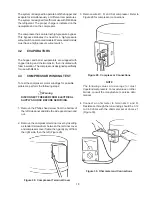
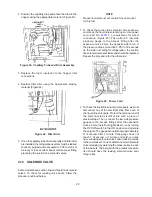
To access the compressor starting components, remove
the Phillips head screw from the bottom of the right side
panel and remove the panel by pulling down and out.
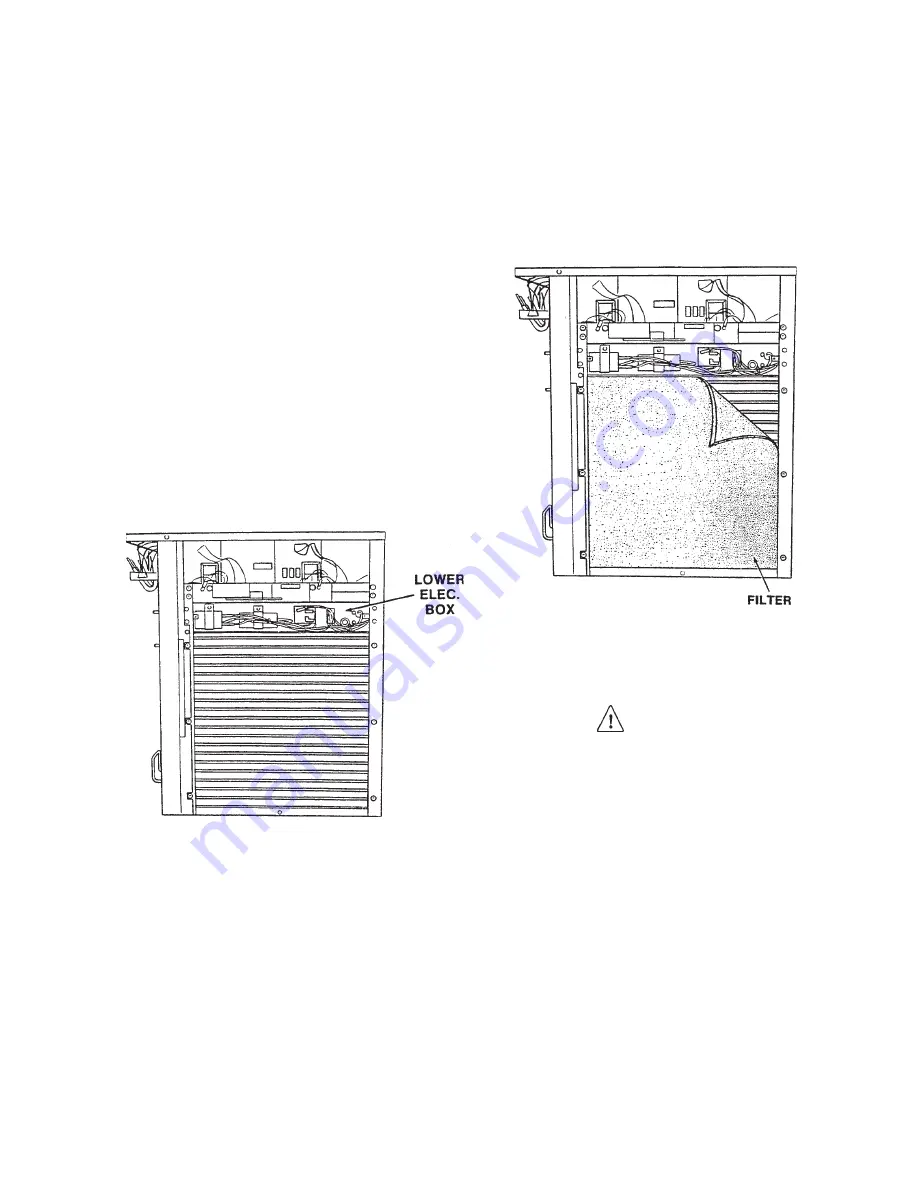
Then, remove the cover from the lower electrical box
located just above the condenser on the right side of the
freezer (Figure 31).
4.4
CONDENSERS
The air-cooled condenser is a copper tube and aluminum
fin type. Condensing is totally dependent upon airflow.
A plugged condenser filter, condenser, or restrictions in
the louvered panel will restrict airflow. This will lower the
capacity of the system and damage the compressor.
The condenser must be kept clean of dirt and grease.
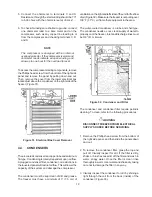
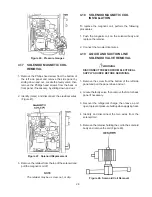
The freezer must have a minimum of 3” (7.5 cm) of
Figure 31. Electrical Box Cover Removal
ventilation on the right and left sides of the unit for free flow
of air (Figure 32). Make sure the freezer is not pulling over
100° F (37° C) air from other equipment in the area.
The water-cooled condenser is a tube and shell type.
The condenser needs a cool, clean supply of water to
properly cool the freezer, Inlet and discharge lines must
be 3/8” I.D. minimum.
The condenser and condenser filter require periodic
cleaning. To clean, refer to the following procedures.
WARNING
DISCONNECT FREEZER FROM ELECTRICAL
SUPPLY SOURCE BEFORE SERVICING.
1. Remove the Phillips head screw from the bottom of
the right side panel, and then slide the panels down
and out.
2. To remove the condenser filter, grasp the top and
pull off. Visually inspect for dirt. If the filter is dirty,
shake or brush excess dirt off the filter and wash in
warm, soapy water. Once the filter is clean rinse
thoroughly in warm, clear water and shake dry, taking
care not to damage the filter in any way.
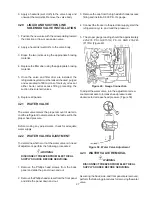
3. Visually inspect the condenser for dirt by shining a
light through the coil from the back (inside) of the
condenser (Figure 33).
Figure 32. Condenser and Filter
Summary of Contents for E131G
Page 1: ...Model E131G F131G SERVICE MANUAL Manual No 513537 3 Mar 2004...
Page 2: ......
Page 14: ...6...
Page 38: ...30 Figure 51 Power Board...
Page 39: ...31 Figure 52 Program Module...
Page 54: ...46...
Page 66: ...58...
Page 68: ...60...
Page 69: ...61 666786...
Page 70: ...62...
Page 71: ...63...
Page 72: ...64...
Page 73: ...65...
Page 74: ...66...
Page 75: ...67...
Page 76: ...68...
Page 77: ...69...
Page 78: ...70...
Page 80: ......

