40
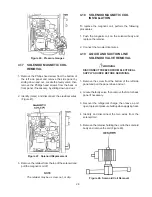
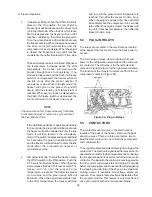
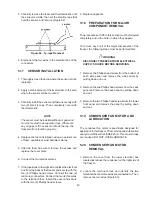
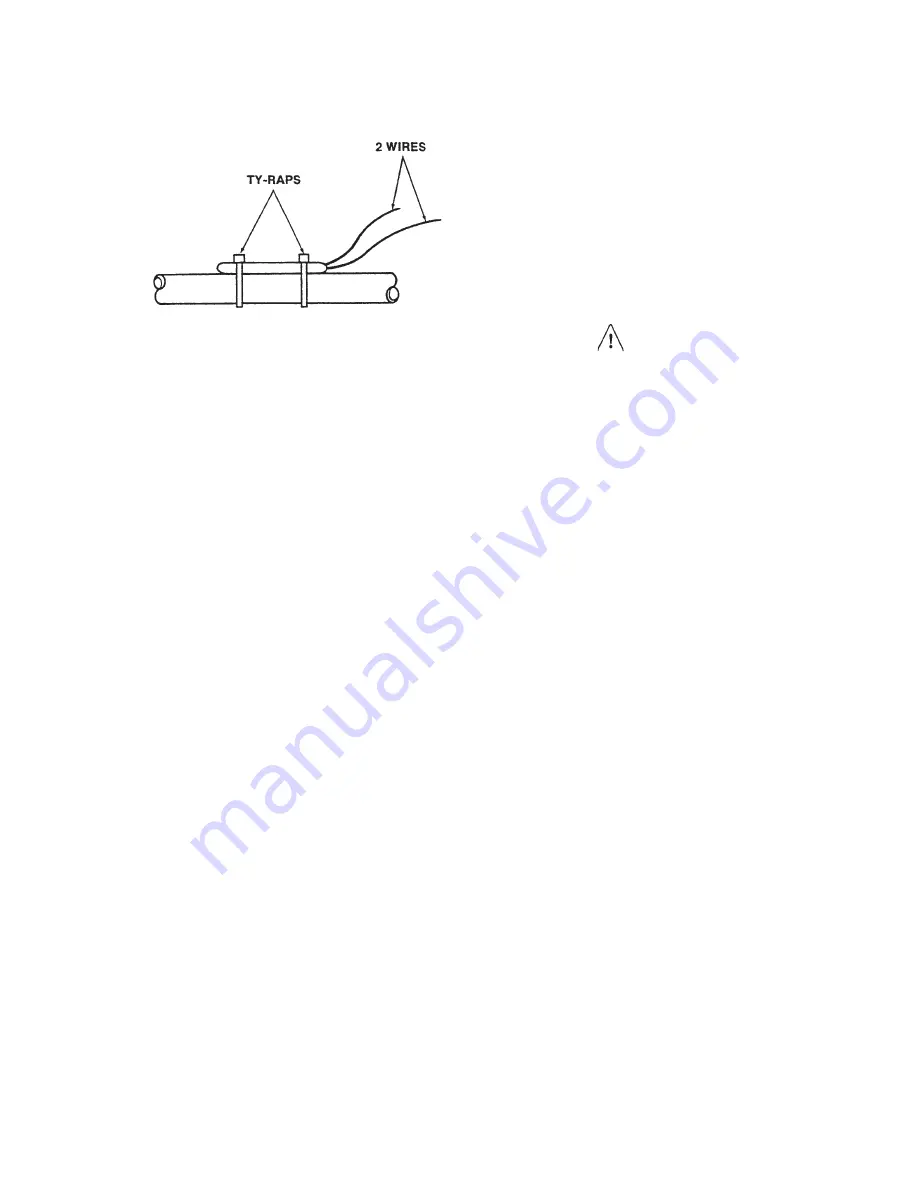
5. Carefully remove the foam and thermal mastic until
the sensor is visible, then cut the small ty-raps that
hold the sensor, and remove (Figure 62).
6. Disconnect the two wires in the electrical box at the
connectors.
5.17
SENSOR INSTALLATION
1. Thoroughly clean the area where the sensor is to be
replaced.
2. Apply a small amount of thermal mastic to the area
where the sensor will be mounted.
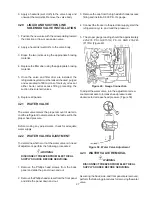
3. Carefully install the sensor and fasten securely with
two (2) small ty-raps. Then completely cover with
thermal mastic.
NOTE
The sensor must be installed without air gaps and
must not contact the evaporator raps. If there are
any air gaps or if the sensor contacts the rap, the
freezer will not function properly.
4. Replace the foam installation using an aerosol can
of foam, available at most hardware stores.
5. After the foam has cured, remove the excess and
replace the cover plate.
6. Connect the two electrical wires.
7. If the repair was to the right side, replace the electrical
box from the back of the freezer and secure with the
four (4) Phillips head screws. Connect the two (2)
red molex connectors. Connect the two (2) fan wires
to the terminal block. Install the cover and secure
with the two (2) Phillips head screws.
Figure 62. Ty-raps Removal
8. Replace all panels.
5.18
PREPARATION FOR MAJOR
COMPONENT REMOVAL
The procedure set forth in this section must be followed
completely and in the order in which they appear.
To remove any or all of the major components of the
freezer, the following steps must be performed first.
WARNING
DISCONNECT FREEZER FROM ELECTRICAL
SUPPLY SOURCE BEFORE SERVICING.
1. Remove the Phillips head screw from the bottom of
each side panel and remove the side panels by
pulling down and out.
2. Remove the two Phillips head screws from the back
panel and remove the back panel by pulling down
and out.
3. Remove the two Phillips head screws from the lower
front panel and remove the panel by pulling down
and out.
5.19
CONDENSER FAN MOTOR AND
LUBRICATION
The condenser fan motor is specifically designed for
application in this freezer. The motor requires lubrication
every six months with an SAE #20 oil. Three to six drops
are required. DO NOT OVER LUBRICATE.
5.20
CONDENSER FAN MOTOR
REMOVAL
1. Remove the cover from the lower electrical box
located just above the condenser on the right side of
the freezer.
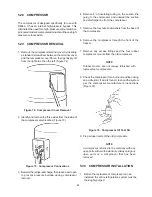
2. Locate the terminal block and identify the two
terminals the fan motor wires are connected to. Then,
remove the two wires (Figure 63).
Summary of Contents for E131G
Page 1: ...Model E131G F131G SERVICE MANUAL Manual No 513537 3 Mar 2004...
Page 2: ......
Page 14: ...6...
Page 38: ...30 Figure 51 Power Board...
Page 39: ...31 Figure 52 Program Module...
Page 54: ...46...
Page 66: ...58...
Page 68: ...60...
Page 69: ...61 666786...
Page 70: ...62...
Page 71: ...63...
Page 72: ...64...
Page 73: ...65...
Page 74: ...66...
Page 75: ...67...
Page 76: ...68...
Page 77: ...69...
Page 78: ...70...
Page 80: ......

