43
5.25
SPEED REDUCER
The speed reducer is a heavy duty sealed unit that does
not require any maintenance.
5.26
SPEED REDUCER REMOVAL
1. Remove the front door assembly, auger support and
bushing, auger shaft and flights, and rear seal
assembly.
2. Loosen the belt tension adjusting nut and remove
the belt.
NOTE
The spacer between the speed reducer and the
barrel is used on the “E” model only.
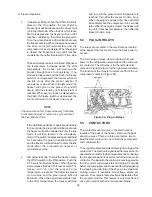
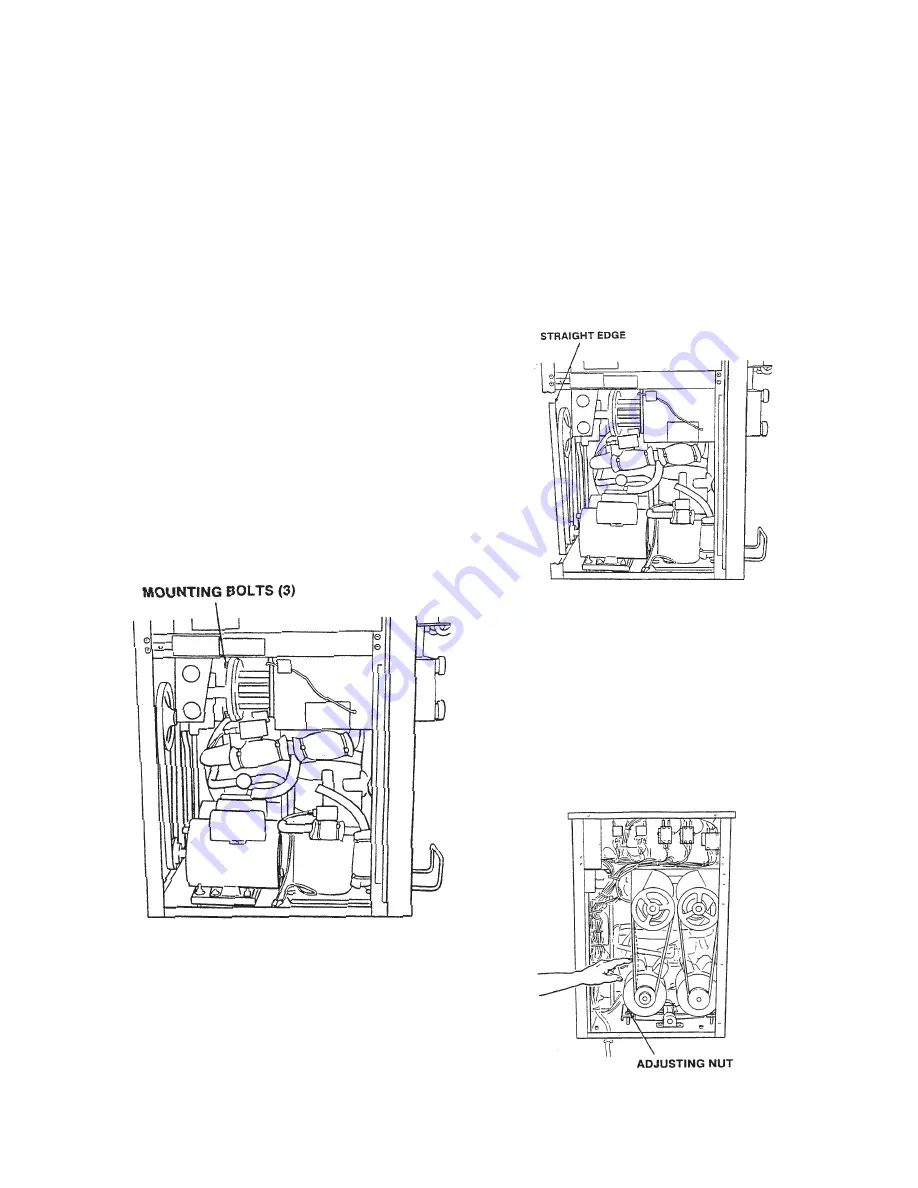
3. Use a 9/16” box end wrench to remove the three
bolts holding the speed reducer to the spacer (Figure
69).
4. Use a ¾” wrench to remove the two bolts holding the
speed reducer to the mounting bracket.
5. Remove the speed reducer from the freezer. Then,
using an Allen wrench, loosen the setscrew and
remove the pulley and key.
Figure 69. Speed Reducer Removal
5.27
SPEED REDUCER INSTALLATION
1. Assemble the pulley and key onto the replacement
speed reducer. Do not fully tighten setscrew.
2. Position the speed reducer to match the holes in the
support bracket and spacer. Then secure using the
appropriate bolts.
3. Align the speed reducer pulley with the motor pulley
and fully tighten the setscrew (Figure 70).
NOTE
You must have proper alignment or short belt life
will result.
4. Check for any wires and/or copper tubing that may
have been pushed out of place.
5. Install and adjust belt to the proper tension (Figure
71).
Figure 70. Speed Reducer Adjustment
Figure 71. Belt Tension Adjustment
Summary of Contents for E131G
Page 1: ...Model E131G F131G SERVICE MANUAL Manual No 513537 3 Mar 2004...
Page 2: ......
Page 14: ...6...
Page 38: ...30 Figure 51 Power Board...
Page 39: ...31 Figure 52 Program Module...
Page 54: ...46...
Page 66: ...58...
Page 68: ...60...
Page 69: ...61 666786...
Page 70: ...62...
Page 71: ...63...
Page 72: ...64...
Page 73: ...65...
Page 74: ...66...
Page 75: ...67...
Page 76: ...68...
Page 77: ...69...
Page 78: ...70...
Page 80: ......

