Page 4
First roll the machine from the box and from the pallet.
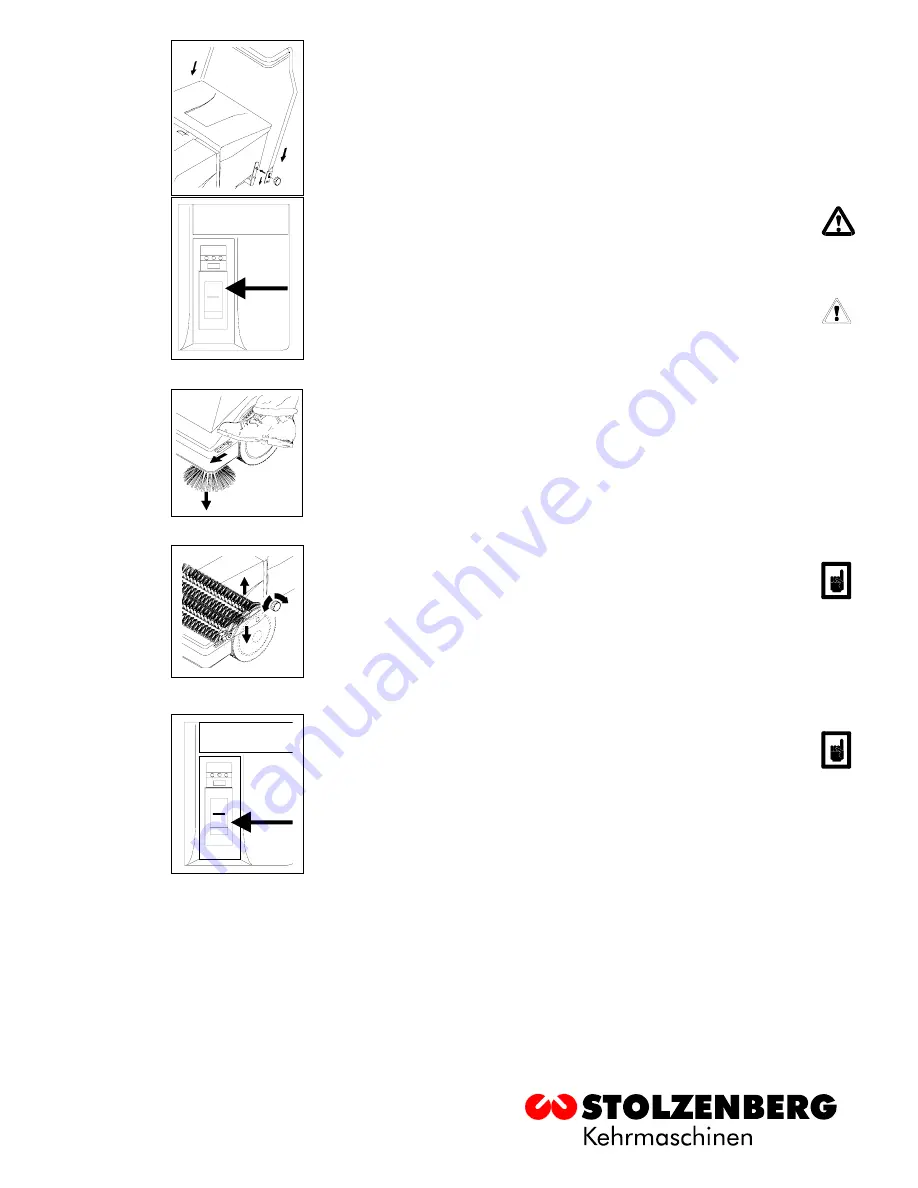
Afterwards, put the steering handle in the upright position, pull it downwards into
the two tappets completely (see Figure) and tighten it with the two thumb screws.
Note: before you carry out the following steps, please ensure that the safety switch
on the steering handle is put in position "0" (see Figure).
Remove the main-cover of the machine unlatching device with the tool supplied in
the reach of the dirt collector after the dirt collector has been removed. After open-
ing up the cover, the positive pole of the battery can be slipped on and be tight-
ened with a spanner (SW 13) (It was removed for reasons of safety during transpor-
tation). Finally, replace the cover latching device again immediately.
4. Starting Up/Operating
After the machine has been assembled, it is immediately ready for operation.
First of all, the two lateral brushes should be lowered. For this purpose, push the
thumb washer forward (see Figure) with your foot until the brushes just touch the
floor.
It is possible to adjust the height of the main sweeping brush using the adjustment
handle on the left side of the machine (under the dirt collector) (see Figure). Please
ensure that the brush tips only touch the floor lightly. If the brushes are adjust too
low, this increases the wear on the brushes and the gear components as well as the
power consumption. Position 1 - the highest brush position (for new, unworn roll-
ers), position 5 - the lowest brush position (for worn brushes or very uneven floors
for a short period of time).
Put the toggle switch on the steering handle in position "I" (see Figure).
Afterwards, the LED's over the switch indicate how much of a charge there is in the
battery. If the green diode is lighted up, the machine is ready for operation. If the
yellow diode is lighted up, go to the loading station. If the red diode is lighted up,
the machine should be switched off immediately to keep the battery from losing its
charge. Put the toggle switch to "0" to shut the machine off. This switch also serves
the purpose of protecting against overloading during power transmission. If the
motor load become significantly higher, for instance as a result of sweepings get-
ting blocked or excessive resistance in the drive, the switch jumps into position 0.
After eliminating the malfunction, the machine may be restarted.
0
I
0
I


