background image

Configuration Menu 

Page - 11 


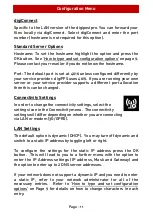
digiConnect  

Specific to the LAN version of the digipostpro. You can forward your 
files  locally  via  digiConnect.  Select  digiConnect  and  enter  the  port 
number (hostname is not required for this option). 


Standard Server Options 

Hostname:  To  set  the  hostname  highlight  the  option  and  press  the 

OK button.  See ‘How to type and set configuration options’

 on page 9.   

Please contact your reseller if you do not know the hostname. 
 
Port: The default port is set at 4616 unless configured differently by 
your service provider. digiFFS uses 4619. If you are running your own 
server  or  your  service  provider  supports  a  different  port  allocation 
then this can be changed.   


Connectivity Settings 

In order to change the connectivity settings, select the 
settings icon in the Connectivity menu.  The connectivity 
settings will differ depending on whether you are connecting 
via LAN or modem (3G/GPRS). 


LAN Settings 

The default option is dynamic (DHCP).  You may turn off dynamic and 
switch to a static IP address by toggling left or right. 
 
To  configure  the  settings  for  the  static  IP  address  press  the  OK 
button.    This  will  lead  to  you  to  a  further  menu  with  the  option  to 
enter  the  IP  Address  settings  (IP  address,  Mask  and  Gateway)  and 
the option to enter up to 2 DNS server addresses. 
 
If your network does not support a dynamic IP and you need to enter 
a  static  IP,  refer  to  your  network  administrator  for  all  of  the 

necessary  entries.    Refer  to  ‘

How  to  type  and  set  configuration 

options

’  on 

Page  9  for  details  on  how  to  change  characters  in  each 

entry.


Summary of Contents for digipostpro

Page 1: ...CONTENT OVERVIEW Assembly and mounting Administrative functions Interaction with digivu and digifobpro Data management and housekeeping ADMINISTRATIVE GUIDE...

Page 2: ......
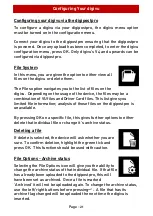
Page 3: ...es 8 9 Networking 10 12 Files Analysis 12 13 Other Configuration Options 14 Maintaining and Transferring Files 15 20 Driver Cards and Driver Card Analysis 15 16 digivu 17 19 digifobpro 20 Archived Fil...

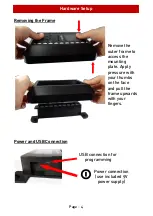
Page 4: ...ower and USB Connection Remove the outer frame to access the mounting plate Apply pressure with your thumbs on the face and pull the frame upwards with your fingers USB connection for programming Powe...

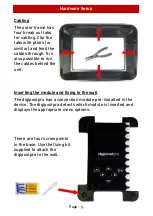
Page 5: ...similar and feed the cables through It is also possible to run the cables behind the unit The digipostpro has a connection module pre installed in the device The digipostpro detects which module is in...

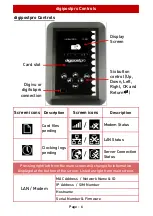
Page 6: ...em MAC Address Network Name ID IP Address SIM Number Hostname Serial Number Firmware Pressing right left from the main screen will change the information displayed at the bottom of the screen Listed a...

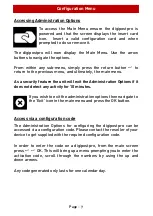
Page 7: ...exit the Administration Options if it does not detect any activity for 10 minutes If you wish to exit the administration options then navigate to the Exit icon in the main menu and press the OK butto...

Page 8: ...es Select the Preferences icon from the main menu and select one of the follow options Language Scroll through the language options and press to save the language selected and return to the preference...

Page 9: ...t highlight the option and press the OK button This allows you to enter or change characters by using the Up and Down arrows holding down the arrow buttons will enable a faster scroll To move to the n...

Page 10: ...ction with the device Please contact your reseller for more information on how to set up an account on digiCentral digiFFS digiFFS File Forwarding System can be used if you want to forward the files r...

Page 11: ...anged Connectivity Settings In order to change the connectivity settings select the settings icon in the Connectivity menu The connectivity settings will differ depending on whether you are connecting...

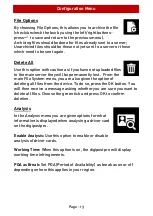
Page 12: ...Card Number date and time of VU download Further analysis of those files on the digipostpro is not available through the configuration menu only immediately after the card has been read please see pag...

Page 13: ...rom the main File System menu you are also given the option of deleting all files from the device To do so press the OK button You will then receive a message asking whether you are sure you want to d...

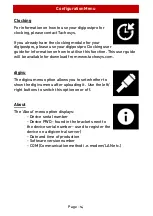
Page 14: ...guide will be available for download from www tachosys com digivu The digivu menu option allows you to set whether to show the digivu menu after uploading it Use the left right buttons to switch this...

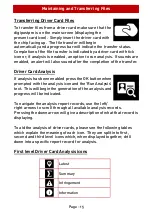
Page 15: ...the transfer Driver Card Analysis If analysis has been enabled press the OK button when prompted with the analysis icon and the Run Analysis text This will begin the generation of the analysis and pr...

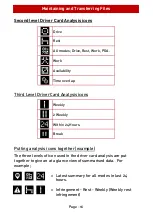
Page 16: ...er example The three levels of icon used in the driver card analysis are put together to give an at a glance view of summarised data For example Latest summary for all modes in last 24 hours Infringem...

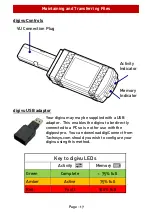
Page 17: ...the digivu to be directly connected to a PC so is not for use with the digipostpro You can download digiConnect from Tachosys com should you wish to configure your digivu using this method Memory Indi...

Page 18: ...memory digivu has 16MB of internal memory which on average will store 120 VU data files The indicator shows a green LED for sufficient memory an orange LED for 75 used memory and a red light indicate...

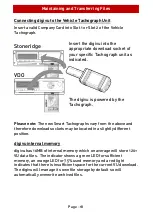
Page 19: ...he digivu and digifobpro It does not support alternative download devices digivu To connect your digivu simply remove the digivu cap and insert the digivu into the digipostpro s front socket The file...

Page 20: ...an alert will sound if enabled and a digifobpro with tick icon will be displayed Simply disconnect your digifobpro from the device Archived Files Once files from a digifobpro or digivu have been tran...

Page 21: ...files This list gives you limited file information analysis of those files on the digipostpro is unavailable By pressing OK on a specific file this gives further options to either delete that individu...

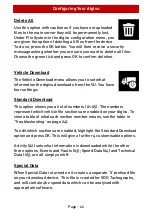
Page 22: ...e four settings Standard Download This option shows you a list of numbers 01 05 The numbers represent which vehicle file sections are enabled on your digivu To view a table of what each section number...

Page 23: ...are having download issues using Slow will set the download speed at a slower rate than the absolute requirements Download Log In the Download Log menu there are a further two options Read Log and Cle...

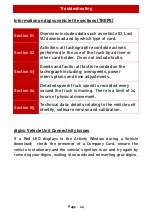
Page 24: ...w includes data such as vehicle ID Last VU download and by which type of card Section 02 Activities all tachograph recordable actions performed in the use of the truck by a driver or other card holder...

Page 25: ...o help identify whether this is the case From the main screen press down down OK This will return the last error message from the server for the current connection Please be aware that this will only...

Page 26: ...Stoneridge Electronics Ltd Charles Bowman Avenue Claverhouse Industrial Park Dundee DD4 9UB Scotland Tel 44 0 1382 866 400 Email amsales stoneridge com www stoneridge electronics com...

Reviews: