background image

Translation of the original instruction

83

Automatic functions:

The device switches to stand-by mode when
- the condensate container is full - an audible signal is output. Empty the container.
- the condensate container is removed from the device during operation - an audible signal is output. 

Switch the device off first, and then unplug the mains plug from the socket.

- the desired humidity level has been reached - the fan continues to run.
The device is switched off (2) POWER
- The fan keeps running for about 10 seconds.
- When switched on again, the fan starts up and the compressor switches on approx. 2 minutes later.

Fig. 7

6.3.6 Condensate container / drain hose

The condensate container collects moisture that has been 

extracted from the indoor air.

When the maximum capacity of approx. 7 l is reached, 

the building dryer switches to stand-by mode and an audi-

ble signal is output. You need to empty the container:

- Turn off the device.
- Unplug the mains plug.
- Open the service flap and remove the container


After emptying the container, refit it and make sure it is 

correctly seated. If the container is not seated correctly, 

an audible signal is output and the display (1) shows (12) 

FULL.

Drain hose:

To extend the building dryer's operating time, you can 

attach a drain hose to the condensate container. This 

enables continuous draining of the condensate (see figs. 

8 and 9):

- Removing the Condensate container (fig. 7)
- Loosen the seal plug (18) on the drain outlet and pull 

the plug out (fig. 8 and 9).

- Thread the supplied drain hose (19) through the hole 

in the side of the housing and push it onto the drain 

outlet (fig. 10).

-

Fit the condensate container again

Fig. 8

18

Fig. 9

18

Fig. 10

19

Make sure that the drain hose is laid straight, 

not kinked and routed into a floor drain. The 

drain must always be lower than the conden-

sate container.

Summary of Contents for HighDry 300

Page 1: ...Bautrockner HighDry 300 Bouwdroger HighDry 300 Déshumidificateur de chantier HighDry 300 Essiccatore edile HighDry 300 HighDry 300 Dehumidifier Stavební vysoušeč HighDry 300 DE NL FR IT GB CZ ...

Page 2: ...tung 3 1 2 2 Mitgeltende Unterlagen 3 2 Produktbeschreibung 3 2 1 Produktdaten 3 2 1 1 Technische Daten 3 2 1 2 Betriebsstoffe 3 2 2 Lieferumfang 3 3 Sicherheit 4 3 1 Darstellung der Sicherheitshinweise 4 3 2 Darstellung von Piktogrammen 4 3 3 Produktsicherheit 4 3 3 1 Bestimmungsgemäße Verwendung 4 3 3 2 Vorhersehbare Fehlanwendung 4 3 4 Gefahrenhinweise 5 3 4 1 Allgemeine Gefahrenhinweise 5 3 5 ...

Page 3: ...uktdaten 2 1 1 Technische Daten Netzspannung 230 V 50 Hz Leistung 0 9 kW Absicherung 4 A Netzkabel 3 x 1 0 mm 1 9 m Schutzklasse IP 22 Luft Umwälzleistung 300 m h Entfeuchtungsleistung max 50 l 24 h bei 30 C und 80 rF 30 l 24 h bei 27 C und 60 rF Druck Ansaugung max 1 MPa Druck Austritt max 2 5 MPa Kondensatbehälter Füllmenge 7 l Kondensatschlauch 1 m Durchmesser 13 mm Abschaltung max Wasserstand ...

Page 4: ...eu tung genannt werden Verbot einer Handlung oder Tätigkeit im Zusammenhang mit einer Gefahrenquelle deren Missachtung zu schwerwiegenden Unfällen führen kann Warnung vor der mit dem Piktogramm dargestellten Gefahr Gebot einer Handlung oder Tätigkeit im Umgang mit einer Gefahrenquelle deren Missachtung zu schwer wiegenden Unfällen führen kann 3 3 Produktsicherheit 3 3 1 Bestimmungsgemäße Verwendun...

Page 5: ...rch speziell geschulte Ser vicemitarbeiter in speziell dafür vorgesehenen Räumlichkeiten erlaubt Im Falle einer notwendigen Wartung eines Defektes oder einer sonstigen Gerätestörung nehmen Sie Kontakt mit der Storch Service Hotline auf 0800 7867247 Auf dem Gerät befinden sich folgende Warn und Sicherheitsaufkleber STORCH Malerwerkzeuge Profigeräte GmbH Platz der Republik 6 D 42107 Wuppertal Art Nr...

Page 6: ...rf nicht unter Einfluss von Alkohol Drogen oder Medikamenten stehen Kindern leistungsgewandelten und schwangeren ist der Betrieb untersagt 6 Lufteinlass mit Luftfilter 7 Fahrgestell 8 Standfüße 9 Luftauslass 10 Kabelaufwicklung 3 5 Verantwortung des Betreibers Der Betreiber muss sicherstellen das Gerät darf nur bestimmungsgemäß verwendet werden das Gerät muss gemäß der Vorgaben dieser Betriebsanle...

Page 7: ...r Betriebsanleitung 5 2 Aufstellung Positionieren Sie das Gerät gerade aufrecht und sicher auf festen und ebenen Boden Achten Sie darauf dass das Gerät nicht im Weg steht und zusammen mit Schläuchen und Kabel keine Stolpergefahr darstellen Stellen Sie das Gerät zwingend mit den nötigen Mindestabständen zu den Wänden oder anderen Hindernissen auf Zur Vorderseite mind 100 cm zu allen anderen Seiten ...

Page 8: ...nungsgemäß installierten Steck dose 230 V mit Schutzkontakt an Kupplungen von Verlängerungskabeln und Anschlussleitungen müssen spritzwassergeschützt sein Benutzung nur bei einwandfreiem Zustand der Netzanschlussleitung Der Bautrockner ist nicht EX geschützt Betreiben Sie das Gerät niemals ohne Luftfilter Prüfen und reinigen oder ersetzen Sie den Luftfilter je nach Zustand vor Inbetriebnahme sh Ab...

Page 9: ...instellen der ge wünschten Dauer in Stunden zum Auto Start Stopp senken 17 16 15 14 13 12 6 7 8 9 10 11 Abb 6 Betriebsanzeige 1 Betriebsanzeige 2 6 Raumtemperatur Fehlercode 7 Entfeuchtung aktiv 8 PRES Raumtemperatur zu hoch 9 SET erscheint wenn gewünschte Luftfeuchtigkeit ausgewählt wird 10 CURRENT erscheint bei Anzeige der aktuellen Luftfeuchtigkeit 11 Aktuelle oder die gewünschte Luftfeuchtigke...

Page 10: ...ay an Pos 14 FROST angezeigt Der Abtauprozess ist je nach Verei sung unterschiedlich lang dauert aber max ca 8 Minuten Schalten Sie das Gerät während des Abtauvorganges nicht aus und ziehen Sie nicht den Netzstecker Der im Display 1 angezeigte Ventilator 13 ist seitlich mit Leistungsbalken versehen Die Leistung des Ventilators hängt von der Luftfeuchtigkeit ab und regelt sich automatisch 6 3 5 Tim...

Page 11: ...t ein Signal Der Behälter muss entleert werden Gerät ausschalten Netzstecker ziehen Serviceklappe öffnen und Behälter entnehmen Nach dem Entleeren des Behälters setzen Sie diesen wieder ein und achten auf den korrekten Sitz Sollte der Behälter nicht korrekt eingestellt sein ertönt ein Signal und im Display 1 wird die Anzeige 12 FULL angezeigt Ablaufschlauch Um die Betriebszeit des Bautrockners zu ...

Page 12: ...RRENT 10 und SET 9 blinken Mit den Pfeiltasten 4 5 erhöhen oder verringern Sie den Wert Dieser wird dann 10 Sekunden als Feuchtigkeitswert 11 angezeigt Danach wechselt die Anzeige zur Normalanzeige der Luftfeuchtigkeit Der Korrekturwert ist nun gespeichert und muss ggf bei Folgeeinsetzten den Gegebenheiten angepasst werden Im Auslieferzustand ist der Wert auf 0 justiert 7 Außerbetriebnahme Aufbewa...

Page 13: ...einigen oder austauschen Gerät auf äußere Verschmutzung prüfen ggf Gerät von einem Fachbetrieb von innen reinigen lassen Wenden Sie sich an die kostenlose STORCH Technik Hotline 0800 7867247 Kontaktschalter am Kondensatbehälter prüfen ggf reinigen bewegen Evtl eingestellte Luftfeuchtigkeit erreicht Am Gerät eingestellte Luftfeuchtigkeit gleich oder höher als im Raum Bautrockner befindet sich gerad...

Page 14: ...es erforderlich machen dürfen nur durch eine befähigte Fachkraft von Storch oder einen dafür befähigten Servicepartner von Storch durchgeführt werden Wen den Sie sich an die kostenlose STORCH Technik Hotline 0800 7867247 Stecker nie mit feuchten Händen anfassen Der Einbau und die Verwendung von Ersatz und Zubehörteilen die die nicht vom Gerätehersteller stam men ist verboten Die Wartungsintervalle...

Page 15: ... kein Wasser in das Gehäuse oder in die Steuerung gelangen oder mit elektrischen Bauteilen in Verbindung kom men Keine Reinigungsmittel Lösemittel etc verwenden 10 3 2 Verschmutzung im Gerätegehäuse prüfen Luftfilter entnehmen Abb 11 Mit geeigneter Lampe durch das Lufteinlassgitter leuchten und auf Verschmutzung prüfen Bei erkannter Verschmutzung das Gerät durch eine befähigte Fachkraft von Storch...

Page 16: ...sschalten Netzstecker ziehen Serviceklappe öffnen und Behälter entnehmen Behälter ausschütten mit Wasser ausspülen Vor dem Einbau den Schwimmerschalter am Kon densatbehälter auf leichte Funktion prüfen evtl vor handene Verschmutzungen entfernen Beim Einbau des Kondensatbehälters auf korrekten Sitz achten 11 Detailzeichnung Ersatzteilübersicht Schaltplan 11 1 Detailzeichnung Abb 13 ...

Page 17: ...schließe 1 25 Sonderbestellung Auflage Lufteinlassgitter 2 26 61 53 18 Wassertasse 1 27 61 53 19 Schwimmschalter Konden satbehälter 1 11 2 Ersatzteilübersicht 28 61 53 21 Kondensatbehälter 7 l 1 32 Verschlussstopfen 1 29 61 53 22 Magnetschalter 1 30 Sonderbestellung Halter Magnetschalter 1 31 Sonderbestellung Halteklammer 1 33 61 53 23 Halteklammer Kondensatbehälter 3 38 34 Sonderbestellung Steuer...

Page 18: ... Ansprüche bestehen ausschließlich an Werkstoff oder Fertigungsfehler sowie ausschließlich bei bestimmungsgemäßer Verwendung des Geräts Verschleißteile fallen nicht unter die Gewährleistungsansprüche Sämtliche Ansprüche erlö schen durch den Einbau von Teilen fremder Herkunft bei unsachgemäßer Handhabung und Lagerung sowie bei offen sichtlicher Nichtbeachtung der Betriebsanleitung Durchführung von ...

Page 19: ... Normen Sicherheit elektrischer Geräte EN 60335 2 40 2003 EN 60335 1 2012 IEC 60335 1 2010 Sicherheit elektrischer Geräte für den Hausgebrauch und ähnliche Zwecke EN 60335 2 41 Niederspannungsrichtlinie 2014 35 EU Bevollmächtigter für die Zusammenstellung der technischen Unterlagen STORCH Malerwerkzeuge Profigeräte GmbH Platz der Republik 6 42107 Wuppertal Jörg Heinemann Geschäftsführer Wuppertal ...

Page 20: ... onderhoudsintervallen 33 10 3 1 Reiniging apparaatbehuizing 33 10 3 2 Vervuiling in de behuizing van het apparaat controleren 33 10 3 3 Reiniging luchtfilter 33 10 3 4 Condensreservoir leegmaken en reinigen 34 11 Detailtekening overzicht met reserveonderdelen elektrische schema 34 11 1 Detailtekening 34 11 2 Overzicht met reserveonderdelen 35 11 3 Schakelschema 36 12 Garantie 36 13 Afvoer 36 14 C...

Page 21: ...tgegevens 2 1 1 Technische gegevens Netspanning 230 V 50 Hz Prestaties 0 9 kW Zekering 4 A Stroomkabel 3 x 1 0 mm 1 9 m Beschermingsklasse IP22 Luchtcirculatie capaciteit 300 m h Ontluchtingsvermogen max 50 l 24 h bij 30 C en 80 rF 30 l 24 h bij 27 C en 60 rF Druk aanzuiging max 1 MPa Druk afvoer max 2 5 MPa Condensreservoir capaciteit 7 l Condensslang 1 m diameter 13 mm Uitschakeling max waterniv...

Page 22: ... op een handeling of activiteit in samenhang met een bron van gevaar waarvan de niet naleving tot ernstige ongevallen kan leiden Waarschuwing voor het gevaar dat wordt weergegeven door het pictogram Gebod voor een handeling of activiteit bij de omgang met een bron van gevaar waarvan de niet naleving tot ernstige ongevallen kan leiden 3 3 Productveiligheid 3 3 1 Gebruik conform de voorschriften De ...

Page 23: ...oelsysteem is alleen toegestaan door spe ciaal opgeleide servicemedewerkers in speciaal daarvoor bestemde ruimtes Neem bij noodzakelijk onderhoud een defect of een andere storing van het apparaat contact op met de Storch Service Hotline 0800 7867247 De volgende waarschuwings en veiligheidsstickers bevinden zich op het apparaat STORCH Malerwerkzeuge Profigeräte GmbH Platz der Republik 6 D 42107 Wup...

Page 24: ...vloed zijn van alcohol drugs of medicijnen Kinderen gehandicapten en zwangere vrouwen mogen het toestel niet gebruiken 6 Luchtinvoer met luchtfilter 7 Onderstel 8 Standvoeten 9 Luchtuitlaat 10 Kabelopwikkeling 3 5 Verantwoordelijkheid van de gebruiker De exploitant moet in het bijzonder garanderen dat het apparaat uitsluitend conform de richtlijnen wordt gebruikt het apparaat moet worden onderhoud...

Page 25: ...5 2 Opstelling Plaats het apparaat recht rechtop en veilig op een stevige en vlakke ondergrond Zorg ervoor dat het apparaat niet in de weg staat en geen struikelgevaar vormt met de slangen en kabels Het is van essentieel belang om het apparaat op te stellen met inachtneming van de vereiste minimumafstanden tot de muren of andere obstakels aan de voorkant minstens 100 cm naar alle andere zijden min...

Page 26: ...ontact 230 V met randaarding dat deskundig werd geïnstal leerd door een gekwalificeerde elektricien Koppelingen van verlengkabels en aansluitleidingen moeten spatwaterveilig zijn Gebruik alleen toegestaan bij optimale toestand van de netkabel De bouwdrager is niet explosieveilig Gebruik het apparaat nooit zonder luchtfilter Controleer en reinig of vervang het luchtfilter afhankelijk van de toestan...

Page 27: ...id verlagen Instellen van de gewenste duur in uren voor de auto start stop verla gen 17 16 15 14 13 12 6 7 8 9 10 11 Afb 6 Bedrijfsindicatie 1 Bedrijfsindicatie 2 6 Ruimtetemperatuur Foutcode 7 Ontvochtiging actief 8 PRES Kamertemperatuur te hoog 9 SET verschijnt wanneer de gewenste luchtvochtig heid wordt geselecteerd 10 CURRENT verschijnt wanneer de huidige luchtvoch tigheid wordt weergegeven 11...

Page 28: ...OST De duur van het ontdooiproces is afhankelijk van het type bevriezing maar duurt maximaal ca 8 minuten Schakel het apparaat tijdens het ontdooien niet uit en trek de stekker niet uit het stopcontact De op het display 1 weergegeven ventilator 13 heeft aan de zijkant een vermogensbalk Het vermogen van de ventilator is afhankelijk van de luchtvochtigheid en wordt automatisch geregeld 6 3 5 Timer p...

Page 29: ...r een signaal Het reservoir moet worden geleegd Schakel het appraat uit Trek de stekker uit het stopcontact Open de serviceklep en verwijder het reservoir Plaats het reservoir na het leegmaken weer terug en zorg ervoor dat het goed op zijn plaats zit Als het reservoir niet correct is geplaatst klinkt er een signaal en op het display 1 wordt 12 FULL weergegeven Afvoerslang Om de bedrijfstijd van de...

Page 30: ...ruik de pijltoetsen 4 5 om de waarde te verhogen of te verlagen Deze wordt vervolgens 10 seconden weergegeven als vochtigheidswaarde 11 Daarna gaat de weergave naar de normale weergave van de luchtvochtigheid De correctiewaarde is nu opgeslagen en moet wanneer deze opnieuw wordt gebruikt mogelijk worden aangepast aan de omstandigheden In de leveringstoestand is de waarde op 0 ingesteld 7 Uitbedrij...

Page 31: ...ig of vervang indien nodig Controleer het apparaat op uitwendige verontreinigingen laat zo nodig een gespecialiseerd bedrijf de binnenkant van het apparaat reinigen Neem con tact op met de gratis technische hotline van STORCH 0800 7867247 Controleer de contactschakelaar op het condensreservoir reinig deze indien nodig en verplaats de schakelaar Eventueel ingestelde luchtvochtigheid bereikt De op h...

Page 32: ...ontact trekken Onderhoud waarbij de behuizing van het apparaat moet worden geopend mag alleen worden uitgevoerd door een gekwalificeerde specialist van Storch of een gekwalificeerde servicepartner van Storch Neem contact op met de gratis technische hotline van STORCH 0800 7867247 Raak de stekker nooit met natte handen aan Het is verboden onderdelen en accessoires in te bouwen en te gebruiken die n...

Page 33: ...geen water in de behuizing of de besturing komen of in contact met elektrische componenten komen Gebruik geen schoonmaakmiddelen oplosmiddelen etc 10 3 2 Vervuiling in de behuizing van het apparaat controleren Luchtfilter verwijderen afb 11 Schijn met een geschikte lamp door het luchtinlaatrooster en controleer op vervuiling Bij constatering van verontreiniging het apparaat door een gekwalificeerd...

Page 34: ...ek de stekker uit het stopcontact Open de serviceklep en verwijder het reservoir Leeg het reservoir spoel schoon met water Controleer voor installatie de vlotterschakelaar op het condensreservoir op eenvoudige en soepele wer king verwijder eventueel aanwezig vuil Let er bij het monteren van het condensreservoir op dat dit correct is geplaatst 11 Detailtekening overzicht met reserveonderdelen elekt...

Page 35: ...lling Deursluiting 1 25 Speciale bestelling Steun luchtinlaatrooster 2 11 2 Overzicht met reserveonderdelen 26 61 53 18 Waterbeker 1 27 61 53 19 Vlotterschakelaar condensre servoir 1 28 61 53 21 Condensreservoir 7 l 1 32 Sluitstoppen 1 29 61 53 22 Magneetschakelaar 1 30 Speciale bestelling Houder magneetschakelaar 1 31 Speciale bestelling Klem 1 33 61 53 23 Klem condensreservoir 3 38 34 Speciale b...

Page 36: ...s uitsluitend met betrekking tot materiaal of productiefouten en uitsluitend bij gebruik van het apparaat con form de voorschriften Voor slijtageonderdelen gelden deze garantie aanspraken niet Alle claims komen te vervallen bij inbouw van onderdelen van andere fabrikanten bij een ondeskundig gebruik en ondeskundige opslag alsmede bij aan toonbare veronachtzaming van de bedrijfshandleiding Reparati...

Page 37: ...basis van zijn ontwerp en type in de door ons in omloop gebrachte uitvoering aan de toepasselijke elementaire veiligheids en gezondheidseisen van de EU richtlijnen voldoet Bij een niet met ons afgestemde verandering van het apparaat is deze verklaring niet langer geldig Omschrijving van het apparaat HighDry 300 Apparaattype Bouwdroger Artikelnummer 61 53 00 Toegepaste richtlijnen EMC elektromagnet...

Page 38: ...ndamentales 50 10 2 Circuit du réfrigérant 50 10 3 Plan de maintenance intervalles de maintenance 51 10 3 1 Nettoyage du boîtier de l appareil 51 10 3 2 Contrôle de la propreté de l intérieur du boîtier de l appareil 51 10 3 3 Nettoyage du filtre à air 51 10 3 4 Vidange et nettoyage du collecteur de condensat 52 11 Dessindétaillé listedespiècesdétachées schémaélectrique 52 11 1 Dessin détaillé 52 ...

Page 39: ...0 V 50 Hz Puissance 0 9 kW Protection par fusible 4 A Câble d alimentation 3 x 1 0 mm 1 9 m Classe de protection IP22 Capacité de circulation d air 300 m h Performances de déshumidification max 50 l 24 h à 30 C et 80 hr 30 l 24 h à 27 C et 60 hr Pression d aspiration max 1 MPa Pression de sortie max 2 5 MPa Volume de remplissage du collecteur de con densat 7 l Tuyau de condensat 1 m diamètre 13 mm...

Page 40: ...ignaler les points suivants L interdiction d une action ou activité liée à une source de risques dont le non respect peut occasionner des accidents graves Mise en garde contre le risque illustré par le pictogramme L obligation d une action ou activité liée au maniement d une source de risques dont le non respect peut occasionner des accidents graves 3 3 Sécurité du produit 3 3 1 Utilisation confor...

Page 41: ...le fabricant Seuls des techniciens de maintenance formés spécialement à cet effet sont habilités à procéder à l ou verture du boîtier de l appareil et aux interventions sur le système de refroidissement Ces opérations doivent être effectuées dans des locaux dédiés spécialement à ces tâches En cas de maintenance nécessaire de défaillance ou d un dysfonctionnement quelconque de l appareil il convien...

Page 42: ...ool de drogues ou de médicaments L utilisation est interdite aux enfants ainsi qu aux personnes aux performances réduites ou enceintes 6 Admission d air avec filtre à air 7 Châssis roulant 8 Pieds 9 Sortie d air 10 Enroulement du câble 3 5 Responsabilité de l exploitant L exploitant doit s assurer que l appareil n est utilisé que de manière conforme l appareil fasse l objet d une maintenance confo...

Page 43: ...eur et plan Veiller à ce que l appareil n encombre pas le passage et ne constitue pas de risque de trébuchage avec ses flexibles et câbles Installer l appareil obligatoirement à la distance minimale prescrite par rapport aux murs ou autres obstacles l espace libre devant la face avant doit être d au moins 100 cm et devant les autres côtés au moins 50 cm Pour optimiser les performances de déhumidif...

Page 44: ...ctricien qualifié Les branchements des rallonges et les câbles d alimentation doivent être protégés contre les projections d eau N utiliser l appareil que si le câble d alimentation est en parfait état Le déshumidificateur de chantier n est pas protégé contre les explosions Ne jamais exploiter l appareil sans filtre à air Avant la mise en service contrôler et nettoyer ou remplacer le filtre à l ai...

Page 45: ... durée souhaitée en heures pour la fonction Marche Arrêt auto matique diminution 17 16 15 14 13 12 6 7 8 9 10 11 Fig 6 Voyant de fonctionnement 1 Voyant de fonctionnement 2 6 Temp amb Code d erreur 7 Déshumidification active 8 PRES Température ambiante excessive 9 SET s affiche lors de la sélection de l humidité ambiante souhaitée 10 CURRENT s affiche pour indiquer l humidité ambiante actuelle 11 ...

Page 46: ...onction de la quantité de givre accumulée le processus de dégivrage est plus ou moins long sans toutefois dépasser une durée maximale d env 8 minutes Ne pas éteindre l appareil pendant le processus de dégivrage et ne pas débrancher la fiche secteur Le ventilateur 13 affiché à l écran 1 est pourvu d une barre de puissance sur le côté La puissance du ventilateur dépend de l humidité ambiante et se r...

Page 47: ...n signal retentit Le collecteur doit être vidé Désenclencher l appareil Débrancher la fiche Ouvrir la trappe de maintenance et retirer le col lecteur Après la vidange du collecteur le réinsérer en veillant à son bon positionnement Si le collecteur n est pas cor rectement réglé un signal retentit et l écran 1 affiche le message 12 FULL Tuyau d évacuation Afin de prolonger la durée de fonctionnement...

Page 48: ...RRENT 10 et SET 9 clignotent Augmenter ou diminuer la valeur à l aide des touches de direction 4 5 Cette valeur s affiche alors pendant 10 secondes en tant que valeur d humidité 11 Ensuite l affichage passe à l affichage normal de l humidité ambiante La valeur de correction est alors enregistrée et devra être adaptée le cas échéant aux conditions des interventions suivantes A la livraison la valeu...

Page 49: ...re à air le nettoyer ou remplacer le cas échéant Contrôler l état de propreté extérieure de l appareil le cas échéant faire net toyer l intérieur de l appareil par une entreprise spécialisée Il convient de s adresser à la ligne gratuite du service technique STORCH au 49 80 07 86 72 47 Contrôler le contacteur du collecteur de condensat le nettoyer actionner le cas échéant L humidité ambiante réglée...

Page 50: ...tenance débrancher la fiche secteur de l alimentation électrique Les opérations de maintenance qui requièrent l ouverture du boîtier de l appareil ne doivent être effectuées que par un technicien qualifié habilité de la société Storch ou par un partenaire de main tenance habilité à cet effet par Storch Il convient de s adresser à la ligne gratuite du service technique STORCH au 49 80 07 86 72 47 N...

Page 51: ...oîtier exclusivement avec un chiffon doux légèrement humidifié à l eau L eau ne doit pas pénétrer dans le boîtier ou la commande ou entrer en contact avec les éléments électriques Ne pas utiliser de détergents de solvants etc 10 3 2 Contrôle de la propreté de l intérieur du boîtier de l appareil Retirer le filtre d air Fig 11 Éclairer à travers la grille d admission d air à l aide d une lampe adap...

Page 52: ...her la fiche Ouvrir la trappe de maintenance et retirer le col lecteur Vidanger le collecteur le rincer à l eau Avant le montage contrôler le bon fonctionnement du contacteur à flotteur du collecteur de condensat éliminer les salissures éventuelles Lors du montage du collecteur de condensat veiller à son bon positionnement 11 Dessin détaillé liste des pièces détachées schéma électrique 11 1 Dessin...

Page 53: ...e 1 11 2 Liste des pièces détachées 25 Commande spéciale Support de la grille d admis sion d air 2 26 61 53 18 Bol d eau 1 27 61 53 19 Contacteur de flotteur du col lecteur de condensat 1 28 61 53 21 Collecteur de condensat 7 l 1 32 Bouchon de fermeture 1 29 61 53 22 Commutateur magnétique 1 30 Commande spéciale Support de commutateur magnétique 1 31 Commande spéciale Pince de fixation 1 33 61 53 ...

Page 54: ... garantie Les droits existent exclusivement à l égard des défauts de matériau ou des vices de fabrication ainsi qu exclusivement en cas d utilisation conforme de l appareil Les pièces d usure ne sont pas couvertes par la garantie Tous les droits per dent leur validité suite au montage de pièces d autres fabricants en cas de manipulation et de stockage non conforme ainsi que de non respect manifest...

Page 55: ...rmes harmonisées appliquées Sécurité des appareils électriques EN 60335 2 40 2003 EN 60335 1 2012 CEI 60335 1 2010 Sécurité des appareils électriques à usage domestiques et similaires EN 60335 2 41 Directive basse tension 2014 35 UE Fondé de pouvoir pour la compilation des documents techniques STORCH Malerwerkzeuge Profigeräte GmbH Platz der Republik 6 D 42107 Wuppertal Jörg Heinemann Gérant Wuppe...

Page 56: ... del dispositivo 69 10 3 2 Verificare la presenza di sporco nell alloggiamento del dispositivo 69 10 3 3 Pulizia filtro dell aria 69 10 3 4 Svuotare e pulire il contenitore della condensa 70 11 Disegno dettagliato Panoramica pezzi di ricambio Schema elettrico 70 11 1 Disegno dettagli 70 11 2 Panoramica dei pezzi di ricambio 71 11 3 Schema elettrico 72 12 Garanzia 72 13 Smaltimento 72 14 Conformità...

Page 57: ...e 230 V 50 Hz Potenza 0 9 kW Protezione 4 A Cavo di alimentazione 3 x 1 0 mm 1 9 m Categoria di protezione IP22 Potenza convenzione aria 300 m h Capacità di deumidificazione mass 50 l 24 h con 30 C e 80 rH 30 l 24 h con 27 C e 60 rH Pressione aspirazione mass 1 MPa Pressione uscita mass 2 5 MPa Contenitore condensa capacità 7 l Flessibile condensa 1 m Diametro 13 mm Spegnimento livello acqua mass ...

Page 58: ...grammi con indicato accan to il relativo significato Divieto di effettuare azioni o attività in relazione ad una fonte di pericolo la cui inosservanza può provocare incidenti gravi Avvertenza di pericolo indicato dal pittogramma Ordine di effettuazione di azioni o attività in relazione ad una fonte di pericolo la cui inosservanza può pro vocare incidenti gravi 3 3 Sicurezza del prodotto 3 3 1 Uso ...

Page 59: ...o aprire l alloggiamento del dispositivo ed eseguire lavori al sistema di raffreddamento solo a personale di servizio specializzato appositamente preparato in ambienti preposti a tale mansioni In caso di un lavoro di manutenzione a causa di un difetto o in caso di altri disturbi del dispositivo con tattare l hotline di servizio Storch 49 0800 7867247 Sul dispositivo si trovano i seguenti adesivi d...

Page 60: ...atore non deve essere sotto l influsso di alcol sostanze stupefacenti o farmaci L esercizio dell apparecchio è vietato a bambini persone inabili e donne in stato di gravidanza 6 Ingresso dell aria con filtro 7 Telaio 8 Piedi di appoggio 9 Scarico aria 10 Riavvolgimento cavo 3 5 Responsabilità del gestore L utilizzatore deve garantire che l apparecchio venga utilizzato solamente in modo regolamenta...

Page 61: ... osservanza delle istruzioni per l uso 5 2 Installazione Posizionare l apparecchio in modo sicuro dritto ed eretto su di una superficie piana e stabile Prestare attenzione a che l apparecchio non intralci e non costituisca un pericolo di inciampo insieme ai tubi flessibili e al cavo Assicurare assolutamente le distanze minime richieste da osservare rispetto alle pareti o altri oggetti del disposit...

Page 62: ... I connettori della prolunga e le linee di allacciamento devono essere protetti contro gli spruzzi d acqua Utilizzare l apparecchio solo se la linea di collegamento alla rete è in condizioni regolari L essiccatore edile non è protetto contro le esplosioni Mai far funzionare il dispositivo senza il filtro dell aria Controllare e pulire o sostituire il filtro dell aria in base alla sua condizione pr...

Page 63: ...in ore per l avvio l arresto automatico abbassare 17 16 15 14 13 12 6 7 8 9 10 11 Fig 6 Indicatore di funzionamento 1 Indicatore di funzionamento 2 6 Temperatura ambiente Codice di errore 7 Deumidificazione attiva 8 PRES Temp ambiente troppo alta 9 SET compare quando viene selezionato il tasso di umidità desiderato 10 CURRENT compare quando viene visualizzato il tasso di umidità attuale 11 Umidità...

Page 64: ...e al grado di gelo ma dura al mass ca 8 minuti Non spegnere il dispositivo durante il procedimento di scongelamento e non tirare la spina Il ventilatore 13 visualizzato nel display 1 è provvisto di un indicatore delle prestazioni Le prestazioni del ventilatore dipendono dall umidità dell aria e si regolano in modo automatico 6 3 5 Programmazione del temporizzatore Tramite il tasto temporizzatore 3...

Page 65: ... svuotato Spegnere l apparecchio Staccare la spina Aprire lo sportello di servizio e rimuovere il conteni tore Dopo aver svuotato il contenitore esso va rimesso al suo posto e assicurato che sia posizionato in modo esatto Se il contenitore non è nella posizione esatta si sente un segnale acustico e nel display 1 viene visualizzato 12 FULL Tubo flessibile di scarico Per allungare la durata di funzi...

Page 66: ...Lampeggiamo le voci CURRENT 10 e SET 9 Tramite i tasti freccia 4 5 si aumenta o si abbassa il valore Tale valore viene visualizzato per 10 secondi come valore di umidità 11 In seguito viene visualizzato il valore normale dell umidità Il valore correttivo è memorizzato e va adeguato eventual alle condizioni date nei successivi turni di lavoro L impostazioni di fabbrica è 0 7 Messa fuori funzione Co...

Page 67: ...la presenza di sporco esterno eventual far pulire l interno del dis positivo da un azienda specializzata Rivolgersi all hotline tecnica gratuita STORCH 49 0800 7867247 Controllare ed eventual pulire muovere l interruttore di contatto del con tenitore della condensa Eventual valore impostato dell umidità dell aria raggiunto Il valore impostato sul dispositivo dell umidità dell aria uguale o superio...

Page 68: ...i alimentazione prima di effettuare attività di manu tenzione Lavori di manutenzione che rendono necessaria l apertura dell alloggiamento vanno eseguiti solo da personale specializzato incaricato da STORCH o da un partner di servizio autorizzato da STORCH Rivol gersi all hotline tecnica gratuita STORCH 49 0800 7867247 Non toccare mai la spina con mani umide È vietato installare e utilizzare pezzi ...

Page 69: ... solo con un panno morbido e inumidito con acqua L acqua non deve penetrare nell alloggi amento oppure nei comandi o nei componenti elettrici Non utilizzare alcun detergente solvente etc 10 3 2 Verificare la presenza di sporco nell alloggiamento del dispositivo Rimuovere il filtro dell aria Fig 11 Con una torcia adatta illuminare la griglia per l entrata dell aria e verificare la presenza di sporc...

Page 70: ... lo sportello di servizio e rimuovere il conteni tore Svuotare il contenitore sciacquare con acqua Prima dell installazione verificare il funzionamento dell interruttore a galleggiante nel contenitore della condensa e rimuovere eventual la presenza di sporco Quando si inserisce il contenitore della condensa assicurare un posizionamento corretto 11 Disegno dettagliato Panoramica dei pezzi di ricamb...

Page 71: ...io 25 Ordinazione speciale Appoggio griglia per l entrata dell aria 2 26 61 53 18 Raccoglitore acqua 1 27 61 53 19 Interruttore a galleggiante contenitore della condensa 1 28 61 53 21 Contenitore della condensa 7 l 1 32 Tappo di chiusura 1 29 61 53 22 Interruttore magnetico 1 30 Ordinazione speciale Supporto interruttore magne tico 1 31 Ordinazione speciale Molla di sostegno 1 33 61 53 23 Molla di...

Page 72: ...zia Il diritti si possono far valere solo per errori di materiale o di produzione nonché esclusivamente in caso di utilizzo appro priato dell apparecchio Le parti di usura non sono soggette a diritti di garanzia Decadranno tutti i diritti di garanzia con l installazione di componenti di terzi maneggio e magazzinaggio non appropriato come pure in casi di manifesta inos servanza delle istruzioni per...

Page 73: ...one e struttura nella versione da noi immessa sul mercato è conforme alle disposizioni fondamentali di sicurezza e di tutela della salute delle direttive CE riportate qui di seguito La presente dichiarazione perderà la sua validità in caso di modifiche sul prodotto non concordate con noi Denominazione dell apparecchio HighDry 300 Tipo di apparecchio Essiccatore edile Numero articolo 61 53 00 Diret...

Page 74: ...cuit 86 10 3 Maintenance plan maintenance intervals 87 10 3 1 Cleaning the device housing 87 10 3 2 Checking for soiling in the device housing 87 10 3 3 Cleaning the air filter 87 10 3 4 Draining and cleaning the condensate container 88 11 Detailed drawing spare parts overview circuit diagram 88 11 1 Detailed drawing 88 11 2 Overview of spare parts 89 11 3 Circuit diagram 90 12 Warranty 90 13 Disp...

Page 75: ...ns voltage 230 V 50 Hz Output 0 9 kW Fuse 4 A Power cable 3 x 1 0 mm 1 9 m Protection class IP 22 Air circulation capacity 300 m h Dehumidification capacity max 50 l 24 h at 30 C and 80 rF 30 l 24 h at 27 C and 60 rF Intake pressure max 1 Mpa Outlet pressure max 2 5 Mpa Condensate container capacity 7 l Condensate hose 1 m diameter 13 mm Shutdown max water level Yes Working temperature range 5 35 ...

Page 76: ...uded Prohibition of an action or activity related to a source of danger where failure to observe may lead to seri ous accidents Warning of the danger represented by the pictogram Prohibition of an action or activity related to handling a source of danger where failure to observe may lead to serious accidents 3 3 Product safety 3 3 1 Intended use The HighDry 300 building dryer is suitable for dehum...

Page 77: ...ated facility If maintenance is required or in case of a defect or other device malfunction please contact the Storch service hotline 0800 7867247 The following warning and safety labels are located on the device STORCH Malerwerkzeuge Profigeräte GmbH Platz der Republik 6 D 42107 Wuppertal Art Nr 61 53 00 Bautrockner High Dry 300 DE Achtung Das Gerät enthält brennbares Gas Die Demontage oder Repar...

Page 78: ...be under the influence of alcohol drugs or medication Children performance impaired persons and pregnant women are not allowed to operate the device 6 Air intake with air filter 7 Chassis 8 Feet 9 Air outlet 10 Cable winder 3 5 Responsibility of the operating company The operating company must ensure the following The device must only be used in the intended manner The device must be maintained in...

Page 79: ...e the operating manual 5 2 Setting up Position the device straight upright and securely on firm and level ground Make sure that the device is not in the way and does not pose a tripping hazard together with hoses and cables It is imperative that you set up the device with the required minimum distances to walls or other obstacles at least 100 cm at the front and 50 cm on all other sides To optimis...

Page 80: ...t that has been correctly installed by a qualified electrician Couplings with extension cables and connecting cables must be splash proof Use only if the power cable is in perfect condition The building dryer is not explosion protected Never operate the device without the air filter Check and clean or replace the air filter depending on its condition before starting up see Fig 4 Check and if neces...

Page 81: ... humidity lowering Setting the desired duration in hours for auto start stop lowering 17 16 15 14 13 12 6 7 8 9 10 11 Fig 6 Operation indicator 1 Operation indicator 2 6 Room tmp Error code 7 Dehumidification active 8 PRES Room temperature too high 9 SET Shown when desired humidity level is selected 10 CURRENT Shows the current humidity level 11 Current or desired humidity level during setting Err...

Page 82: ...ted in the display at pos 14 FROST The duration of the defrosting process can differ depending on the degree of icing but will not take longer than approx 8 minutes max Do not switch off the device or disconnect the mains plug during defrosting The fan 13 shown in the display 1 has power bars at the side The fan power depends on the humidity level and is controlled automatically 6 3 5 Timer progra...

Page 83: ...g dryer switches to stand by mode and an audi ble signal is output You need to empty the container Turn off the device Unplug the mains plug Open the service flap and remove the container After emptying the container refit it and make sure it is correctly seated If the container is not seated correctly an audible signal is output and the display 1 shows 12 FULL Drain hose To extend the building dr...

Page 84: ...ENT 10 and SET 9 displays flash Use the arrow keys 4 5 to increase or reduce the value The value is then displayed for 10 seconds as the humidity value 11 The display then changes back to the normal humidity level display The correction value is now saved it may need to be adapted to the actual conditions in subsequent deployment In as delivered condition the value is set to 0 7 Decommissioning st...

Page 85: ... Check the air filter clean or replace if needed Check the device for external soiling if necessary have the inside of the device cleaned by a qualified contractor Contact the free STORCH Technical hotline 0800 7867247 Check the contact switch on the condensate container clean or move if nee ded Has the configured humidity level been reached Humidity level configured on device same as or higher th...

Page 86: ...circuit before maintenance Maintenance that requires opening the device s housing may only be carried out by an authorised Storch specialist or an authorised Storch service partner Contact the free STORCH Technical hotline 0800 7867247 Never touch plugs with moist hands The installation and use of spare parts and accessories not sourced from the device manufacturer is pro hibited The maintenance i...

Page 87: ...g only with a soft cloth which is slightly moistened with water No water may enter the housing or the control device or come into contact with electrical parts Do not use cleaning agents solvents etc 10 3 2 Checking for soiling in the device housing Remove the air filter fig 11 Shine a suitable lamp through the air inlet grille and check for soiling If you detect soiling have the device checked by...

Page 88: ... off the device Unplug the mains plug Open the service flap and remove the container Tip out the container rinse with water Before installing check the float switch on the con densate container for easy action remove any dirt that may be present When installing the condensate container ensure that it is correctly seated 11 Detailed drawing spare parts overview circuit diagram 11 1 Detailed drawing...

Page 89: ...order Door lock 1 25 Special order Air inlet grille support 2 26 61 53 18 Water tray 1 27 61 53 19 Condensate container float switch 1 11 2 Overview of spare parts 28 61 53 21 Condensate container 7 l 1 32 Sealing plug 1 29 61 53 22 Solenoid switch 1 30 Special order Solenoid switch holder 1 31 Special order Holding bracket 1 33 61 53 23 Holding bracket Condensate container 3 38 34 Special order C...

Page 90: ...ntitlement Claims can only be accepted for material defects or manufacturing errors and only assuming proper use of the device Wear and tear parts are not covered by warranty rights All claims shall become void in the event of installation of third party components improper handling and storage as well as in the event of obvious disregard of the operating instruc tions Performing repairs All repai...

Page 91: ...t the following machine complies with the fundamental health and safety requirements of the EC Directives in terms of its design construction and version we have brought into circulation This warranty loses its validity in case of unauthorised modification of the tool Designation of device HighDry 300 Device type Building dryer Article number 61 53 00 Applicable directives EMC Electromagnetic Comp...

Page 92: ...bezpečnostní pokyny 104 10 2 Oběh chladicího prostředku 104 10 3 Plán údržby intervaly údržby 105 10 3 1 Čištění krytu přístroje 105 10 3 2 Kontrola znečištění v krytu přístroje 105 10 3 3 Čištění vzduchového filtru 105 10 3 4 Vyprázdnění a čištění nádrže na kondenzát 106 11 Podrobný výkres přehled náhradních dílů schéma zapojení 106 11 1 Podrobný výkres 106 11 2 Přehled náhradních dílů 107 11 3 S...

Page 93: ... A Síťový kabel 3 x 1 0 mm 1 9 m Třída ochrany IP22 Výkon oběhu vzduchu 300 m h Odvlhčovací výkon max 50 l 24 h při 30 C a 80 rel vlhk 30 l 24 h při 27 C a 60 rel vlhk Tlak nasávání max 1 MPa Tlak výstupní max 2 5 MPa Nádrž na kondenzát plnicí množství 7 l Hadice na kondenzát 1 m průměr 13 mm Odpojení max stav vody ano Pracovní oblast teplota 5 35 C Pracovní oblast vlhkost vzduchu 10 95 rel vlhk C...

Page 94: ...í piktogramy s významem uve deným vedle Zákaz jednání nebo činnosti v souvislosti se zdrojem nebezpečí jehož nedodržování může vést k závažným nehodám Varování před nebezpečím zobrazeným piktogramem Zákaz jednání nebo činnosti související se zdrojem nebezpečí jehož nedodržování může vést k závažným nehodám 3 3 Bezpečnost produktu 3 3 1 Použití v souladu s určením Stavební vysoušeč HighDry 300 je v...

Page 95: ...o pouze speciálně školeným pracovníkům servisu v prostorech k tomu určených V případě nutné údržby závady nebo jiné poruchy přístroje kontaktujte servisní Hotline firmy Storch na 0800 7867247 Na přístroji se nacházejí následující výstražné a bezpečnostní nálepky STORCH Malerwerkzeuge Profigeräte GmbH Platz der Republik 6 D 42107 Wuppertal Art Nr 61 53 00 Bautrockner High Dry 300 DE Achtung Das Ger...

Page 96: ...vem alkoholu drog nebo léků Dětem osobám se sníženou schopností a těhotným je provoz zakázán 6 Přívod vzduchu se vzduchovým filtrem 7 Podvozek 8 Stavěcí nohy 9 Odvod vzduchu 10 Naviják kabelu 3 5 Odpovědnost provozovatele Provozovatel musí zajistit že se přístroj smí používat pouze v souladu se stanoveným účelem použití u přístroje musí být prováděna údržba podle údajů uvedených v tomto provozním ...

Page 97: ...5 2 Instalace Přístroj postavte svisle rovně a bezpečně na pevný a rovný podklad Dbejte na to aby přístroj nestál v cestě a dohro mady s kabely a hadicemi nezpůsoboval nebezpečí klopýtnutí Přístroj bezpodmínečně postavte s nutnými minimálními vzdálenostmi od stěn nebo jiných překážek Od přední strany min 100 cm od všech ostatních stran min 50 cm K optimalizaci výkonu odvlhčování se doporučuje míst...

Page 98: ...lované odborným pracovníkem elektro Spojky u prodlužovacích kabelů a přípojovací vedení musí být chráněny proti odstřikující vodě Používání pouze při bezvadném stavu síťového připojovacího vedení Stavební vysoušeč není EX chráněn pro explozivní oblasti Přístroj nikdy neprovozujte bez vzduchového filtru Vzduchový filtr zkontrolujte před uvedením do provozu a podle stavu jej vyčistěte nebo vyměňte v...

Page 99: ...ení po žadované doby trvání v hodinách k Auto Start Stop snížení 17 16 15 14 13 12 6 7 8 9 10 11 Obr 6 Signalizace provozu 1 Signalizace provozu 2 6 Okolní teplota Chybový kód 7 Odvlhčování aktivní 8 PRES okolní teplota příliš vysoká 9 SET objeví se když je volena požadovaná vlhkost vzduchu 10 CURRENT objeví se při zobrazení aktuální vlhkosti vzduchu 11 Aktuální nebo požadovaná vlhkost vzduchu běh...

Page 100: ...azováno na displeji u pol 14 FROST Proces odmrazování je různě dlouhý podle míry zledovatění trvá ale max cca 8 minut Přístroj nevypínejte během odmrazování a nevytahujte síťovou zástrčku Na displeji 1 zobrazovaný ventilátor 13 má z obou stran ukazatel výkonu Výkon ventilátoru závisí na vlhkosti vzduchu a reguluje se automaticky 6 3 5 Programování časovače Timer Pomocí tlačítka Timer 3 lze naprogr...

Page 101: ...by a zazní signál Nádrž musí být vyprázdněna Přístroj vypněte Vytáhněte síťovou zástrčku ze zásuvky Otevřete servisní klapku a vyjměte nádrž Po vyprázdnění nádrž umístěte zpět a dbejte na správné osazení Pokud by nádrž nebyla správně nastavena zazní signál a na displeji 1 se zobrazí ukazatel 12 FULL Odtoková hadice K prodloužení provozní doby stavebního vysoušeče exi stuje možnost umístit odtokovo...

Page 102: ...čítky se šipkou 4 5 zvyšte nebo snižte hodnotu Tato hodnota je potom 10 sekund zobrazována jako hodnota vlhkosti 11 Potom přejde zobrazení k normálnímu zobrazení vlhkosti vzduchu Hodnota korekce je nyní uložena a musí být příp přizpůsobena daným okolnostem při následujícím použití Ve stavu při dodání je hodnota nastavena na hodnotu 0 7 Ukončení provozu uschování Síťovou zástrčku nikdy nevytahujte ...

Page 103: ...těte nebo vyměňte Přístroj zkontrolujte ohledně vnějšího znečištění příp přístroj nechte zevnitř vyčistit odbornou firmou Obraťte se na bezplatnou Hotline firmy STORCH Technika 0800 7867247 Zkontrolujte kontaktní spínač u nádrže na kondenzát příp jej vyčistěte pohybujte s ním Je dosaženo nastavené vlhkosti vzduchu Vlhkost vzduchu nastavená na přístroji je stejná nebo vyšší než vlhkost vzdu chu v m...

Page 104: ...né otevřít kryt přístroje smějí provádět pouze oprávnění odborní pracovníci firmy Storch nebo servisní partner který k tomu má oprávnění od firmy Storch Obraťte se na bezplat nou Hotline firmy STORCH Technika 0800 7867247 Zástrčky se nedotýkejte mokrýma rukama Je zakázáno namontování a používání náhradních dílů a dílů příslušenství které nepocházejí od výrobce přístroje Intervaly údržby musejí být...

Page 105: ...eným vodou Voda se nesmí dostat do krytu nebo do řízení ani nesmí přijít do kontaktu s elektrickými součástmi Nepoužívejte žádné čisticí prostředky rozpouštědla atd 10 3 2 Kontrola znečištění v krytu přístroje Vyjměte vzduchový filtr obr 11 Vhodnou lampou sviťte skrz mřížku pro přívod vzduchu a zkontrolujte ji ohledně znečištění Při rozpoznání znečištění přístroj nechte překontrolovat oprávněným o...

Page 106: ...e Vytáhněte síťovou zástrčku ze zásuvky Otevřete servisní klapku a vyjměte nádrž Nádrž vylijte vypláchněte vodou Před namontováním plovákového spínače u nádrže na kondenzát zkontrolujte lehkost funkce příp odstraňte stávající znečištění Při namontování nádrže na kondenzát dbejte na správné osazení 11 Podrobný výkres přehled náhradních dílů schéma zapojení 11 1 Podrobný výkres Obr 13 ...

Page 107: ...vláštní objednávka Podpěra mřížky pro přívod vzduchu 2 11 2 Přehled náhradních dílů 26 61 53 18 Podtác na vodu 1 27 61 53 19 Plovákový spínač u nádrže na kondenzát 1 28 61 53 21 Nádrž na kondenzát 7 l 1 32 Uzavírací ucpávka 1 29 61 53 22 Magnetický spínač 1 30 Zvláštní objednávka Držák magnetického spínače 1 31 Zvláštní objednávka Přídržná spona 1 33 61 53 23 Přídržná spona u nádrže na kondenzát 3...

Page 108: ...ároky na záruku existují výhradně u materiálu nebo výrobní vady a také výhradně při používání přístroje v souladu s určeným účelem Nároky na záruku se nevztahují na díly podléhající opotřebení Veškeré nároky zanikají zamonto váním dílů cizího původu při nepřiměřeném zacházení a skladování a také při zřejmém nedodržování provozního návo du Provádění oprav Veškeré opravy smějí být prováděny výhradně...

Page 109: ...ístroj na základě své koncepce a druhu konstrukce a také v provedení námi uvedeném do provozu odpovídá příslušným základním bezpečnostním požadavkům a požadavkům k ochraně zdraví směrnic ES Při námi neodsouhlasené změně zařízení ztrácí toto prohlášení svou platnost Označení přístroje HighDry 300 Typ přístroje Stavební vysoušeč Číslo výrobku 61 53 00 Použité směrnice EMV Elektromagnetická slučiteln...

Page 110: ......

Page 111: ...86 72 43 alleen binnen Duitsland FR Tél 49 0 2 02 49 20 112 Fax 49 0 2 02 49 20 111 Ligne d assistance SAV gratu 49 800 7 86 72 47 Service gratuit de commande par téléphone 49 800 7 86 72 44 Fax de commande gratuit 49 800 7 86 72 43 uniquement en Allemagne IT Tel 02 66 22 77 15 GB Tel 49 0 2 02 49 20 112 Fax 49 0 2 02 49 20 111 Free service hotline 0800 786 72 47 Toll free order hotline 49 800 786...
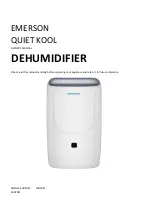
Page 112: ... 53 03 Luchtfilter Référence Désignation 61 53 00 Déshumidificateur de chantier HighDry 300 61 53 03 Filtre à air N art Denominazione 61 53 00 Essiccatore edile HighDry 300 61 53 03 Filtro dell aria Art no Description 61 53 00 HighDry 300 Dehumidifier 61 53 03 Air filter Výr č Označení 61 53 00 Stavební vysoušeč HighDry 300 61 53 03 Vzduchový filtr Art Nr Bezeichnung 61 53 00 Bautrockner HighDry 3...

Reviews: