background image

F

5388-4-00/1

La garantie est 2 ans à compter de la date d’achat. Les
réclamations ne peuvent être prises en compte que sur
présentation d’un justificatif de la date d’achat.

La garantie ne s'étend pas à des traces d'usure naturelle et
des dommages résultant d'une sollicitation excessive ou d'un
emploi inapproprié ou non conforme.

Si vous avez des questions, appelez-nous ou envoyez-nous
un courriel :
Téléphone : +49 (0)9255/7766
Courriel : info@recaro.com

sto5388-4-00/1  disk Storchenmühle  My Seat, Hinweis2 F Montageanleitung
erst. 15.04.08 ps  / geänd. am

Summary of Contents for My Seat SP

Page 1: ...ngen en technische wijzigingen voorbehouden NL Istruzioni di montaggio ed uso Sistema di sicurezza per bambini gruppo 2 3 15 36 kg Le presenti istruzioni di montaggio ed uso devono sempre essere consegnate al cliente Salvo errori di stampa omissioni e modifiche tecniche I Montage und Gebrauchsanleitung Kinder Rückhaltesystem Gruppe 2 3 15 36 kg Diese Montage und Gebrauchsanleitung unbedingt dem Ku...

Page 2: ...ptimiert Storchenmühle Storchenmühle wünscht Ihnen allzeit gute Fahrt Dear Parents only the best for your child Congratulations You have chosen a high grade quality product from Storchenmühle Bringing up a child is one of the most fulfilling tasks that life can bring and at the same time is a huge responsibility It s good to know that you are not alone and that you are supported by a competent par...

Page 3: ... Permit Number 0430 1141 Die Rückenlehne verfügt zur Lehnenanpassung an den Fahrzeugsitz über zwei Posi tionen Zum Verstellen des Rückens den Rücken leicht anheben 1 und in die ge wünschte Position schwen ken 2 For adjustment to the car seat the backrest has two positions To adjust the back lift the back slightly 1 and swivel to the re quired position 2 D GB sto1352 4 02 1 disk Storchenmühle My Se...

Page 4: ... height The upper edge of the head rest should always be at the same height as the top of the child s head Legen Sie den Beckengurt des Dreipunktgurtes in die Gurtführungen ein und schließen Sie das Schloß Auf hörbares Einrasten ach ten Insert the lap belt of the three point belt in the belt guide and close the lock Ensure that there is an aud ible click when it engages D GB sto1353 4 00 1 disk St...

Page 5: ... auf die richtige Gurtführung an den lasttra genden Punkten Das Gurtschloß muß unter halb der Gurtführung liegen Ensure the correct belt guide in way of the load bearing positions The belt lock must be below the belt guide D GB 5 1365 4 00 1 sto1354 4 00 1 disk Storchenmühle My Seat XL Bild 5 6 Montageanleitung erst 28 11 02 ps geänd am 6 1366 4 00 1 ...

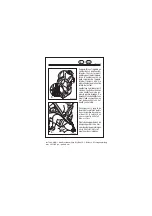
Page 6: ...he upholstery remove the safety screw A and separate the seat and backrest When you have put the upholstery back on secure the backrest by fully screwing in the safety screw Öffnen Sie den Klettver schluß hinten am Rücken und ziehen Sie das Polster nach vorne ab Open the Velcro closure be hind the back and pull the upholstery away from the front D GB sto1355 4 00 1 disk Storchenmühle My Seat XL Bi...

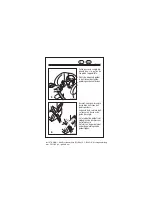
Page 7: ...pen the zipper at the back of the headrest and pull the upholstery away from the front Ziehen Sie das Polster nach oben vom Sitz ab Pull the upholstery upwards and away from the seat D GB 9 1362 4 00 1 10 1363 4 00 1 sto1356 4 00 1 disk Storchenmühle My Seat Bild 9 10 Montageanleitung erst 28 11 02 ps geänd am ...

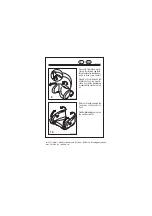
Page 8: ...disposal Remove upholstery from the child safety seat drill out the locking spring and take the plastic components and the locking spring to a recycling centre Details about the material together with a date clock are available on every plastic component see dia gram Place the upholstered sections in the dustbin The operating instructions can be recycled as waste paper D GB 1134 4 01 1 PE 12 6 3 9...

Page 9: ...ersitz ausgetauscht werden Der Kindersitz muß im Werk überprüft werden Der Kindersitz ist immer gemäß Einbauanleitung im Auto zu befestigen auch wenn er nicht benutzt wird Ein nicht befe stigter Sitz kann bereits bei einer Notbremsung andere Insassen verletzen Warnhinweis Wir weisen darauf hin dass bei Benutzung von Kinderautositzen Beschädigungen der Fahrzeugsitze nicht auszuschließen sind Die Si...

Page 10: ...e unbeaufsichtigt Stark auftragende Kleidungsstücke müssen vor dem Anschnal len ausgezogen werden Den Kindersitz vor direkter Sonneneinstrahlung schützen um zu verhindern daß sich Ihr Kind daran verbrennt Der Sitz kann mit lauwarmem Wasser und Seife gereinigt werden Der abgenommene Bezug kann nach Waschanleitung laut Pflegeetikett gewaschen werden Der Kindersitz darf nicht ohne Bezug verwendet wer...

Page 11: ...nicht auf natürliche Abnut zungserscheinungen und Schäden durch übermäßige Bean spruchung oder Schäden durch ungeeignete oder unsachge mäße Verwendung Sollten Sie Fragen haben rufen Sie uns an oder schreiben Sie uns eine E Mail Telefon 49 0 9255 77 66 E Mail info recaro com sto5385 4 00 1 disk Storchenmühle My Seat Hinweis2 D Montageanleitung erst 15 04 08 ps geänd am ...

Page 12: ...g to ECE 44 04 After an accident the child seat must be replaced The child seat must be tested in the factory Always fasten the child seat in the car in accordance with the installation instructions even when it is not being used An unfastened seat can injure the other occupants in the event of emergency braking Warning We point out that the use of child seats may cause damage to the vehicle seats...

Page 13: ...ulky clothing must be removed before you strap your child in Protect the child seat from direct sunlight otherwise your child could suffer burns from coming into contact with the seat The seat can be cleaned with lukewarm water and soap The removed cover can be washed in accordance with the washing instructions on the care label The child seat must not be used without the cover Never replace the c...

Page 14: ...f purchase The warranty does not cover natural wear and damage due to excess strain or damage due to unsuitable or improper use If you have any questions call us or send us an email Telephone 49 0 9255 7766 email info recaro com sto5386 4 00 1 disk Storchenmühle My Seat Hinweis2 GB Montageanleitung erst 15 04 08 ps geänd am ...

Page 15: ...chenmühle vous souhaite une bonne route Lieve ouders voor uw kind alleen maar het beste Hartelijk gefeliciteerd U hebt een hoogwaardig merkproduct van de firma Storchenmühle gekocht Een kind opvoeden is een van de mooiste taken die het leven stelt en gelijktijdig een grote verantwoordelijkheid Goed te weten dat u daarbij niet alleen staat maar door een competente partner terzijde gestaan wordt die...

Page 16: ...F NL Le dossier peut être réglé dans deux positions pour l adapter au siège du véhicu le Pour régler le dossier soulevez le légèrement 1 et inclinez le dans la position souhaitée 2 De rugleuning kan via twee standen worden aangepast aan de leuning van de auto stoel Voor het veranderen van de positie van de rugleu ning wordt deze lichtjes op getild 1 en in de gewenste positie gebracht 2 sto1368 4 0...

Page 17: ...de ge wenste positie brengen De bovenkant van de hoofdsteun moet steeds overeenkomen met de bovenkant van het hoofd van het kind Faites passer la sangle de bassin de la ceinture 3 points dans les guides de sangles et bouclez la ceinture en vous assurant qu elle fait bien clic Plaats de heupgordel van de driepuntsgordel in de hier voor bestemde geleidingen en sluit het slot Het slot moet hoorbaar i...

Page 18: ...angle passe bien au niveau des points porteurs La boucle de la ceinture doit se trouver en dessous du guide de sangle Let er op dat de gordel juist verloopt aan de posities voor de lastopname Het slot van de gordel moet onder de geleiding van de gordel liggen F NL 5 1365 4 00 1 sto1370 4 00 1 disk Storchenmühle My Seat XL Bild 5 6 Montageanleitung erst 29 11 02 ps geänd am 6 1366 4 00 1 ...

Page 19: ...n rugelement los Wanneer u de bekleding weer hebt aangebracht borgt u het rugelement door de borgschroef weer tot de aanslag in te draaien Ouvrez la fermeture velcro à l arrière du dossier et enle vez le rembourrage en le ti rant vers l avant Open de klittenbandsluiting aan de achterkant van de rugleuning en trek de bekle ding er voorzichtig naar vo ren toe af F NL sto1371 4 00 1 disk Storchenmühl...

Page 20: ...ssluiting aan de achterkant van de hoofd steun en trek de bekleding er voorzichtig naar voren toe af Retirez le rembourrage de l assise en le tirant vers le haut Trek de bekleding naar voren toe van de stoel af F NL 9 1362 4 00 1 10 1363 4 00 1 sto1372 4 00 1 disk Storchenmühle My Seat Bild 9 10 Montageanleitung erst 29 11 02 ps geänd am ...

Page 21: ...uels et le mode d emploi avec les vieux papiers Aanwijzing voor de verwij dering Neem de bekleding van de stoel af Boor de vastzetveer uit de stoel Voeg de kunst stof onderdelen en de vast zetveer toe aan de betreffen de stroom voor afval Alle kunststof onderdelen zijn voorzien van een datum zie tekening Voeg de bekleding toe aan de stroom voor huis houdelijk afval Voeg de gebruiksaanwijzing toe a...

Page 22: ...ge auto doit être contrôlé en usine Le siège auto doit toujours être fixé dans la voiture conformément aux instructions d utilisation même s il ne sert pas En cas de freinage violent un siège non fixé peut blesser les occupants du véhicule Avertissement Nous attirons votre attention sur le fait que l utilisation de sièges pour enfants peut endommager les sièges du véhicule La directive de sécurité...

Page 23: ...mais votre enfant sans surveillance Les vêtements épais manteaux etc doivent être enlevés avant la mise de la ceinture Protégez le siège auto de l exposition directe aux rayons solaires car votre enfant pourrait se brûler Nettoyez le siège à l eau tiède et au savon Vous pouvez laver la housse en respectant les conseils d entretien de l étiquette Ne pas utiliser le siège auto sans sa housse Il ne f...

Page 24: ...t La garantie ne s étend pas à des traces d usure naturelle et des dommages résultant d une sollicitation excessive ou d un emploi inapproprié ou non conforme Si vous avez des questions appelez nous ou envoyez nous un courriel Téléphone 49 0 9255 7766 Courriel info recaro com sto5388 4 00 1 disk Storchenmühle My Seat Hinweis2 F Montageanleitung erst 15 04 08 ps geänd am ...

Page 25: ...n De kinderstoel dient in de fabriek te worden gecontroleerd De kinderstoel dient steeds volgens de montageaanwijzing in de auto te worden bevestigd ook indien deze niet wordt gebruikt Een onbevestigde kinderstoel kan al bij een noodremming een gevaar voor andere passagiers betekenen Waarschuwing Wij maken u erop attent dat bij gebruik van kinderautozitten beschadigingen aan de voertuigzitten niet...

Page 26: ... moeten voor het aansnoeren uitgetrokken worden Stel de kinderstoel niet bloot aan direct zonlicht zo voorkomt u dat uw kind zich aan de stoel verbrandt De stoel kan worden gereinigd met lauwwarm water en zeep Nadat u de bekleding van de stoel heeft afgenomen kan deze worden gewassen Neem hiervoor de instructies op het etiket in acht De kinderstoel mag niet zonder bekleding worden gebruikt De bekl...

Page 27: ...et uit op natuurlijke slijtageverschijnselen en schade door overmatige belasting of schade door een niet geschikt of onvakkundig gebruik Mocht u nog vragen hebben bel ons dan even op of stuur ons een mailtje Telefoon 49 0 9255 7766 E mail info recaro com sto5389 4 00 1 disk Storchenmühle My Seat Hinweis2 NL Montageanleitung erst 15 04 08 ps geänd am ...

Page 28: ... Storchenmühle Storchenmühle vi augura buon viaggio Caros padres Para su hijo solamente lo mejor Nuestras felicitaciones Uds se han decidido a favor de un producto de marca de primera calidad de la casa Storchenmühle Criar un hijo es una de las tarea más hermosas que plantea la vida y al mismo tiempo una gran responsabilidad Está bien saber que Uds no están sólos a ese respecto sino que tienen a s...

Page 29: ...rtificado 0430 1141 Per essere adattato al sedile dell autoveicolo lo schienale dispone di due posizioni Per spostareloschienale sollevar lo leggermente 1 e portarlo nella posizione desiderata 2 El respaldo de la silla dispone de dos posiciones para su ad aptación al asiento del vehícu lo Para modificar la incli nación del respaldo levantarlo ligeramente 1 y llevarlo a la posición deseada 2 I E st...

Page 30: ...lreposacabezas a la altura deseada El borde superior del reposacabezas deberíaestarsiemprenivelado con el punto más alto de la cabeza del niño Inserire la cinghia addominale della cintura a tre punti nelle apposite guide ed allacciarla Assicurarsi di sentire un clic Introduzca el cinturón de la cadera del cinturón de tres puntos en la guía del cinturón y ciérrelo Al cerrarlo se debe oír un clic I ...

Page 31: ...mente nelle apposite guide La fibbia di chiusura della cintura deve trovarsi al di sotto della guida Procure que el cinturón esté bien emplazado en aquellos puntos que soporten peso El cierre del cinturón debe estar situado por debajo de la guía del cinturón I 5 1365 4 00 1 E sto1503 4 01 1 disk Storchenmühle My Seat XL Bild 5 6 Montageanleitung erst 25 11 03 ps geänd am 09 03 04 ps 6 1366 4 00 1 ...

Page 32: ...e el asiento del respaldo Después de haber vuelto a colocar la almohadilla asegure el respaldo apretando el tornillo de seguridad hasta su tope Aprire la chiusura a velcro sul retro dello schienale e rimuovere l imbottitura tirando da davanti Abra el cierre de velcro en el reverso del respaldo y saque la almohadilla tirando hacia delante I E sto1504 4 01 1 disk Storchenmühle My Seat XL Bild 7 8 Mo...

Page 33: ...parte trasera del reposacabezas y saque la almohadilla tirando hacia delante Tirare l imbottitura verso l alto e rimuoverla dal sedile Saque la almohadilla del asiento tirando hacia delante I 9 1362 4 00 1 10 1363 4 00 1 E sto1505 4 01 1 disk Storchenmühle My Seat Bild 9 10 Montageanleitung erst 25 11 03 ps geänd am 09 03 04 ps ...

Page 34: ...so in un apposito con tenitore per la carta Indicaciones para la eliminación de desechos Retirar la almohadilla de la silla sacar el resorte de trin quete desecharloselementos de material sintético y el re sorte de trinquete Cada ele mento de material sintético estáprovistodeespecificación del tipo de material y reloj calendario véase ilustración Echar las almohadillas a la basura y la hoja de ind...

Page 35: ...e e farlo revisionare presso il produttore Fissare sempre il seggiolino all interno del veicolo seguendo le istruzioni di montaggio anche se non viene utilizzato Un seggiolino non fissato può ferire altri occupanti dell auto già nel caso di una frenata d emergenza Avvertimento Avvisiamo espressamente sul fatto che nell utilizzo dei seggiolini per bambini non sono da escludere dei danneggia menti a...

Page 36: ...indumenti abbastanza imbottiti devono essere tolti prima di allacciarsi le cinture Proteggere sempre il seggiolino dai raggi diretti del sole per evitare che il bambino si possa scottare Il seggiolino può essere pulito con acqua tiepida e sapone La fodera può essere lavata in base alle indicazioni riportate in etichetta Il seggiolino non deve essere utilizzato senza fodera Non sostituire mai la fo...

Page 37: ...omunque naturali segni di usura o danni attribuibili ad un eccessivo carico ossia danni dovuti ad un utilizzo non adeguato o non appropriato In caso di maggiori domande non esitate a telefonarci o scriveteci semplicemente una e mail Telefono 49 0 9255 7766 E mail info recaro com sto5391 4 00 1 disk Storchenmühle My Seat Hinweis2 I Montageanleitung erst 15 04 08 ps geänd am ...

Page 38: ...silla debe examinarse en fábrica Se debe instalar la silla en el coche siguiendo las instrucciones de instalación aunque no se utilice la silla Una silla que no quede bien sujeta podría provocar daños en los ocupantes del coche al producirse un frenado de emergencia Advertencia Advertimos que al usar asientos para niños no se pueden excluir daños en los asientos del vehículo La norma de seguridad ...

Page 39: ...a silla Nunca deje al niño sin vigilancia Antes de poner el cinturón hace falta quitarse ropa voluminosa No exponga la silla directamente al sol y evite así que el niño se queme con la silla La silla se puede lavar con agua tibia y jabón La funda retirada se puede lavar según las instrucciones en su etiqueta Nunca utilice la silla sin funda La funda no se debe reemplazar jamás por otra que no esté...

Page 40: ... La garantía no se extiende a síntomas de desgaste natural y daños debido a carga excesiva o daños debido a uso inadecuado o no conforme a su destino Si Ud tiene todavía preguntas llámenos o escríbanos un email Teléfono 49 0 9255 7766 Email info recaro com sto5392 4 00 1 disk Storchenmühle My Seat Hinweis2 E Montageanleitung erst 15 04 08 ps geänd am ...

Page 41: ...s mais lindas que oferece a vida e ao mesmo tempo uma grande responsabilidade Está bem saber que os senhores não estão sòzinhos nesse respeito mas que têm ao seu lado um associado competente que optimiza a segurança do seu filho no carro desde o início a Storchenmühle A Storchenmühle deseja sempre boa viagem sto5393 4 00 1 disk Storchenmühle My Seat Hinweis1 P Montageanleitung erst 15 04 08 ps geä...

Page 42: ...ologação 0430 1141 O encosto para as costas disponibiliza duas posições para a adaptação do encosto ao assento do veículo Para o ajuste das costas levantar as costas ligeiramente 1 e girar para a posição desejada 2 P sto1586 4 02 1 disk Storchenmühle My Seat XL Bild 1 2 P Montageanleitung erst 09 03 04 ps geänd am 07 03 07 ps 16 04 08 ps 1 1357 4 00 1 1 2 2 1358 4 00 1 ...

Page 43: ...e cabeça deve estar sempre à mesma altura da parte superior da cabeça da criança Coloque o cinto de segurança subabdominal do cinto de três pontos de fixação nas guias do cinto e feche o fecho Prestar atenção ao encaixe audível P sto1587 4 00 1 disk Storchenmühle My Seat XL Bild 3 4 P Montageanleitung erst 09 03 04 ps geänd am 3 1360 4 00 1 Klick 4 1364 4 00 1 ...

Page 44: ...nto no apoio de cabeça Preste atenção à guia correcta do cinto nos pontos de carga O fecho do cinto tem de estar por baixo da guia do cinto P 5 1365 4 00 1 sto1588 4 00 1 disk Storchenmühle My Seat XL Bild 5 6 P Montageanleitung erst 09 03 04 ps geänd am 6 1366 4 00 1 ...

Page 45: ...ostas Quando voltar a colocar o forro fixe as costas rodando o parafuso de fixação até encostar Abra o fecho de velcro atrás nas costas e retire o forro pela frente P sto1589 4 00 1 disk Storchenmühle My Seat XL Bild 7 8 P Montageanleitung erst 09 03 04 ps geänd am A 7 1359 4 00 1 8 1361 4 00 1 ...

Page 46: ...air atrás no apoio de cabeça e retire o forro pela frente Retire o forro pela parte de cima do assento P 9 1362 4 00 1 10 1363 4 00 1 sto1590 4 00 1 disk Storchenmühle My Seat Bild 9 10 P Montageanleitung erst 09 03 04 ps geänd am ...

Page 47: ...m material sintético e as molas de engate Cada peça em material sintético tem indicações sobre o material com relógio com data ver imagem Colocar o forro no lixo doméstico Colocar o manual de instruções no papelão P 1134 4 01 1 PE 12 6 3 9 01 11 sto1591 4 00 1 disk Storchenmühle My Seat XL Bild 11 P Montageanleitung erst 09 03 04 ps geänd am ...

Page 48: ...ça tem de ser substituída A cadeira de criança tem de ser verificada na fábrica A cadeira de criança tem de ser fixada no automóvel sempre de acordo com o manual de instalação mesmo quando não é utilizada Um assentamento não seguro da cadeira pode ferir no caso de uma travagem brusca os outros ocupantes Advertimos que ao usar assentos para crianças não se podem excluir danos nos assentos do veícul...

Page 49: ...gilância Antes de pôr o cinto é preciso despir roupa volumosa Proteger a cadeira para criança da radiação solar directa para evitar que a sua criança se queime O assento pode ser limpo com água morna e sabão O revestimento removível pode ser lavado de acordo com as instruções de lavagem presentes na etiqueta A cadeira para criança não deve ser utilizada sem revestimento O revestimento nunca deve s...

Page 50: ...stende a síntomas de desgaste natural e danos devido a carga excessiva ou danos devido a utilização inadequada ou não conforme ao seu destino Se tiverem ainda perguntas chamem nos ou escrevam nos um email Telefone 49 0 9255 7766 Email info recaro com sto5394 4 00 1 disk Storchenmühle My Seat Hinweis2 P Montageanleitung erst 15 04 08 ps geänd am ...

Page 51: ...1847 4 01 1 NOTIZEN NOTES sto1847 4 01 1 disk Storchenmühle Notizen A6 erst 19 08 04 tk geänd am 05 07 05 ps ...

Page 52: ...1847 4 01 1 NOTIZEN NOTES sto1847 4 01 1 disk Storchenmühle Notizen A6 erst 19 08 04 tk geänd am 05 07 05 ps ...

Reviews: