background image

 9

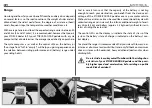
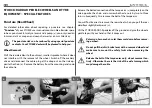
5.  Is the battery tight in its mounting 

(e) 

and is it locked correctly 

(f)

Never set off with a loose and unlocked battery.


For more information see chapter 

“mounting the battery”

.

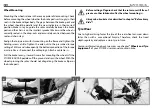
6.  Are the tyres in good condition and do they have sufficient pres-

sure? The minimum and maximum pressure (in bar or PSI) is indi-

cated on the tyre side 

(g)

.


For more information see chapter 

“Wheels and Tyre Equipment” 

of your STORCK user manual mountain bike and the enclosed oper-

ating instructions.

7.  Spin the wheels to check whether the rims are true. Watch the gap 

between rim and brake pad or, in the case of disc brakes, between 

frame and rim or tyre. Untrue rims can be an indication of tyres with 

ruptured sides or broken axles or spokes.


For more information see chapter 

“Wheels and Tyre Equipment”


of your STORCK user manual mountain bike and the enclosed oper-

ating instructions.

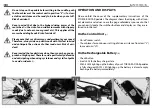
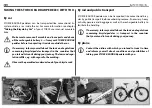
8.  Test the brakes in stationary by firmly pulling the brake levers to-

wards  the  handlebars 

(h)

. The  brake  pads  of  rim  brakes  must  hit 

the rim evenly with their entire surface without touching the tyre 

during braking or in open condition or in between. Make sure you 

cannot pull the brake levers all the way to the handlebars and check 

the  hydraulic  brake  cables  for  leaks.  Check  the  thickness  of  the 

brake pads, as well.


With  disc  brakes  you  should  directly  get  a  positive  braking  re-

sponse. If you have to actuate the brake lever more than once to 

get a positive braking response, have the STORCK-RADDAR pedelec 

checked by your STORCK dealer.


For more information see chapter 

“brake system” 

of your STORCK 

user  manual  mountain  bike  and  the  enclosed  operating  instruc-

tions.

e

f

g

h

Summary of Contents for STORCK-RADDAR Pedelec

Page 1: ...ead page 5 7 before your first ride Be sure to read also your STORCK user manual mountain bike Please perform the functional check on page 8 11 before every ride Supplementary Instructions STORCK RADDAR Pedelec ...

Page 2: ...re not intended to help you as semble a STORCK RADDAR pedelec from individual components to repair it or to make a partly assembled STORCK RADDAR pedelec ready for use These supplementary instructions are not applicable to any oth er than the displayed STORCK RADDAR pedelec Be sure to read also the STORCK user manual mountain bike that you have received from your STORCK dealer Technical details in...

Page 3: ...mp Carrier Rear light Rear brake Drive Front derailleur Cassette spockets Rear derailleur Chain Chainring Chrank set Pedal Stem Shifter Handlebar Display Brake lever Headset Front light Mudguards Fork Rotor Front brake Drop out Wheel Quick release Spoke Rim Tyre Valve Hub A B C Motor Rechargeable battery Display and control unit A B C ...

Page 4: ...Control Unit Thumb lever for setting of drive assistance On off rocker switch LED indicating the voltage state ...

Page 5: ...stance 15 Range 16 OPERATION AND DISPLAYS 17 On the Control Unit 17 On the Rechargeable Battery 17 RECHARGEABLE BATTERY 18 Removing the Battery 18 Charging the Battery 18 Charging Process 20 Mounting the Battery 20 Battery Care 21 Storing the Battery 21 Cleaning the Battery 21 STORCK RADDAR PEDELEC DRIVE SPECIAL FEATURES 21 Chain Wear 21 STORCK RADDAR PEDELEC WHEELS AND TYRE EQUIPMENT SPECIAL FEAT...

Page 6: ...sible during cycling be sure to carry out the functional check described in chapter Before EVERY Ride be fore setting off Even a manual as big as an encyclopaedia could not describe any possible combination of pedelec models and components or parts on the market It therefore focuses on your newly purchased STORCK RADDAR pedelec and standard components and provides useful in formation and warnings ...

Page 7: ... ride under the influence of prescription drugs drugs medicals alcohol or when you are tired Do not ride with a second person on your STORCK RADDAR pedelec and never ride without having both hands on the handlebars Observe the legal regulations concerning off road cycling These regulations may differ in each country Please respect nature when riding off road Only use your bicycle on signposted wel...

Page 8: ... h 15 mph Your STORCK RADDAR pedelec complies with these conditions Unlimited use of cycle lanes is permitted with your STORCK RADDAR pedelec Wearing a helmet is recommended but not compulsory STORCK RADDAR pedelecs are designed for cycling exclusively on lanes and roads with a smooth surface Only use trails that are allowed for bicycles STORCK RADDAR pedelecs are not suitable for off road use Usi...

Page 9: ... country you intend to use the STORCK RADDAR pedelec Have your STORCK RADDAR pedelec equipped accordingly before using it on public roads 3 The rechargeable battery of your STORCK RADDAR pedelec must be charged e before you set off for the first time Are you familiar with the handling and mounting of the recharge able battery f Before you set off for the first time check whether the battery is pro...

Page 10: ...r self familiar with your new gears in an area free of traffic if neces sary For more information see chapter Gears of your STORCK user manual mountain bike and the enclosed operating instructions 7 Are both saddle and handlebars properly adjusted The saddle should be set to a height from which you can just reach the pedal in its lowest position with your heel Check whether your toes reach to the ...

Page 11: ...ult in an uncontrolled start of your STORCK RADDAR pedelec Risk of accident G Beawarethatthedistanceyouneedtostop yourbicycle may increase when you are riding with your hands on bar ends g or on multi position handlebars The brake levers are not always within easy reach G Please note that in wet conditions the brake performance is less effective and the tyre grip reduced Keep this fact in mind in ...

Page 12: ...ountain bike and the enclosed operat ing instructions 2 Are the connections of the rechargeable battery the control unit and the motor correctly plugged b For more information see chapter Rechargeable Battery and Operation and Displays 3 Is your battery fully charged c Keep in mind to entirely recharge the battery after every ride You need not wait until the battery is empty For more information s...

Page 13: ...For more information see chapter Wheels and Tyre Equipment of your STORCK user manual mountain bike and the enclosed oper ating instructions 8 Test the brakes in stationary by firmly pulling the brake levers to wards the handlebars h The brake pads of rim brakes must hit the rim evenly with their entire surface without touching the tyre during braking or in open condition or in between Make sure y...

Page 14: ...s Turn on the lights as soon as dusk sets in For more information see chapter Legal Requirements for Rid ing on Public Roads of your STORCK user manual mountain bike 11 If your STORCK RADDAR pedelec has suspension check it as fol lows Press down on your STORCK RADDAR pedelec and see wheth er the spring elements retract and extend as usual For more information see chapters Suspension Forks Rear Sho...

Page 15: ...reached the endof their service lifemaybreakwithoutpreviouswarning Let your dealer maintain and service your STORCK RADDAR pedelec regularly and in cases of doubt it is always best to replace components After an accident 1 Check whether the wheels are still firmly fixed in the drop outs h and whether the rims are still centred with respect to the frame or fork Spin the wheels and observe the gap e...

Page 16: ... chain still runs on the chainrings and the sprockets If your STORCK RADDAR pedelec fell over to the chain side verify the proper functioning of the gears Ask somebody to lift the STORCK RADDAR pedelec by the saddle and carefully shift through all the gears Pay particular attention when shifting to the small gears and make sure the rear derailleur does not get too close to the spokes d as the chai...

Page 17: ... of the battery can result in water or moisture entry and short circuits or electric shocks The rechargable battery may catch fire or even explode In such a case contact your STORCK dealer immediately For more information see chapter Rechargeable Battery 6 Lift your STORCK RADDAR pedelec up a few centimetres and let it bounce onto the ground If this causes any sort of noise search for loosened bol...

Page 18: ... components made of aluminium can break without previous warning They must not be repaired i e straightened as the imminent risk of breakage will remain This applies in particular to the fork the handlebars the stem the cranks the seat post and the pedals When in doubt it it always recommendable to have these components replaced as your safety comes first Ask your STORCK dealer for help G If your ...

Page 19: ... the moment you stop pedalling The degree of assistance can be determined by shifting the push lever at the control unit it ranges continuously from low L f to full assist ance H g The drive assistance is provided until the maximum permitted speed of 25 km h 15 mph is reached and gently stopped up to this limit From approx 25 km h 15 mph on the drive switches into the recuperation mode Please note...

Page 20: ...city of the battery is not big enough to reach your destination you benefit from the decisive ad vantage of the STORCK RADDAR pedelec over a pure motor vehicle Without drive assistance it can be used like a conventional bicycle with unlimited range and in view of the inferior additional weight of auxil iary drive 4 5 kg and battery approx 2 5 kg nearly without losses in terms of riding characteris...

Page 21: ... when you ap proach at high speed Therefore ride particularly defensive and anticipating when using cycle lanes and cycle footpaths to avoid accidents f Operation and Displays Please unfold the cover of the supplementary instructions of this STORCK RADDAR pedelec The diagram shows the display with all con trol elements and values Leave this page unfolded as you read so that you can easily locate t...

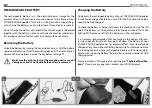
Page 22: ... wetted while the battery is removed Charging the Battery On delivery the rechargeable battery of your STORCK RADDAR pedelec is usually not charged Before you set off for the first time the battery needs to be fully charged To check the battery s charge state press the check button on the left side of the battery d The battery is fully charged when all five LEDs light up With only one LED left the...

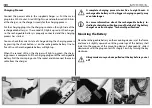
Page 23: ...an ambient temperature of approx 20 degrees Celsius Therefore after a ride e g in cold weather wait until the temperature of the battery has increased be fore starting the charging process h a If the rechargeable battery or the charger or parts of it must be replaced only use original spare parts In such a case contact your STORCK dealer a Do not dispose of your rechargeable battery with normal ho...

Page 24: ...ht up green the charg ing process is complete Pull the charging plug out of the rechargeable battery Pull the mains plug out of the socket and disconnect the mains cable from the charger A A complete charging process takes five to eight hours A rechargeable battery with a bigger charging capacity may even take longer iFor more information about the rechargeable battery in cluding technical specifi...

Page 25: ...er of explosion Cleaning the Battery Clean the battery shell with a dry or if at all a slightly moist rag g Do not direct the water jet of a high pressure cleaner at the rechargeable battery as there is a risk of water entry and or a short circuit STORCK RADDAR Pedelec Drive Special Features Chain Wear The drive chain is a wearable part of your STORCK RADDAR pedelec As the auxiliary drive of your ...

Page 26: ...drop out on the side op posite the chain b Remove the battery from the mounting and undo the cable tie Release the bolted connection of the torque arm c completely on the side opposite the chain and unscrew both axle nuts by two to three turns subsequently Also remove the bolt of the torque arm You will find it easier to remove the rear wheel when you pull the rear derailleur slightly backwards d ...

Page 27: ...ue setting of 40 Nm and subsequently the bolted connection of the torque arm to 8 Nm e Reconnect the cable plugs Attach a cable tie f Pull the brake lever g several times after mounting the wheel Lift the STORCK RADDAR pedelec off the ground and spin the wheel With the wheel spinning the rotor should not drag along the brake calliper or the brake pads gBefore setting off again check that the rotor...

Page 28: ... transit during your journey The laws and regu lations differ e g with regard to the marking A Observe the permitted maximum load of your bicycle rack By rail and public transport STORCK RADDAR pedelecs can be transported like conventional bicy cles by public transport Before embarking remove if necessary heavy or bulky panniers and baggage as well as the rechargeable battery to facilitate the han...

Page 29: ...the mounting device as well as the plug in connection on the rear drop out g that is on the side opposite the chain If the auxiliary drive still does not work after restarting switch it off and ride on with out drive assistance Contact your STORCK dealer immediately The auxiliary drive does not work as usually e g it propels the STORCK RADDAR pedelec without your pedalling Stop immediate ly Switch...

Page 30: ...TORCK dealer will have assembled and adjusted your STORCK RADDAR pedelec ready for use when you come to collect it Neverthe less your STORCK RADDAR pedelec needs regular care c Have your local STORCK dealer do the scheduled maintenance work This is the only way to ensure that all components function safely and reliably for many miles The bicycle will be due for its first service after 100 to 300 ki...

Page 31: ...rvicing and repairs are jobs best left to your STORCK deal er If you have your bicycle serviced by anyone else than an expert you run the risk that parts of your STORCK RADDAR pedelec will fail Risk of accident When working on your STORCK RADDAR pedelec restrict yourself to jobs for which you are equipped e g with a torque wrench including bits f and have the necessary knowledge gIf a component ne...

Page 32: ...20 Celsius 4 Fahrenheit to 60 Celsius 140 Fahrenheit Storage temperature 25 Celsius 13 Fahrenheit to 75 Celsius 167 Fahrenheit Protection class IP61 Weight 0 08 kg Lighting c d Nominal voltage 6 Volt Performance front lamp 40 Lux WARRANTY AND GUARANTEE You have full warranty rights for the RADDAR auxiliary drive within the first two years after purchase Rechargeable batteries are wearable parts Ne...

Page 33: ...STORCK BICYCLE GmbH Rudolfstraße 1 D 65510 Idstein Phone 49 0 61 26 9 53 60 0 fax 49 0 61 26 95 36 111 info storck bicycle com www storck bicycle com ...

Reviews: