MACHINE OPERATION
STORMCHASER 86038660 03/29/07
PRE-RUN INSPECTION
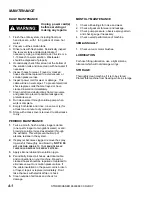
1. Check all fittings and connectors for proper
assembly.
2. Check all hoses for leaks. Repair or replace any
damaged hoses.
3. Check power cord(s) for any damage. If
damaged, replace.
EQUIPMENT SET-UP
1. Plug power cord from machine into properly
grounded wall outlet.
2. Turn vacuum motor switch on and off to make
sure there is electrical power at machine.
3. Connect vac hose to machine. Slide the swivel
cuff over the outlet on the tank.
4. Connect the hose to your machine and wand.
Pull back the knurled collar on the quick
disconnect coupler and push onto the connection
on the chassis. To avoid leaks, check to be that
a positive connection was made.
5. Pour clean, hot water into the solution tank.
To avoid possible tank distortion, water
temperature must not exceed 140 F (60C).
6. Add a non-foaming cleaning solution concentrate,
for use in hot water extractors at the proportions
noted on the container (See list below), into
solution tank.
NOTE: When using powder
cleaner, pre-mix with hot water in a clean
container before adding to the solution tank.
7. Turn pump and vacuum switch(s) to the on
position.
NOTE: Pump may need to be primed
for solution flow.
(see Priming the Pump)
8.
Start cleaning.
3-3
To prevent possible disease hazard, before
attempting to clean bodily fluids spills, you must
kill any viruses, germs or bacteria present in the
bodily fluid.
SUITABLE
INCOMPATIBLE
CHEMICALS
CHEMICALS
Alkalis
Aldehydes
Clorox II Bleach*
Aromatic Hydrocarbons
Defoaming
Agents
Butyls
Detergents
Carbon
Tetrachloride
Hydroxides
Clorox*
Oxygen Bleaches
Chlorinated Bleaches
Soaps
Chlorinated
Hydrocarbons
Sta-Puf Fabric
D-Limonene
Softener*
Lysol*
Vinegar
Methyls
(MEK)
Perchlorethylene (perc)
Phenols
Trichlorethylene
*Registered Trademark
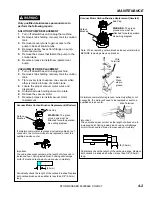
PRIMING THE PUMP
1. Connect priming hose to solution output on
machine.
2. Run open end of priming hose to vacuum intake.
3. Turn pump and both vacuums on and seal off
hose going into vacuum in take.
4.
Do this for 30 seconds or until pump is putting out
a steady flow of water.
Summary of Contents for 10070480
Page 9: ...THIS PAGE LEFT BLANK INTENTIONALLY STORMCHASER 86038660 03 29 07 2 5 ...
Page 19: ...STORMCHASER 86038660 03 29 07 4 6 THIS PAGE LEFT BLANK INTENTIONALLY ...
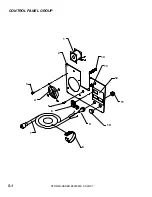
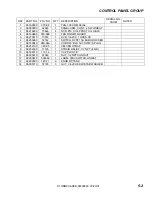
Page 20: ...CONTROL PANEL GROUP STORMCHASER 86038660 03 29 07 13 4 7 3 9 8 10 6 5 11 12 1 2 14 5 1 ...
Page 26: ...PUMP GROUP 100 PSI STORMCHASER 86038660 03 29 07 2 6 7 6 2 4 5 2 6 8 1 9A 9B 5 7 ...
Page 28: ...PUMP GROUP 200 PSI STORMCHASER 86038660 03 29 07 1 3 2 6 5 4 5 9 ...
Page 32: ...VACUMM GROUP UPPER STORMCHASER 86038660 03 29 07 1 2 3 5 6 7 9 10 8 15 11 12 14 13 4 16 5 13 ...
Page 34: ...VACUMM GROUP LOWER STORMCHASER 86038660 03 29 07 4 6 5 7 3 2 10 11 1 8 9 12 5 15 ...
Page 36: ...WIRING DIAGRAM 100 PSI STORMCHASER 86038660 03 29 07 5 17 ...
Page 37: ...WIRING DIAGRAM 200 PSI STORMCHASER 86038660 11 05 09 5 18 ...


