Page 54 /59
snengde_installation-product-SN-range v1.2 - Copyright Netasq 2015
PRESENTATION AND INSTALLATION GUIDE – SN RANGE
APPENDIX G: CHANGING A POWER SUPPLY MODULE (SN3000 AND SN6000)
APPENDIX G: CHANGING A POWER SUPPLY MODULE
(SN3000 AND SN6000)
SN3000
WARNNING
Certain Stormshield Network SN3000 appliances are not compatible with 48VDC power supply
modules and these appliances must not be used with 48VDC modules.
Affected products have the following Part number: SN3000-XA10A-101
If your SN3000 is one of such appliances, and you wish to use a 48VDC power supply module,
please contact your partner or reseller in order to replace your appliance.
1.
Disconnect the module from the electrical supply:
-
AC mains supply: disconnect the mains cable.
-
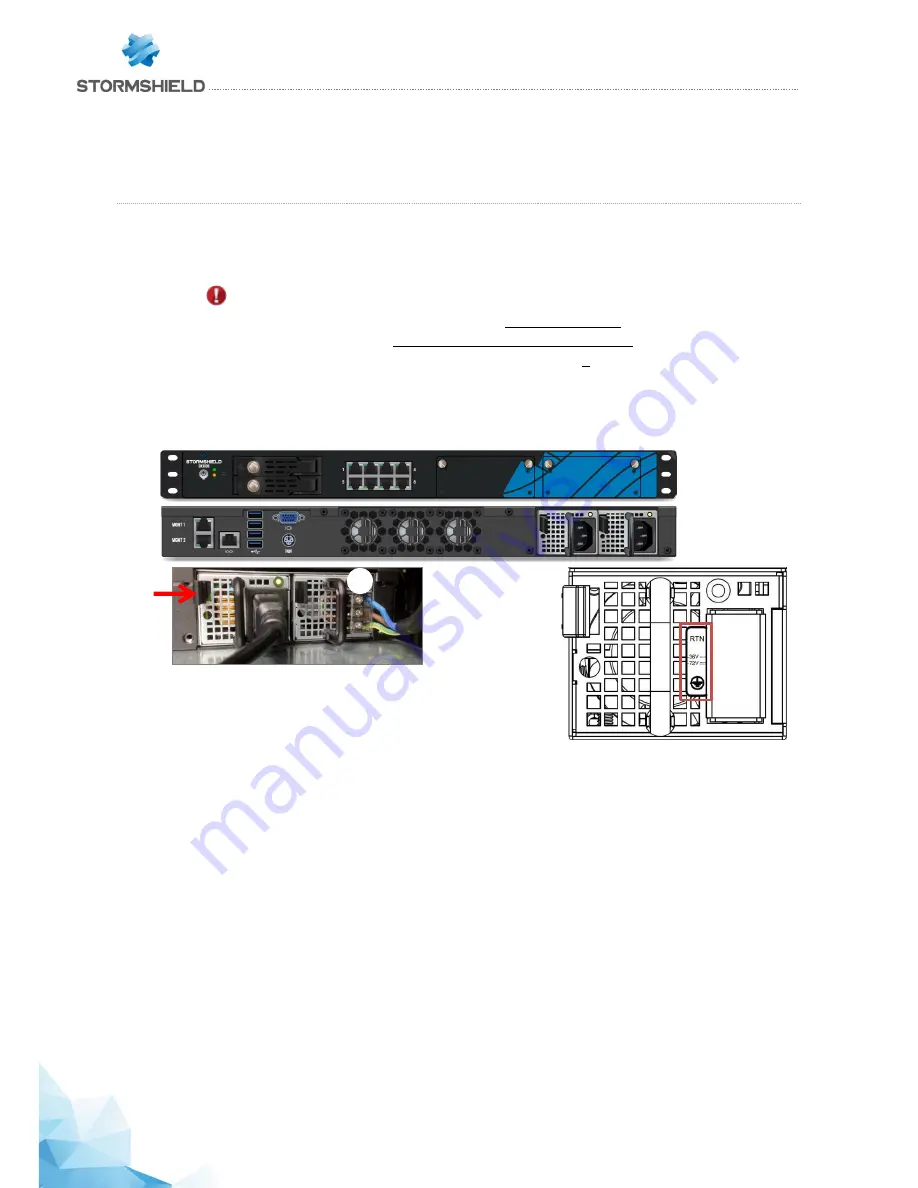
48VDC supply: first, disconnect the power cord from the 48VDC source. Next, on the module,
remove the protective cover
1
, then use a screwdriver to disconnect the three supply wires.
2.
Remove the module: push the release lever sideways toward the extraction handle, and use
the handle to pull the module. Take hold of the case of the module and remove it completely.
3.
Insert the new module with the product label facing upwards. When the module is fully
inserted, push until you hear a “click” that indicates that the module is locked in place. Verify
that the module is locked in place by pulling gently on the extraction handle: the module must
not move.
4.
Attach the new module to the electrical supply:
-
AC mains supply: connect the mains cable.
-
48VDC supply: with the power cord disconnected from the 48VDC supply, use a screwdriver to
attach the three wires of the power cord to the module
1
then reattach the protective cover.
The wires must be connected to the 48VDC module as shown above. Next, connect the power
cord to the 48VDC source.
1


