background image

Preparation

Instructions for use • C-MAC

®

 Pocket Monitor • DRE117_EN_V1.0_10-2020_IFU_CE-MDR

16

3.

Notify customer service.

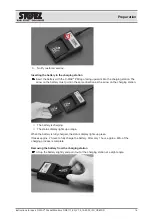
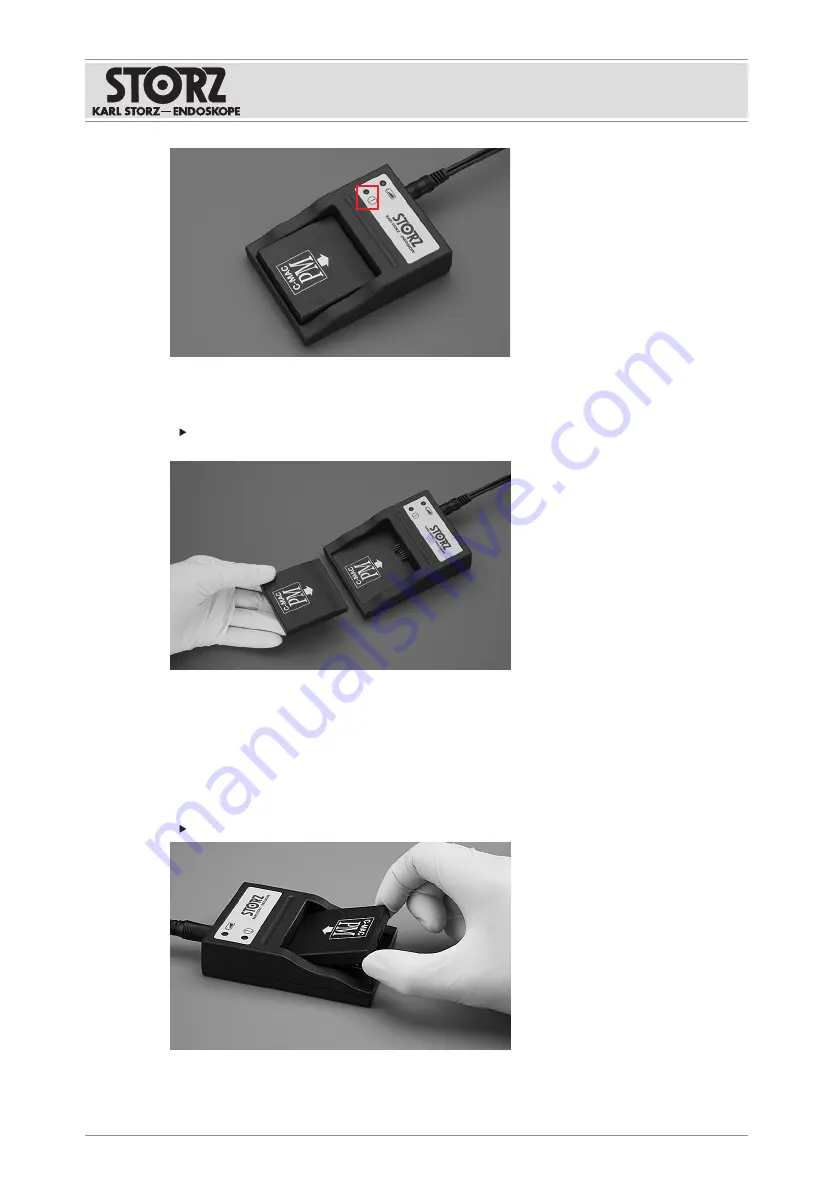
Inserting the battery in the charging station

Insert the battery with the C-MAC

®

 PM logo facing upwards into the charging station. The

arrow on the battery must point in the same direction as the arrow on the charging station.

ð

The battery is charging.

ð

The status display lights up orange.

When the battery is fully charged, the status display lights up green.

It takes approx. 2 hours to fully charge the battery. After only 1 hour, approx. 80% of the
charging process is complete.

Removing the battery from the charging station

Lift up the battery slightly and pull it out of the charging station at a slight angle.

Summary of Contents for C-MAC 8403XD

Page 1: ...Instructions for use C MAC Pocket Monitor en ...

Page 2: ... illustrations product descriptions and texts are the intellectual property of KARL STORZ SE Co KG Their use and reproduction by third parties require the express approval of KARL STORZ SE Co KG All rights reserved 10 2020 ...

Page 3: ...nt conditions 8 3 10 Risk of explosion 8 4 Product description 9 4 1 Product overview 9 4 2 Possible combinations 9 4 3 Technical specifications 10 4 4 Symbols employed 11 4 4 1 Symbols on the packaging 11 4 4 2 Symbols on the product 12 4 5 Ambient conditions 12 5 Preparation 14 5 1 Unpacking the product 14 5 2 Connecting the power supply 14 5 2 1 Charging the battery 14 5 2 2 Inserting and remov...

Page 4: ...magnetic compatibility 31 10 1 General notes on the operating environment 31 10 2 Table 1 Compliance level for immunity tests 31 10 3 Table 2 Test levels for proximity fields from HF wireless communications equipment 33 10 4 Table 3 Test levels for radiated and conducted immunity tests 33 10 5 Table 4 Emission class and group 35 10 6 Table 5 Recommended separation distances between portable and mo...

Page 5: ...he instructions for use of the combinable products carefully and follow all the safety notes and warnings 1 3 Scope These instructions for use are valid for the following products Item number Product 8403XD C MAC Pocket Monitor 8403XDC C MAC Pocket Monitor Protective Cover 1 4 Description of warning messages To prevent any injury to persons or damage to property the warnings and safety notes in th...

Page 6: ...opes and video laryngoscopes is contraindicated if in the opinion of the responsible physician use is contraindicated or the patient is not able to undergo surgery or anesthesia due to his or her general condition Laryngoscopes and video laryngoscopes must not be used for procedures in direct contact with the central nervous system CNS and central cardiovascular system 2 4 Intended conditions of u...

Page 7: ...ure prior to use Check the product for the following points before and after every use Completeness Good working order Rough surfaces left inadvertently Sharp corners Burred edges Correct assembly of the components Functionality Do not leave broken off components inside the patient Do not overload the product with mechanical stress Do not bend bent products back to their original position 3 3 Unst...

Page 8: ...reprocessed under unsuitable conditions patients users or third parties may be injured and the device can be damaged Observe the ambient conditions listed in the instructions for use and reprocessing 3 10 Risk of explosion The product can generate sparks which cause combustible or flammable gases and liquids to ignite or explode This may cause injuries to patients users and third parties The produ...

Page 9: ...er 2 Battery compartment 5 C MAC Video Laryngoscope 3 Video connector for C MAC Video Unit 6 BlueButton multifunction button 4 2 Possible combinations Video units from other manufacturers cannot be connected Article Order no C MAC Video Laryngoscope MAC 3 8403AX C MAC Video Laryngoscope MAC 3 8403AXC C MAC Video Laryngoscope MAC 4 8403BX C MAC Video Laryngoscope MAC 4 8403BXC C MAC Video Laryngosc...

Page 10: ...MAC S Video Laryngoscope MILLER 0 051110 10 C MAC Video Laryngoscope MAC 3 8404AX C MAC Video Laryngoscope MAC 3 8404AXC C MAC Video Laryngoscope MAC 4 8404BX C MAC Video Laryngoscope MAC 4 8404BXC C MAC Video Laryngoscope MIL 0 8404DXC C MAC Video Laryngoscope MAC 0 8404EXC C MAC Video Laryngoscope MIL 1 8404GXC C MAC Video Laryngoscope D BLADE 8404HX C MAC Video Laryngoscope D BLADE Ped 8404HXP ...

Page 11: ...h 1 5 m Dimensions Wall power supply W x H x D Approx 60 mm x 70 mm x 35 mm without power adaptor Charging station W x H x D Approx 103 mm x 75 mm x 25 mm Weight Wall power supply Approx 135 g Charging station Approx 120 g USB Data Cable 8403XDD Dimensions length 2 m Weight 120 g USB port 2 0 Connecting Cable 8403XDP Dimensions length 50 m Weight 86 g 4 4 Symbols employed 4 4 1 Symbols on the pack...

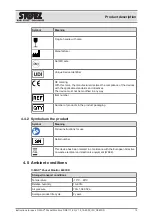
Page 12: ...d directives The device must not be modified in any way Item number Number of products in the product packaging 4 4 2 Symbols on the product Symbol Meaning Follow instructions for use Serial number This device has been marked in accordance with the European Directive on waste electrical and electronic equipment WEEE 4 5 Ambient conditions C MAC Pocket Monitor 8403XD Storage transport conditions Te...

Page 13: ... conditions Temperature 0 C 40 C Relative humidity 30 70 Air pressure 700 1 080 hPa Battery Charger 8403XDL USB Data Cable 8403XDD Connecting Cable 8403XDP Storage transport conditions Temperature 10 C 60 C Relative humidity 5 95 Operating conditions transient area Temperature 0 C 40 C Relative humidity 5 95 ...

Page 14: ...Li ion battery 1 Before each use ensure that the power supply to the Pocket Monitor is provided for the planned procedure 2 Use the charge level symbol to check the battery charge level and recharge the battery if required The battery must be recharged at the latest when the red charge level symbol is displayed Battery charging and usage time Usage time Approx 1 5 hours Charging time Approx 2 hour...

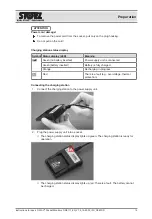
Page 15: ...nserted Power supply unit is connected Green battery inserted Battery is fully charged Orange Recharging in progress Red There is a fault e g overvoltage thermal protection Connecting the charging station 1 Connect the charging station to the power supply unit 2 Plug the power supply unit into a socket ð The charging station status display lights up green The charging station is ready for operatio...

Page 16: ...e battery must point in the same direction as the arrow on the charging station ð The battery is charging ð The status display lights up orange When the battery is fully charged the status display lights up green It takes approx 2 hours to fully charge the battery After only 1 hour approx 80 of the charging process is complete Removing the battery from the charging station Lift up the battery slig...

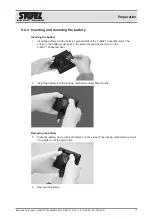
Page 17: ... the battery compartment of the C MAC Pocket Monitor The arrow on the battery must point in the same direction as the arrow on the C MAC Pocket Monitor 2 Insert the battery into the locking mechanism using both thumbs Removing the battery 3 Press the battery down with both thumbs on the sides of the locking mechanism and pull it towards you at the same time 4 Remove the battery ...

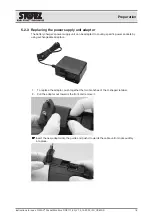
Page 18: ...y charger s power supply unit can be adapted to country specific power sockets by using exchangeable adaptors 1 To replace the adaptor push together the two branches of the U shaped retainer 2 Pull the adaptor out towards the front and remove it Insert the new adaptor into the guide and push it towards the cable until it clicks audibly into place ...

Page 19: ...for USA Japan Adaptor for UK Adaptor for Australia Adaptor for Europe 5 3 Connecting the product The C MAC Pocket Monitor can be connected to a C MAC Video Unit while folded up or down Fully insert the product s video connector into the C MAC Video Unit socket The connector and socket orientation pins must be precisely aligned on top of each other ...

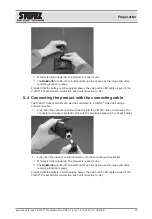
Page 20: ...le The C MAC Pocket Monitor can also be connected to a C MAC Video Unit using a connecting cable 1 Fully insert the connecting cable connector into the C MAC Video Unit socket The connector and socket orientation pins must be precisely aligned on top of each other 2 Fully insert the product s video connector into the connecting cable socket ð Monitor is folded upwards The product is ready for use ...

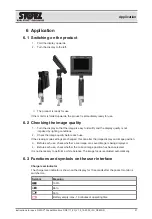
Page 21: ...onditions 2 Check the image quality before each use If the viewing mode settings are changed this can alter the image display and image position 3 Before each use check whether a live image or a saved image is being displayed 4 Before each use check whether the correct image position has been selected It is not necessary to perform a white balance The image focus is adjusted automatically 6 3 Func...

Page 22: ...ue information bar is displayed at the top of the screen for a few seconds Display Meaning Left Remaining storage capacity in minutes Center Current software version Right Number of the directory in which the saved data are stored Green information bar After the recording function is triggered the green information bar is displayed at the top of the screen for a few seconds ...

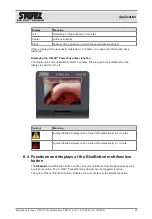
Page 23: ... display turns off automatically after 10 minutes Warning symbols indicate when the display is about to turn off Symbol Meaning Symbol flashes Display will be turned off automatically in 2 minutes Symbol flashes Display will be turned off automatically in 1 minute 6 4 Functions and displays of the BlueButton multifunction button The BlueButton multifunction button on the video unit activates singl...

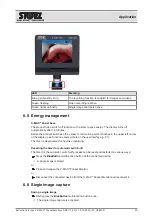
Page 24: ...ellow or red warning symbol flashes in the upper left corner of the display see Functions and symbols on the user interface p 21 The timer is deactivated during video recording Resetting the timer for automatic switch off The timer for the automatic switch off process can be reset and restarted in various ways Press the BlueButton multifunction button of the connected device ð A single image is st...

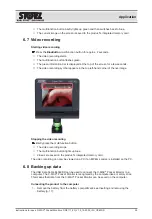
Page 25: ...ymbol appears in the top left hand corner of the live image Stopping the video recording Briefly press the multifunction button ð The video recording stops ð The multifunction button lights up blue ð Videos are saved on the product s integrated memory card The video recording can only be viewed on a PC if an MPEG 4 codec is installed on the PC 6 8 Backing up data The USB Data Cable 8403XDD can be ...

Page 26: ... pins must be precisely aligned on top of each other 3 Connect the data cable s USB plug to the computer ð The product is powered by the computer ð The computer recognizes the product after approx 7 seconds ð The Check and repair message is displayed on the computer 4 Start the process on the computer ð The product is connected to the computer 5 Transfer data from the product to the computer ...

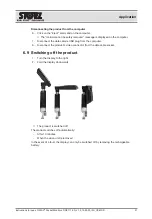
Page 27: ...he computer 7 Disconnect the data cable s USB plug from the computer 8 Disconnect the product s video connector from the data cable socket 6 9 Switching off the product 1 Turn the display to the right 2 Fold the display downwards ð The product is switched off The product switches off automatically After 10 minutes When the video unit is removed In the event of a fault the display can only be switc...

Page 28: ... use C MAC Pocket Monitor DRE117_EN_V1 0_10 2020_IFU_CE MDR 28 7 Disassembly 7 1 Disassembling the product The product can be removed during operation and connected to another video unit Disconnect the product from the video unit ...

Page 29: ...t infections and airborne infections products must first be decontaminated KARL STORZ reserves the right to send back contaminated products 8 2 Disposing of the product The product meets the requirements of the Directive on Waste Electrical and Electronic Equipment WEEE Within the scope of application of this directive KARL STORZ SE Co KG is responsible for the proper disposal of this product 1 Th...

Page 30: ...sories Item Order no Charging Station for C MAC PM 8403XDL Rechargeable Battery 8403XDA C MAC Pocket Monitor connecting cable 8403XDP USB Data Cable 8403XDD Protection cap for C MAC System Interface 8403YZ C MAC PM Protective Cover 8403XDC 9 2 Spare parts Item Order no Power Supply Unit for C MAC PM 8403XD ET27 30 0005770 Connecting Cable 8403XDP ...

Page 31: ...tection for radio transmission operation The user might need to take mitigation measures such as relocating or re orienting the product The emission characteristics of this product make it suitable for use in professional healthcare facilities as well as in a residential environment CISPR 11 Class B This product offers adequate protection to radio communication service In the rare event of interfe...

Page 32: ...d 315 phase angles Voltage interruption 100 for 250 300 cy cles The power supply qual ity should be that of a typical commercial or hospital environment If the user of the product requires continued op eration in the event of interruptions to the power supply network it is recommended that the product be oper ated with an uninter ruptible power supply or a battery Magnetic field at the power fre q...

Page 33: ...GSM 1900 DECT LTE band 1 3 4 25 UMTS Pulse modula tion 217 Hz 28 28 1 845 1 970 2 450 2 400 2 570 Bluetooth WLAN 802 11 b g n RFID 2450 LTE band 7 Pulse modula tion 217 Hz 28 28 5 240 5 100 5 800 WLAN 802 11 a n Pulse modula tion 217 Hz 9 9 5 500 5 785 10 4 Table 3 Test levels for radiated and conducted immunity tests Guidelines and manufacturer s declaration electromagnetic immunity The product i...

Page 34: ... 800 MHz to 2 5 GHz Interferences may occur in the vicinity of equipment marked with the following symbol Note At 80 MHz and 800 MHz the higher frequency range applies Note These guidelines may not apply in all situations The propagation of electromagnetic waves is affected by absorptions and reflections of buildings objects and people a Field strengths from fixed transmitters e g base stations fo...

Page 35: ...aration distances between portable and mobile HF communications equipment and the product The product is intended for use in an electromagnetic environment in which HF disturbances are controlled The customer or user of the product can help prevent electromagnetic interference by maintaining a minimum distance between portable and mobile HF communications equipment transmitters and the product as ...

Page 36: ...tation 8403XDL CMOS videoendoscope de fective Send the CMOS videoendoscope or C MAC Pocket Monitor to KARL STORZ for repair TFT screen defective Rechargeable battery is empty or defective C MAC Pocket Monitor can not be switched off Internal firmware blocked Remove rechargeable battery C MAC Pocket Monitor de fective If the fault reoccurs send the C MAC Pocket Monitor to KARL STORZ for repair Clou...

Page 37: ...computer Clear storage Storage full Image video cannot be shown on the PC screen No MPEG 4 codec installed Install an MPEG 4 codec on the PC Format the C MAC Pocket Monitor storage memory on the PC with FAT 32 standard Creating storage appears in the white bar at the top Corrupt file system The message disappears automatically after approx 10 minutes the device must remain connected to the power s...

Page 38: ...RL STORZ Endoscopy Suomi OY Taivaltie 5 01610 Vantaa Finland Phone 358 0 96824774 Fax 358 0 968247755 Email asiakaspalvelu karlstorz fi KARL STORZ SE Co KG Representation Office Kęstučio st 59 Lenktoji st 27 08124 Vilnius Lithuania Phone 370 5 272 0448 Mobile 370 685 67 000 Email info lt lv karlstorz com KARL STORZ Endoskopi Danmark A S Skovlytoften 33 2840 Holte Denmark Phone 45 45162600 Fax 45 4...

Page 39: ...Building B 18F Beijing IFC No 8 Jianguomenwai Street Chaoyang District 100022 Beijing People s Republic of China Phone 86 10 5638188 Fax 86 10 5638199 Email info karlstorz com cn KARL STORZ Endoscopy Shanghai Ltd Shanghai Branch Room 701A Building 5 Room 501 Building 7 No 3000 Longdong Avenue Pilot Free Trade Zone 201203 Shanghai People s Republic of China Phone 86 21 60339888 Fax 86 21 60339808 E...

Page 40: ...ORZ SE Co KG Dr Karl Storz Straße 34 78532 Tuttlingen Postfach 230 78503 Tuttlingen Germany Phone 49 7461 708 0 Fax 49 7461 708 105 E mail info karlstorz com www karlstorz com DRE117 EN V1 0 10 2020 IFU CE MDR ...

Reviews: