background image

Cooking On Induction Hobs

Do not leave an empty pan on a heating zone.

Pans should be placed in the centre of the heating
zone.

Never heat up a sealed tin of food, as it may

explode. 

When you use a pan with a non-stick coating (eg;

Teflon) with little or no fat, heat the pan first for a
moment on setting 

6

or 

7

.

We recommend that you do not put metal cooking
utensils, cutlery, knives or other metal objects on

the hob, as they could become hot if they are near
a cooking area which is in use.

It is perfectly possible to use a pan w ith a small e r

diameter than that of the ring marked on the vit ro -
c e ra m i c glass (note that we recommend a minimum

5” pan base diameter); there will be no loss of
energy as is the case with conventional cookers

(electricity and gas).

Nothing should ever be left lying on the hob.

Lift pans onto and off the hob, rather than sliding

them across the surface, to avoid marks and
scratches.

As soon as the water boils, turn the cooking zones
down to a lower setting; this will help prevent pans

boiling over.

As pans are on a smooth surface, they will move

easily if knocked accidentally; turning pan handles
so they are not overhanging the edge of the hob,

will help prevent this happening and keep them out
of the reach of children.

Be careful when cooking foods in salted water, or

foods containing large amounts of sugar or syrup, if
they are spilt onto hot areas of the hob they may

damage the glass.   
Wipe any spillage as soon as  possible.
Use pans which are large enough to avoid overflows
onto the vitro-ceramic glass hob surface.

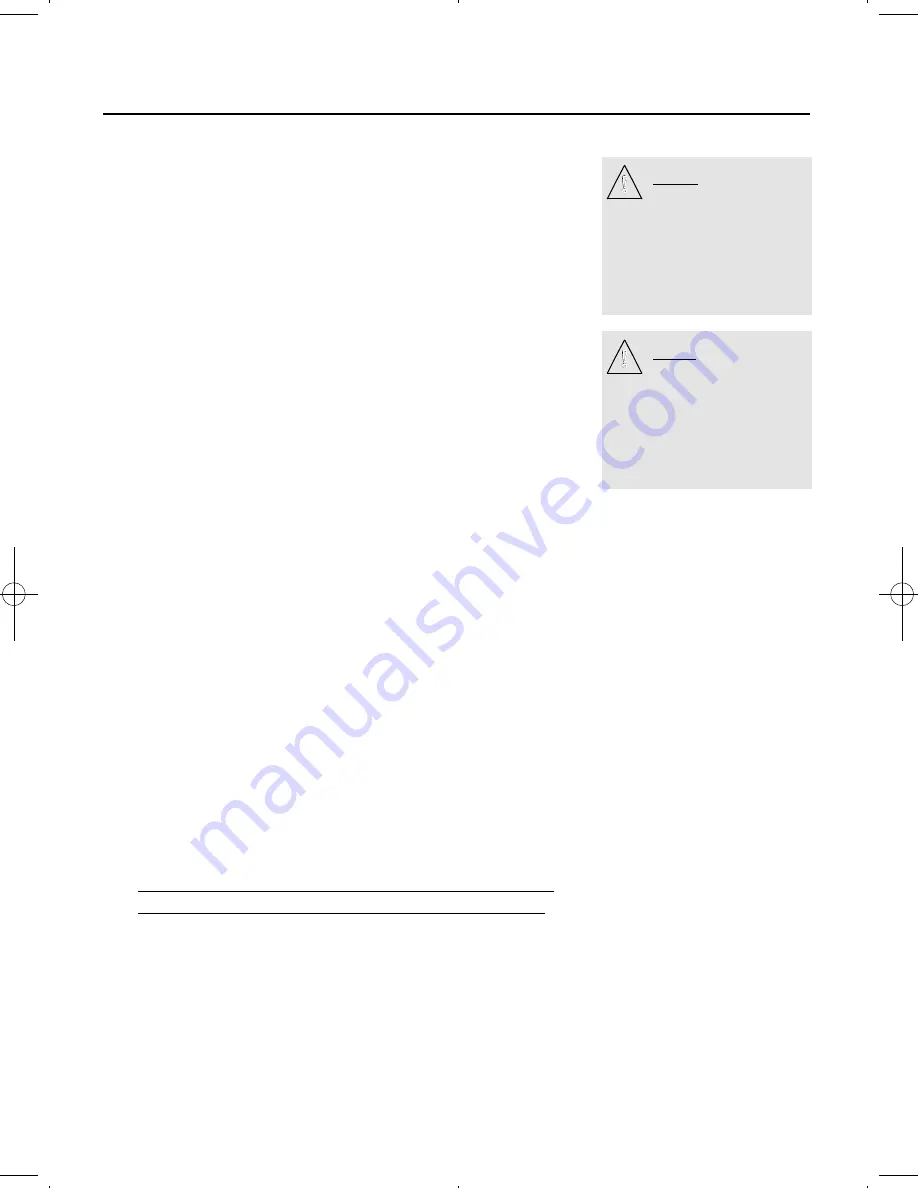
Do  not use  the  hotplate

surface  for  storage,  as  a

chopping  board  or  work

surface.   This  may  dam-

age  the  glass  or  cause  it

to shatter without warning

due  to  small  chips  in  the

glass.

!

A l w a y s s w itch  off  the

appliance  after  use.   Do

not  use  the  pan  detector

(if fitted)  as  a  method  of

s w itching  off  the  appli-

ance.

!

15

08 26296 00 - C   TCi  22/10/07  10:07 am  Page 15

Summary of Contents for S7-C600TCi

Page 1: ...S7 C600TCi S7 C900TCi Handbook ...

Page 2: ...l Data 4 About The S7 C900CTi Includes Technical Data 5 Safety 6 What The Symbols Mean 7 Using The Hob general information 8 10 Induction safety types of pans cooking tips 11 16 Care Cleaning 17 Troubleshooting 19 Installation 20 Service Record 25 Customer Care Inside back cover ...

Page 3: ...s we recommend that you wear protective gloves when installing and moving this appliance This will prevent any injury Our policy is one of constant development and improvement Strict accuracy of illustrations and specifications cannot be guaranteed Modification to design and material may be necessary subsequent to publication Always use a registered installer for this appliance WARNING For your ow...

Page 4: ...s based on 220 240 V 50Hz Small 1 4 induction Medium 1 85 induction Small 1 4 induction Hob Dimensions Width 580mm Depth 510mm Height ABOVE WORKTOP Height FLUSH FITTED 4mm 0mm Cut out required WxD 552mm x 482mm Hob Aesthetics Features 4 elements Child lock Timer Boost med 2 5kW Boost sml 1 8kW Keep warm Easy clean glass hob 4 ...

Page 5: ... appliance comes fitted with a cable for installation Large 2 3 induction Medium 1 85 induction Small 1 4 induction Hob Dimensions Width 880mm Depth 510mm Height ABOVE WORKTOP Height FLUSH FITTED 4mm 0mm Cut out required WxD 848mm x 480mm Hob Aesthetics Features 5 elements Child lock Griddle Timer Boost ex lge 3 7kW Boost lge 3 2kW Boost med 2 5kW Boost sml 1 8kW Keep warm 5 ...

Page 6: ...y with the appliance Keep all flammable materials away from the hob Do not place aluminium foil or plastic utensils on hot surfaces Turn pan handles to a safe position so they are out of reach of children not overhanging the appliance and cannot be caught accidentally Commercial simmering aids should not be used as they create excessive temperatures that can dam age the surface and may cause a haz...

Page 7: ...lectromagnetic interference Your induction cooking hob thus complies fully with the statutory re q u i rements Directive 89 336 EEC It is designed to not interfere with the functioning of other electrical equipment as long as these also comply with the same regulations Your induction hob generates magnetic fields in its immediate vicinity So that there is no interference between your cooking hob a...

Page 8: ...energy heat into that metal The trans ferred enegry causes the metal cooking vessel to become hot In this way the heat for cooking food is produced directly inside the pan the hob top hardly heats up at all as it only receives heat from the pan placed on it Compared with conventional cooking hobs the induction hob is Quicker Full wattage of power is immediately available at the heating zone More e...

Page 9: ...for induction cooking saucepan pot frying pan chip pan etc Some stainless steel pans have copper bases which are usually not suitable Aluminium pans with a special base Choose pans with a thick base as this ensures more even cooking the heat is more evenly distrib uted The pan test Because of its leading edge technology your induction hob is able to recognise most pans Place your pan on a heating ...

Page 10: ...e hob will cease working until you touch the control again with any other icon resuming at exactly the same heat setting Minus For use with functions such as the minute minder or timer if fitted Plus For use with functions such as the minute minder or timer if fitted Boost A full power boost until the contents of the pan is at boiling point The heat setting will then reduce to a pre selected heat ...

Page 11: ...lt setting of 9 in the zone The heat setting can be adjusted using the or icons whenever you need to during cooking To switch off the individual elements either touch and hold the icon until 0 appears or touch and hold both and To switch off all of the elements and the entire hob touch the power on off Increase decrease Element position Lock Pause Resume Power On Off Boost Simmer P _ _ _ _ _ Incre...

Page 12: ...Choose and assign Choose either the simmer or boost function and assign it to element by touching either the or on the con trol panel which corresponds to the desired element Simmer This function uses a very low constant heat ideal for delicate sauces and melting chocolate and but ter In the heat setting area near to the element you have selected a u shape will illuminate to indi cate Simmer is in...

Page 13: ...red heat setting Activate the timer by touching the and which are located below the timer LED display Around the timer there are neon lights surrounding the display these correspond to you heating zones These will flash when not selected and remain static when selected Touch and hold the and until the neon light representing the chosen zone is illuminated Use the and to set the required duration T...

Page 14: ...eel pans Stainless steel pans should be cleaned with a soft cloth and soapy water Appearance of white marks Cause salt added to cold water Solution add salt when the water boils Appearance of specks Cause hard water Solution boil diluted vinegar in the pan then rinse and dry Burned food stuck to the bottom of the pan Cause temperature too high Solution leave the pan to soak or boil soapy water in ...

Page 15: ...e hob rather than sliding them across the surface to avoid marks and scratches As soon as the water boils turn the cooking zones down to a lower setting this will help prevent pans boiling over As pans are on a smooth surface they will move easily if knocked accidentally turning pan handles so they are not overhanging the edge of the hob will help prevent this happening and keep them out of the re...

Page 16: ...ter in order to dilute the starch they contain Make sure you use a sufficiently large pan to avoid boiling over the temperature setting may need to be reduced to maintain a simmer Mushrooms should be poached in a small quantity of boiling water with salt butter and lemon juice When liquids boil reduce the control setting to main tain a simmer Vegetables will cook quicker if chopped in smaller piec...

Page 17: ... The following recommendations will help to keep the ceramic glass surface bright and clean Use a dampened paper towel or clean damp cloth to apply a small dab of cleaner conditioner to clean each heating area Use another paper towel or a clean dry soft cloth to wipe dry and then polish the whole glass surface To remove any stubborn marks or heavy soiling a non scratching mild cream cleaner may be...

Page 18: ...o not use a dishcloth or dish sponge to wipe the hob this can leave a film of detergent on the surface which will discolour the hob next time a heating area is used Clean cloths kept for the cleaning of the hob can be used Do not use too much cleaner conditioner only a thin coating is required any excess may burn on and dis colour the hob when it is next in use If persistent stains or marks remain...

Page 19: ... a few minutes after the hob has been turned off To cool down the electronics Once a cooking zone has been turned on the indicators on the panel keep flashing The pan you are using is not suitable for induction cooking or is less than 12cm 5 in diameter The hob won t work The indicators don t come on The electricity supply is not reaching the appliance faulty supply or connection Check the fuses a...

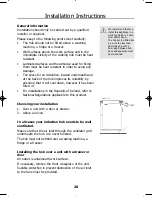
Page 20: ...ations in the Republic of Ireland refer to National Regulations applicable to this product Choosing your installation 1 Over a unit with a door or drawer 2 Above an oven In all cases your induction hob needs to be well ventilated Make sure that the air inlet through the ventilator grid underneath the hob are never blocked The hob must not be fitted over a washing machine a fridge or a freezer Inst...

Page 21: ...ven A minimum 9mm gap must be maintained between the oven top and the base of the hotplate The appliance MUST be fitted on the runner kit provid ed It is not suitable for shelf type installation if the plinth line is to be maintained Ovens other than Stoves Refer to the manufacturer s instructions for clearances above the oven We recommend a 9mm gap between hob and appliance should the work surfac...

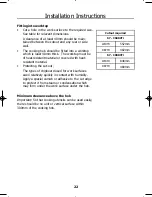
Page 22: ...l or covered with heat resistant material Protecting the cut out The types of chipboard used for work surfaces swell relatively quickly in contact with humidity Apply a special varnish or adhesive to the cut edge to protect it from steam or condensation which may form under the work surface under the hob Minimum clearance above the hob Important So that cooking utensils can be used easily there sh...

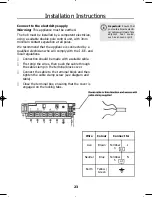
Page 23: ... electrician using a suitable double pole control unit with 3mm minimum contact separation at all poles We recommend that the appliance is connected by a qualified electrician who will comply with the I E E and local regulations l Connection should be made with a suitable cable l First strip the wires then push the cable through the cable clamp in the terminal block cover l Connect the cable to th...

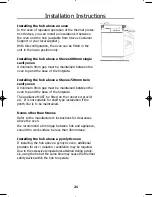
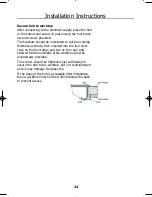
Page 24: ...top thickness as shown then inserted into the four slots two on the front edge and two on the rear and screwed into the underside of the worktop using the woodscrews provided The screws should be tightened just sufficiently to secure the hob to the worktop but not overtightened as this may damage the glass top If the base of the hob is accessible after installation than a partition must be fitted ...

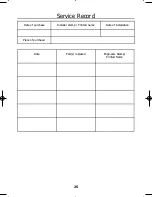
Page 25: ...Service Record Date of purchase Installer stamp Printed name Date of installation Place of purchase Date Part s replaced Engineers Stamp Printed Name 25 ...

Page 26: ......
Page 27: ... 22 22 502 Calls will be answered in strict rotation as soon as possible Please record your model and serial number in the spaces above Having these numbers to hand will help us to help you quickly and more efficiently should you need to call us for any reason Model Number Serial Number ...

Page 28: ...ey Lane Prescot Merseyside L35 2XW Tel Customer Care 0871 222 2502 Trade Support 0871 222 2625 Customer Support Line 0871 222 2635 Fax 0871 222 2645 Stoves is a member of Glen Dimplex Home Appliances 08 26296 00 2007 BI Hob ...

Reviews: