23
13.2 GEOMAGNETIC CALIBRATING YOUR DRONE
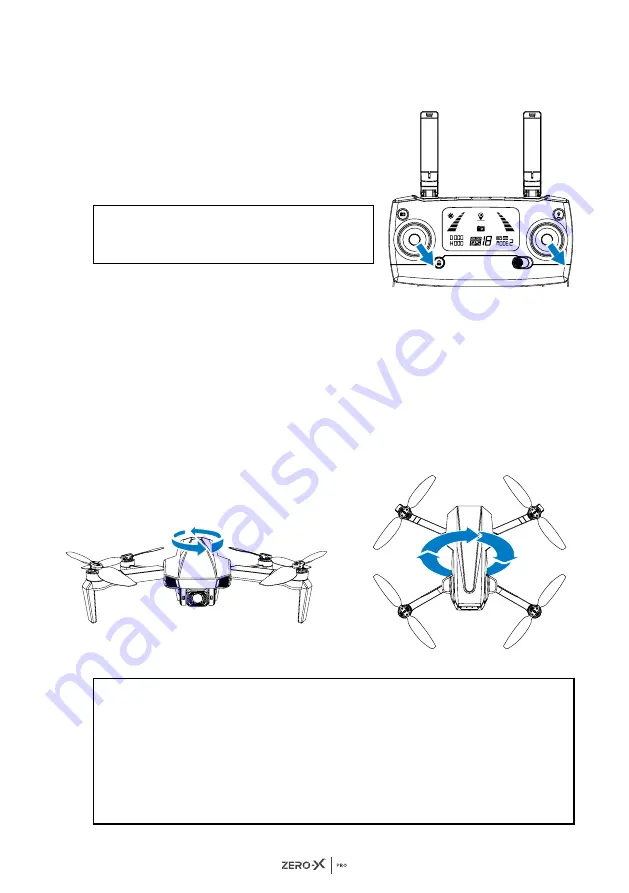
To enter into calibration mode, you must unlock the Drone first.
To do this, pull both thumb sticks to the bottom right corner together at
the same time. (See picture for your
reference).
There are two steps to calibrate your
Drone successfully: Horizontal calibration
& Vertical calibration.
NOTE:
• Do not calibrate the Drone in an area with strong magnetic fields, parking lots or
construction sites with underground reinforcement.
• Do not carry any magnetic objects or materials (such as keys or mobile phones) when
you are calibrating your Drone.
• Keep away from large metal objects during the calibration process.
• It is recommended not to wear smart watches while flying your Drone as it may
interfere with the GPS signal.
NOTE:
• It is recommended to calibrate your Drone
before each flight.
STEP 1: HORIZONTAL
CALIBRATION
Turn on the Drone and remote and
pair them if they are not paired
already, the indicator light will turn
yellow and start flashing. Hold the
Drone horizontally and rotate it
360° by the centre at least 3 times.
When the horizontal calibration has
completed the lights will change to
flashing
green
slowly.
STEP 2: VERTICAL CALIBRATION
Hold the Drone vertically with the
camera facing up and rotate it 360°
by the centre at least 3 times. Be
sure to keep the camera always
facing up, otherwise calibration will
not work. When vertical calibration
is completed and successful the
indicator light will turn to
yellow /
green.
Summary of Contents for Zero-X Pro ZXMP-D500
Page 1: ...USER MANUAL stratus ZXMP D500...
Page 2: ......
Page 3: ...1...
Page 39: ...37 25 0 NOTES...
Page 40: ...38...
Page 41: ...39...


