21
Commissioning
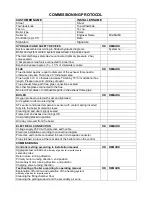
Instruction/commissioning/handover
Commissioning the control
Setting the boiler temperature
Instruction/commissioning/
handover
Following completion of the
hydraulic and electrical installation,
the boiler must be commissioned by
a qualified specialist.
Ensure all parts are fitted in
accordance with these instructions.
On completion of the installation
allow a suitable period of time for
any fire cement and mortar to dry
out, before lighting the boiler. Once
the boiler is under fire check all
seals for soundness and check that
the flue is functioning correctly and
that all products of combustion are
vented safely to atmosphere via the
chimney terminal.
On completion of the installation and
commissioning ensure that the
operating instructions for the boiler
are left with the customer. Please
advise the customer on the correct
use of the appliance and warn them
to use only the recommended fuel
for the boiler.
Advise the user what to do should
smoke or fumes be emitted from the
stove.
As part of the handover to the
system user, a qualified specialist
must explain the functions and
operation of the boiler precisely
in accordance with the
installation and operating
manuals. The commissioning
protocol can be used as an aid.
Commissioning the control
After turning on the main heating
switch on site, the power supply
to the control is activated and a
self-test of the control is carried
out automatically.
After completion of the self-test
the control is ready for operation.
Alternately, the operating status
and the boiler temperature
appear on the display. In the
event a malfunction is displayed
after turning on the main heating
switch, this must be fixed. (For
precise information about this,
please refer to the
‘Troubleshooting’ section).
The main heating switch
should in principle remain
switched on, since otherwise
important monitoring and
protective functions cannot be
performed.
Following the combustion
sequence, the control switches
automatically to stand-by
(energy efficiency function)
Setting the boiler temperature
Following the first
commissioning of the control and
the ensuing system settings by a
professional, the following
message appears on the text
display:
Heating
OFF
The Selection menu is entered
by pressing the 'Arrow' button
and the following message
appears on the display:
S E L E C T I O N
+ -
INFORMATION
<--
The menu item ‘SETTINGS’ is
s
elected by pressing the ‘Plus’
button. The following appears on
the text display:
S E L E C T I O N
+ -
SETTINGS
<--
The selected menu item is
confirmed by pressing the
‘Arrow’ button. The following
appears on the text display:
Boiler set point
+ -
TK S [
C] ##
<--
The value can be changed by
pressing the 'Plus' or 'Minus'
button.
Setting range: 70
– 85
C
(See
important instruction
–
function description)
The changed value is saved by
pressing the ‘Arrow’ button.
By pressing the ‘Arrow’ button
once again, one will arrive via
the next menu again to the text
display:
Heating
OFF
Commissioning the boiler
Heating up
During the initial commissioning,
resp. after a long standstill, the
following should be observed:
A ‘cold’ flue has no, or too little
outlet pressure, so that in this
case the exhaust fumes are
poorly expelled. Heating up will
be facilitated if you heat up the
flue with paper through the
cleaning hatch.
The following order of events
must be adhered to when
heating up the boiler:
- press the
‘Add fuel’ button. The
following appears on the text
display:
DO NOT OPEN!
Please wait!
- the induced draft fan operates
at high speed and the ‘Add fuel’
indicator blinks
- the door opener is released
after 15 seconds and the
following appears on the text
display:
C A U T I O N
OPEN SLOWLY!
Filling door 1 (centre) can now
be opened.
Filling door 2 (top), the filling lid
(60 L) and the ashes door
remain closed!
- open the interior door using the
operating hook
- switch off the induced draft fan
by pressing
the ‘Minus’ button,
place 2 to 3 small dry split logs
inside, cover with kindling wood,
place paper and cardboard on
top and
ignite from above
.
- switch on the induced draft fan
again by pressing the ‘Add fuel’
button; the ‘Add fuel’ indicator
blinks for 10 minutes
- close the interior door; the
filling door remains open
Summary of Contents for 40S-70
Page 27: ...23 Commissioning Circuit diagram ...
Page 29: ...24 Commissioning Short operating instructions ...
Page 31: ......
Page 35: ...28 Notes ...
Page 38: ......


