86
December
2017
880017
‐
4
18.5 ESR-AUTO PLUS TROUBLESHOOTING STEPS – WINDOWS 10
The following steps should be performed to ensure ESR-Auto Plus functionality. In order to test
functionality, the ESR-Auto Plus must be connected to a workstation via the supplied USB cable.
1.
Open Device Manager on the workstation. Windows Key --> Settings --> Search for Device
Manager.
2.
Connect the ESR-Auto Plus to the workstation using the supplied USB cable.
3.
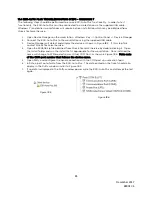
Device Manager will detect and display the device as shown in Figure 18.7. Make note of the
COM port number that follows the device name. If this step fails, contact Streck Technical
Service.
4.
Open Putty and configure the Serial connection with the COM port you noted in Step 3.
5.
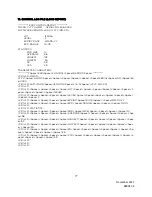
Initiate a print out of data from the ESR-Auto Plus. The data printed on the ticket should also
display in the Putty window similar to Figure 18.2.
6.
If no data is displayed in the Putty window power cycle the ESR-Auto Plus and attempt the test
again.
Figure 18.7


