Important Safety Information
1.
Compressor: Use 12 volt DC only. Make sure that your vehicle 12V power socket is free of any ash,
residue or debris. A dirty power socket can cause the compressor and power cord to overheat.
Overheating can cause damage to your compressor/vehicle and could cause personal injury (disconnect
power when not in use).
2.
This air compressor is designed to inflate car tyres, bike tyres, ATV tyres, sports equipment, air
mattresses, beach toys and other inflatables. Do not use for any other purpose other than inflating.
If you do so, personal injury can occur.
3.
When operating your compressor do not run for more than 10 minutes of continuous use. Allow
compressor to cool down for 10 minutes before re-using.
4.
After using, turn off power switch (3).
5.
The compressor is not a toy. Keep away from children at all times.
6.
Do not carry compressor by the air hose or power cord, damage may occur.
7.
Do not leave the compressor unattended while in operation.
8.
Do not over inflate. Be sure to follow the manufactures instructions for the item you are inflating.
9.
Keep the compressor away from flammable areas/liquids at all times.
10. Do not operate the compressor in wet or damp areas.
11. Operate the compressor only with the accessories that are included.
To inflate tyres
1. Move vehicle so that the tyre valve is on the bottom closest to the ground. Place the air compressor
next to the tyre.
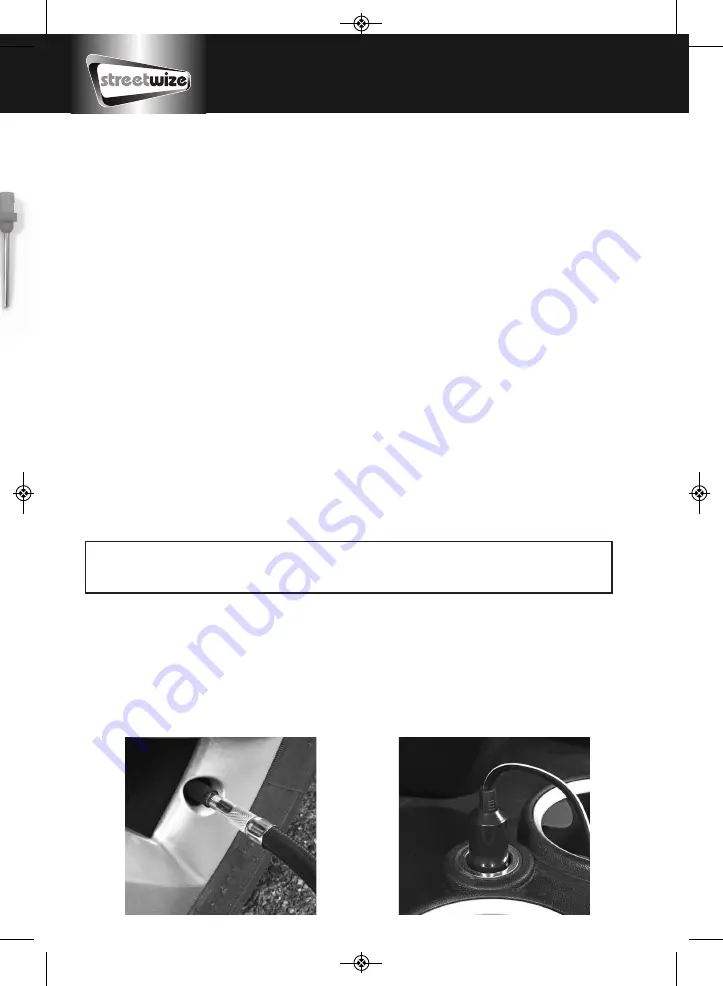
2. Place connector on tyre valve stem and screw on until tight and no air is escaping (fig 1).
3. Plug the power cord into the 12V power socket receptacle (fig 2).
4. When the correct pressure is reached on the analogue pressure gauge, unplug the power cord.
5. Remove adaptor from tyre valve, remove the power cord from the 12V power socket.
12V
Mini
AirCompressor
SWAC1
NOTE: THIS COMPRESSOR OPERATES ONLY ON 12 VOLT DC. DO NOT ATTEMPT TO OPERATE THIS
COMPRESSOR WITH ANY OTHER SOURCE OR VOLTAGE. DO NOT REWIRE OR RECONFIGURE
COMPRESSOR FROM IT'S ORIGINAL DESIGN OR PERSONAL INJURY OR BODILY HARM MAY OCCUR.
C
Y
Fig 1
Fig 2
SWAC1-Manual.qxp_Layout 1 09/03/2018 16:51 Page 2


