


26
BA_170-22D_A14_180704_en
5.4
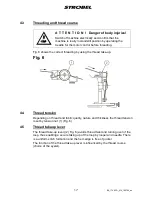
The machines of the 170 series create blindstitch hemming. The special
applications of the corresponding subclasses are described under “
Sewing
2.3 Range
of applications”.
The sewing result should be an elastic seam free of marks. Depending on
fabric quality the sewing requires a certain skill. The following instructions will
help the operator to obtain this skill.
5.4.1
If there are no former values available, proceed as follows:
Blindstitch hemming
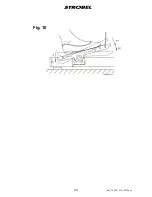
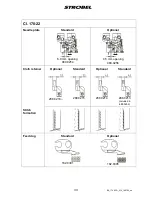
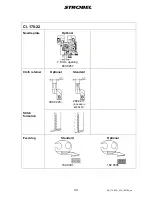
1.
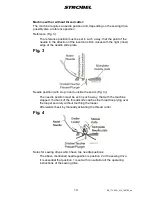
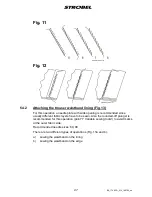
Set the desired stitch length. Fig. 11 shows the resulting seam according
to the stitch length.
2.
Set the stitch depth.
3.
Check the pressure of the cloth retainer and readjust it, if necessary.
4.
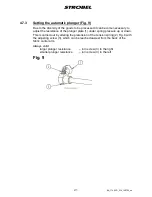
Set the limit stop of the plunger.
5.
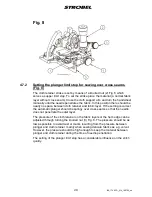
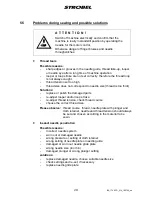
Set the material guide by loosening screw (4) Fig. 8 and displacing the
material guide (5) to get the corresponding limit stop for the hem edge.
You can sew at the hem edge or on the hem. See Fig. 12.
6.
check the stitch length and readjust the feed dog, if necessary.
7.
Set the thread tension. The seam should lay loosely on the hem.
8.
Re-thread to obtain a better seam appearance.
Place the material and make sure that the feed dog can catch the beginning of
the seam after the first stitch.
Operate the treadle briefly. Go on sewing or, if necessary, change a.m. settings
until you get the desired result.
Readjust the stitch depth regulation if the stitches show through on the outer
fabric side.
Sometimes certain "marks" caused by the needle penetration on the outside of
the fabric cannot be avoided when the fabric is extremely thin or hard.
Make sure that during sewing the hem edge is always guided along the material
guide. Avoid sudden treadle operations since speed changes during the sewing
process may influence the needle penetration.
Summary of Contents for 170-22D
Page 4: ......
Page 5: ...1 BA_170 22D_A14_180704_en ...
Page 6: ...2 BA_170 22D_A14_180704_en ...
Page 29: ...25 BA_170 22D_A14_180704_en Fig 10 ...
Page 40: ......


